Introduction to Bakery-Style Lemon Meltaway Thumbprint Cookies
Welcome, fellow bakers! If you’re searching for that perfect treat to brighten your day, look no further than these Bakery-Style Lemon Meltaway Thumbprint Cookies. These delightful little gems melt in your mouth and pack a zesty punch that’s sure to impress.
I know how hectic life can get, whether juggling family or work. This recipe is your trusty sidekick—fast, fuss-free, and unbelievably delicious. Imagine serving these elegant cookies at your next gathering; they’ll be gone before you can say, “Who wants seconds?” Let’s get started on this delightful baking adventure!
Why You’ll Love This Bakery-Style Lemon Meltaway Thumbprint Cookies
Honestly, what’s not to love? These cookies are a breeze to make, giving you a sense of accomplishment without hours in the kitchen. Each bite is a symphony of buttery goodness and tangy lemon curd. They’re perfect for lifting spirits, whether you’re treating yourself after a long day or impressing guests with minimal effort. Plus, the delightful meltaway texture makes them irresistible. You’ll find yourself baking them again and again!
Ingredients for Bakery-Style Lemon Meltaway Thumbprint Cookies
Let’s talk ingredients! You’ll need a handful of staples to create these Bakery-Style Lemon Meltaway Thumbprint Cookies. They’re not only easy to source but also elevate the flavor of each cookie.
- Unsalted butter: The star of our recipe! It gives cookies a rich, classic flavor and melt-in-your-mouth texture.
- Granulated sugar: This sweetener is essential for texture and taste, helping the cookies achieve that delightful crisp and chewiness.
- Egg yolk: It adds richness and contributes to the luscious meltaway quality. Plus, that golden hue is hard to beat!
- Vanilla extract: This aromatic enhancer brings warmth and depth to the flavor profile of the cookies.
- All-purpose flour: The backbone of most baking endeavors, it provides structure to our cookies without making them too dense.
- Cornstarch: A little goes a long way! It helps create that ultra-tender texture we all love in meltaway cookies.
- Baking powder: This leavening agent is key for that perfect rise. It ensures your cookies are light and airy.
- Salt: Just a pinch! Salt enhances the overall flavor, balancing sweetness and accentuating the cookies’ buttery notes.
- Lemon curd: The bright star of the show! This zesty addition shines inside the cookies, making every bite a burst of citrus joy.
- Powdered sugar: The finishing touch that adds a delicate sweetness and a lovely dusting effect around the edges.
For exact measurements of these ingredients, as well as optional alternatives, check out the bottom of the article where you can find everything available for printing!

How to Make Bakery-Style Lemon Meltaway Thumbprint Cookies
Let’s dive into baking these scrumptious Bakery-Style Lemon Meltaway Thumbprint Cookies! I promise you, every step is straightforward and filled with joy. Follow along, and soon you’ll have a delightful batch waiting for you!
Step 1 – Creaming the Butter and Sugar
Start by placing your softened unsalted butter into a mixing bowl. Add the granulated sugar and cream them together with a hand mixer or stand mixer on medium speed. Keep mixing for about 2-3 minutes.
Your goal? A light and fluffy mixture that looks almost like whipped clouds. This step is crucial; it’s where the magic of texture begins. You’ll want to see that beautiful pale color to know you’ve done it right.
Step 2 – Adding Egg Yolks and Vanilla
Next up, crack that egg and separate the yolk from the white. We only need the yolk for this recipe. Add it to your buttery mix, along with the vanilla extract. Mix everything in until it’s smooth.
Why is this step important? The egg yolk adds richness, while the vanilla brings warmth and depth to the cookies. Trust me, you’ll taste the difference!
Step 3 – Mixing Dry Ingredients
In a separate bowl, whisk together the all-purpose flour, cornstarch, baking powder, and salt. I always find it helpful to sift them to avoid any lumps. This ensures your cookies remain light and airy.
Once they’re well combined, gently fold the dry mixture into the butter mixture. The key here is to mix just until combined. Over-mixing can lead to tough cookies, and nobody wants that!
Step 4 – Chilling the Dough
Now comes the waiting game! Chill your dough in the refrigerator for about 20-30 minutes. This is a crucial step for achieving that lovely bakery-style texture.
Chilling helps the butter solidify, which means your cookies won’t spread too much while baking, resulting in those pretty cracks on top we all love.
Step 5 – Forming Cookie Balls
Once your dough is chilled and ready to go, roll it into balls about 1.5 to 2 tablespoons in size. I like using a cookie scoop for this step—it makes uniform cookies easier!
Next, place the dough balls onto a parchment-lined baking sheet, giving them a little space to breathe. Trust me, parchment paper is your best friend here; it prevents sticking and ensures easier clean-up!
Step 6 – Creating Indentations
Now, it’s time to create those signature thumbprints! Use your thumb or a ½ teaspoon measuring spoon to press gently in the center of each cookie ball.
Make sure you create a nice deep well, as this is where your luscious lemon curd will sit. Don’t worry about perfection—each cookie will have its unique charm!
Step 7 – Filling with Lemon Curd
Here comes the fun part! Spoon about ½ to 1 teaspoon of lemon curd into each indentation. To avoid overflow, less is more here. You want just enough to sit pretty in the center without spilling over the edges.
This is where the zesty magic of lemon comes into play, giving your cookies that delightful tang we all crave.
Step 8 – Baking the Cookies
Preheat your oven to 350°F (175°C). Pop those cookie sheets in for about 11-13 minutes. You’ll know they’re ready when the edges look pale golden, and the centers appear glossy.
Keep an eye on them! Overbaking can lead to a firmer texture, and we all want that meltaway goodness, right?
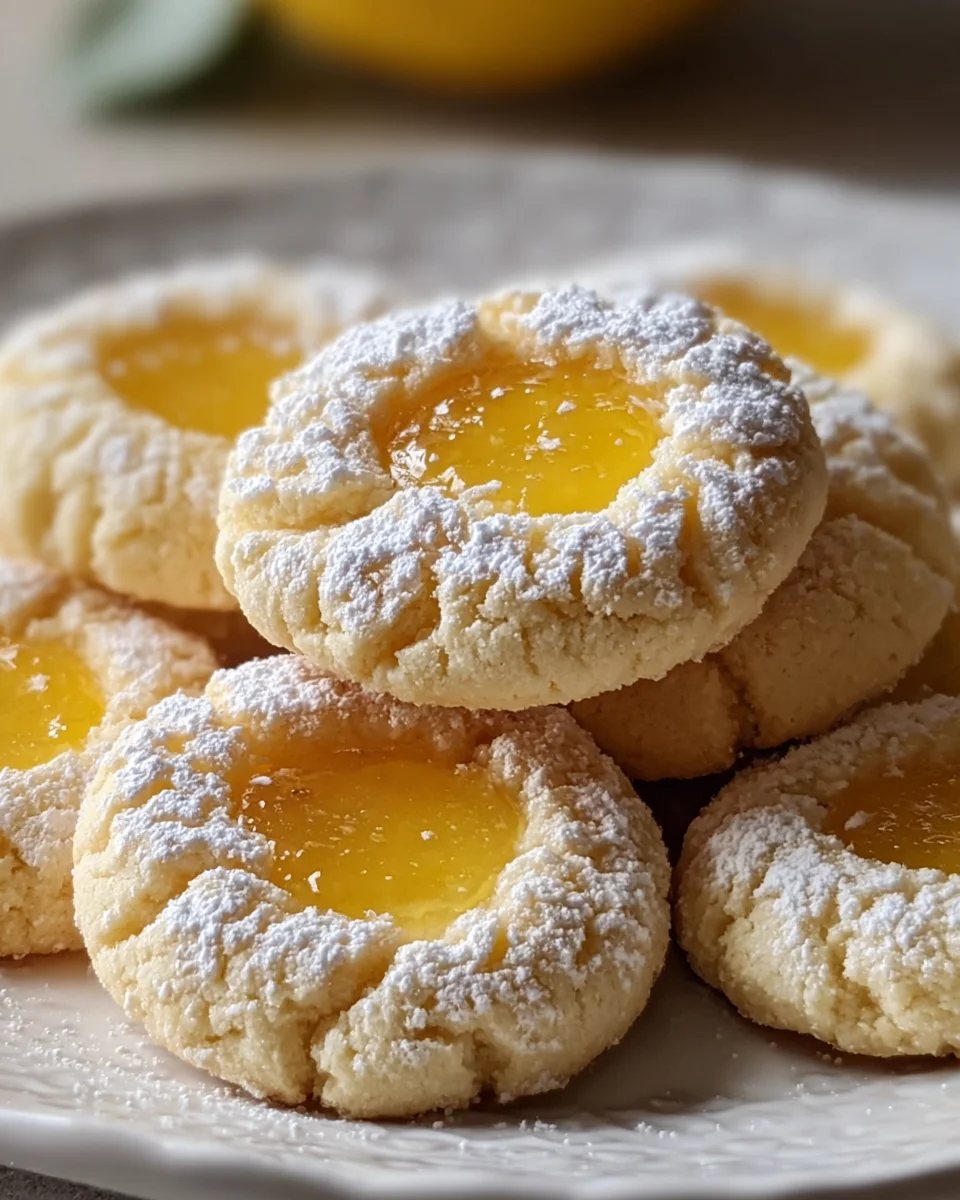
Step 9 – Dusting with Powdered Sugar
Once your cookies are baked to perfection, let them cool for about 2 minutes on the baking sheet. Then, take some powdered sugar and dust it around the edges.
This creates that beautiful “snow ring” effect while keeping the lemon curd center clean. It’ll look so pretty that you’ll want to snap a photo before they disappear!
Tips for Success
- Always use softened butter for creaming—it makes a huge difference in texture.
- Don’t skip chilling the dough; it’s essential for that meltaway quality.
- Use a cookie scoop for uniform cookie sizes, ensuring even baking.
- Keep an eye on your cookies while baking to prevent overbaking.
- Use fresh lemon curd for vibrant flavor.
Equipment Needed
- Mixing bowls: Any size will work, but a large bowl is ideal for creaming.
- Hand mixer or stand mixer: A mixer makes creaming easy, but you can use a whisk for a workout!
- Parchment paper: Essential for easy cookie removal and clean-up.
- Cookie scoop: For uniform cookie sizes; a tablespoon works too!
- Baking sheets: Standard size is great, but any baking dish will do.
Variations on Bakery-Style Lemon Meltaway Thumbprint Cookies
- Lavender Lemon Cookies: Add dried culinary lavender into the dough for a floral twist that pairs beautifully with lemon.
- Berries Galore: Swap out lemon curd with raspberry or blueberry preserves for a berry-infused surprise!
- Gluten-Free Version: Use a gluten-free all-purpose flour blend in place of regular flour. Just check that your cornstarch is also gluten-free.
- Chocolate Dipped: Once cooled, dip half the cookie in melted dark chocolate for a rich and decadent option.
- Coconut Lime Meltaways: Replace lemon curd with lime curd and sprinkle toasted coconut on top for an island vibe.
Serving Suggestions for Bakery-Style Lemon Meltaway Thumbprint Cookies
- Pair these cookies with a refreshing cup of herbal tea for a delightful afternoon treat.
- Serve alongside a light, fruity salad for a balanced dessert option.
- Add them to a dessert platter with other cookies for a visually appealing display.
- Drizzle with a little extra lemon curd on the side for that zesty punch.
FAQs about Bakery-Style Lemon Meltaway Thumbprint Cookies
Can I use store-bought lemon curd? Absolutely! While making your own lemon curd can be a fun project, high-quality store-bought lemon curd works wonderfully and saves time.
How do I store these cookies? Store your Bakery-Style Lemon Meltaway Thumbprint Cookies in an airtight container at room temperature. They’ll stay fresh for about a week—if they last that long!
Can I freeze the cookies? Yes! You can freeze the cookies before baking. Just roll the dough into balls, freeze them on a baking sheet, then transfer them to a freezer bag. Bake from frozen, adding an extra minute to the baking time.
What if my cookies spread too much while baking? If this happens, your dough may not have been chilled long enough. Next time, ensure thorough chilling for perfect shapes and that lovely bakery-style crackle!
Can I make these cookies ahead of time? Definitely! You can bake them a day or two in advance. Just dust with powdered sugar right before serving for that freshly baked look.
Final Thoughts on Bakery-Style Lemon Meltaway Thumbprint Cookies
As you embark on this delightful journey of baking Bakery-Style Lemon Meltaway Thumbprint Cookies, I hope you find as much joy in the process as in the delicious outcome. Each bite is not just a treat; it’s a little moment of happiness that can brighten your day or bring a smile to a loved one’s face. Whether shared at a gathering or savored over a quiet cup of tea, these cookies create lasting memories. So roll up your sleeves, embrace the sweet chaos of the kitchen, and enjoy making these delightful cookies that are sure to wow everyone!
Print
Bakery-Style Lemon Meltaway Thumbprint Cookies
- Prep Time: 30 minutes
- Cook Time: 12 minutes
- Total Time: 42 minutes
- Yield: Approximately 24 cookies 1x
- Category: Dessert
- Method: Baking
- Cuisine: American
- Diet: Vegetarian
Description
Delicious bakery-style cookies with a meltaway texture, filled with zesty lemon curd.
Ingredients
- 1 cup (226 g) unsalted butter, softened
- ⅔ cup (135 g) granulated sugar
- 1 large egg yolk
- 1 tablespoon vanilla extract
- 2 cups (240 g) all-purpose flour
- 2 tablespoons cornstarch
- ½ teaspoon baking powder
- ½ teaspoon salt
- ½–¾ cup lemon curd
- Powdered sugar for dusting
Instructions
- Cream the softened butter and granulated sugar for 2–3 minutes until pale and fluffy.
- Add the egg yolk and vanilla, mixing until smooth and creamy.
- Whisk flour, cornstarch, baking powder, and salt in a separate bowl, then fold into the wet mixture just until combined.
- Chill the dough for 20–30 minutes to help the cookies stay thick and create those pretty bakery-style cracks.
- Roll dough into 1.5–2 tablespoon balls and place onto a parchment-lined baking sheet.
- Press the center of each ball gently with your thumb or a ½ teaspoon measuring spoon to form a deep well.
- Spoon ½–1 teaspoon of lemon curd into each indentation.
- Bake at 350°F (175°C) for 11–13 minutes, just until the edges look pale golden and the centers appear glossy. Do not overbake.
- Let cool for 2 minutes, then dust powdered sugar around the edges, keeping the lemon center clean for that signature “snow ring.”
Notes
- Chilling the dough is essential for the texture.
- Use fresh lemon curd for the best flavor.
- Adjust the amount of lemon curd based on your preference.
Nutrition
- Serving Size: 1 cookie
- Calories: 120
- Sugar: 6 g
- Sodium: 70 mg
- Fat: 8 g
- Saturated Fat: 5 g
- Unsaturated Fat: 3 g
- Trans Fat: 0 g
- Carbohydrates: 10 g
- Fiber: 0 g
- Protein: 1 g
- Cholesterol: 20 mg


