Introduction Bariatric Gelatin Recipe for Weight Loss
If you’ve recently undergone bariatric surgery or you’re on a weight loss journey that requires high-protein, low-calorie, and easy-to-digest meals this Bariatric Gelatin Recipe for Weight Loss is about to become your new best friend.
Unlike store-bought gelatin desserts that are full of sugar and artificial junk, this homemade version is clean, customizable, and specifically designed to support weight loss and recovery. It’s made with plain gelatin powder, sugar-free juice, and cold water, delivering a refreshing, guilt-free snack that’s gentle on the stomach, rich in amino acids, and incredibly easy to make.
Whether you’re in the liquid stage post-op, looking for a low-carb treat, or need a protein-packed option to curb cravings, this gelatin checks all the boxes. Let’s break down why it works—and how to make it part of your weekly meal prep.
What is Bariatric Gelatin?
Bariatric gelatin is a protein-rich, sugar-free gelatin snack tailored to meet the nutritional needs of individuals who’ve undergone weight loss surgery such as gastric sleeve, gastric bypass, or lap-band procedures.
This isn’t your typical Jell-O cup. It’s a functional, nutrient-conscious recipe that:
- Helps repair tissues after surgery
- Supports hydration during recovery
- Keeps you full longer with minimal calories
Unlike dessert-style gelatin mixes, which often contain artificial colors and high-fructose corn syrup, bariatric gelatin is clean, unflavored, and customizable. You get all the gut-healing, skin-supporting, and protein-boosting benefits without the crash or empty calories.
It’s also ideal for those with chewing difficulties, nausea, or appetite suppression after surgery—when solid protein sources may feel too heavy or hard to tolerate.
Table of Contents
Table of Contents
Why Gelatin is Ideal for Bariatric Patients
Gelatin is one of the most underrated tools in post-bariatric nutrition. It’s not just a “diet food”—it’s a healing agent that works wonders when you’re in recovery mode or building a sustainable weight loss routine.
Here’s why it’s perfect:

1. High in Amino Acids
Gelatin is made from collagen and contains glycine, proline, and glutamic acid, which aid in:
- Healing tissues and skin post-surgery
- Strengthening the gut lining
- Supporting metabolism and muscle tone
2. Easy to Digest
After bariatric surgery, digestion is delicate. Gelatin is soft, light, and soothing—it glides through the digestive tract and won’t cause discomfort or bloating, unlike dense protein bars or shakes.
3. Naturally Satiating
Though light, gelatin helps you feel full by expanding slightly in the stomach, giving a sensation of satisfaction without needing to overeat.
4. Helps with Hydration
Many people struggle to stay hydrated post-surgery. Gelatin contains water and can support fluid intake, especially when cold or flavored with electrolytes.
Nutritional Benefits of Gelatin for Weight Loss
The nutritional value of gelatin isn’t just in its low calorie count—it’s in its high functionality.
Key Nutrients & Benefits:
- Glycine: Promotes better sleep, supports liver detox, and balances blood sugar
- Proline: Crucial for skin and connective tissue healing
- Low in carbs: Perfect for low-carb or keto diets
- Protein-rich: Each tablespoon of plain gelatin provides 5–6g of protein
Plus, it’s virtually fat-free, making it a great choice if you’re watching calories but still want to stay full between meals.
Key Ingredients Explained
Let’s dive into what makes this simple recipe so effective and customizable.
1. Plain Gelatin Powder (2 tablespoons)
- Use unflavored, uncolored gelatin (like Knox or a grass-fed brand)
- It’s a pure source of protein with no additives
- Avoid flavored or sweetened varieties, which often contain sugar or artificial ingredients
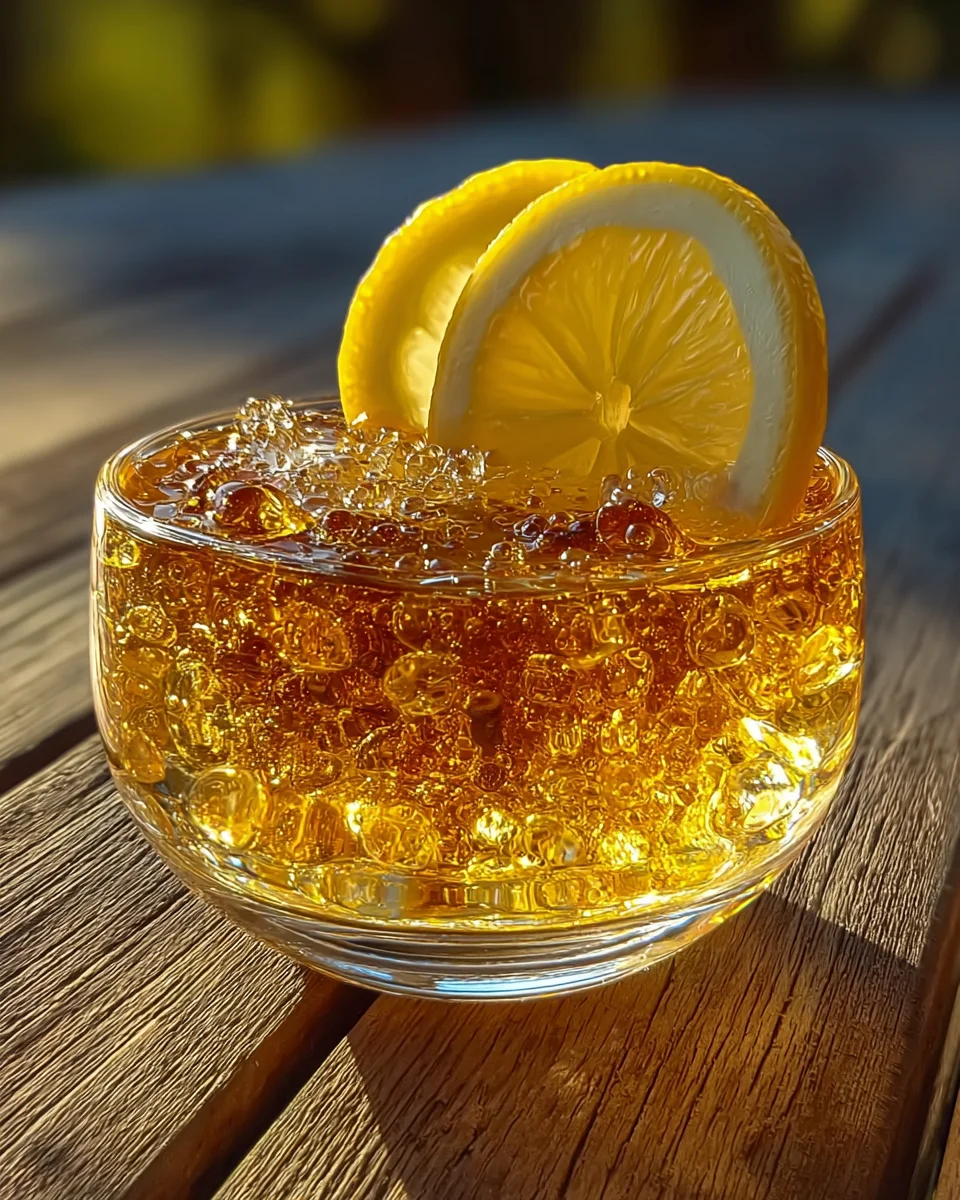
2. Sugar-Free Fruit Juice (1 cup)
- Provides flavor without the sugar spike
- Choose options like:
- Cranberry juice (great for urinary health)
- Lemon water or light lemonade
- Orange-flavored electrolyte water
- Read labels: choose juices with 0g sugar, and avoid artificial colors if possible
3. Cold Water (1 cup)
- This is used for blooming the gelatin
- Essential for proper texture and smoothness
Optional Add-Ins:
- Lemon zest or mint for freshness
- Collagen peptides for extra protein
- A dash of monk fruit or stevia if you want it sweeter without calories
Choosing the Right Juice for Weight Loss
When selecting your juice, the key is low sugar, high flavor. Some of the best options include:
- Unsweetened cranberry juice (diluted with water to cut tartness)
- Electrolyte waters with citrus or berry flavors
- Infused water with lemon or cucumber
- Bariatric-specific vitamin-enhanced drinks
Avoid juices labeled “cocktail” or those with added sugars or high-fructose corn syrup. Even “natural” juices can have 20+ grams of sugar per cup!
If unsure, look for drinks labeled:
- “Sugar-Free”
- “No Added Sugar”
- “Keto-Friendly”
- “Bariatric Approved”
Step-by-Step Recipe Instructions
Ingredients:
- 2 tablespoons plain gelatin powder
- 1 cup cold water
- 1 cup sugar-free fruit juice
Instructions:
1. Bloom the Gelatin (5 minutes)
- Pour cold water into a heat-safe mixing bowl.
- Slowly sprinkle gelatin over the surface—don’t dump it all in at once!
- Let sit for 5 minutes to allow the gelatin to absorb the water and form a gel-like texture.
2. Warm the Juice (2–3 minutes)
- In a small pot, gently warm the juice on low heat—do NOT boil.
- You want it hot enough to dissolve the gelatin, but not so hot that it breaks down the proteins.
3. Combine (1–2 minutes)
- Add the bloomed gelatin to the warm juice.
- Whisk until completely dissolved—the liquid should be smooth and clear with no lumps.
4. Portion & Chill (3 hours)
- Pour into silicone molds, small plastic cups, or even an ice cube tray.
- Refrigerate for at least 3 hours or until fully set.
- Pop them out and enjoy!
This batch makes about 4–6 small portions, depending on your mold or cup size.
How to Bloom Gelatin Properly
If there’s one part of this recipe you don’t want to rush, it’s the blooming process. This step ensures your gelatin dissolves smoothly and sets correctly—without clumps, grit, or a weird texture.
What is Blooming?
Blooming is the process of hydrating gelatin granules in cold liquid, allowing them to swell before being heated. Skipping or rushing this step often leads to rubbery or lumpy gelatin.
How to Do It Right:
- Cold Water First: Never sprinkle gelatin into hot liquid—it will clump and not dissolve properly.
- Sprinkle Evenly: Slowly distribute gelatin powder over the cold water’s surface. Don’t dump it all in one spot.
- Let It Sit: Give it at least 5 minutes to absorb the water. It should look thick and slightly rubbery.
- Warm Gently: Add the warm (not boiling) juice afterward to melt and dissolve the bloomed gelatin.
Pro tip: If you’re making a bigger batch, bloom the gelatin in a wide bowl so it spreads evenly and absorbs quickly.
Setting and Storage Tips
After mixing and pouring your gelatin into molds or containers, the final step is letting it set properly. Here’s how to get the texture just right:
Chilling Time:
- Refrigerate for at least 3 hours or until firm.
- You’ll know it’s ready when it jiggles but holds its shape.
Containers to Use:
- Silicone molds: Great for bite-sized “protein gummies”
- Small plastic or glass cups: Easy to portion and cover
- Mini mason jars: Great for grab-and-go snacking
Storage Tips:
- Keep refrigerated in a sealed container for up to 5–6 days
- Do not freeze—gelatin breaks down and loses texture when frozen
- For convenience, make a full week’s worth in one go, store in snack cups, and grab as needed
Bonus Tip: If using for post-op recovery, write the date on each container so you can rotate and use the freshest batches first.
Flavor Variations and Enhancements
This recipe is a solid base, but once you get comfortable, feel free to experiment with different flavors and add-ins to keep things exciting:
Flavor Ideas:
- Citrus Glow: Use lemon juice + lemon zest + electrolyte water for a tangy boost
- Tropical Chill: Mix coconut water and sugar-free pineapple flavor
- Berry Boost: Add freeze-dried raspberry powder to a cranberry base
Protein Enhancers:
- Add collagen peptides (dissolve into the warm juice) for extra protein
- Mix in unflavored whey isolate if your doctor recommends it
Sweeteners & Extras:
- A few drops of liquid stevia or monk fruit for extra sweetness
- Fresh mint or cucumber slices infused in the juice before warming
- Dash of turmeric or ginger for anti-inflammatory benefits
Get creative, but always check with your nutritionist or surgeon if you’re in the early post-op phase to avoid any irritation or setbacks.
How This Fits Into a Bariatric Diet Plan
This gelatin recipe aligns beautifully with the structured phases of a bariatric post-op plan—especially in the liquid and soft food stages.
Post-Surgery Phase Guide:
| Phase | Can You Eat This Gelatin? | Notes |
|---|---|---|
| Clear Liquid | ✅ If strained and sugar-free | Use a very diluted version without zest or extras |
| Full Liquid | ✅ Perfect snack option | High-protein, easy on digestion |
| Pureed/Soft Foods | ✅ Continue use | Helps add texture and variety |
| Regular Maintenance | ✅ Great between meals | Use to curb cravings or replace sugary snacks |
Portion Guide:
- Each serving should be around 1/4 to 1/2 cup
- Offers 5–6 grams of protein per tablespoon of gelatin
- Eat 1–2 servings per day, especially in place of other sweets or to break up your protein routine
This is a gentle, effective way to stay on track with your protein intake, manage portion control, and treat yourself without derailing progress.
Gelatin vs. Collagen: What’s the Difference?
Though they’re often used interchangeably, gelatin and collagen are not exactly the same—especially when it comes to how they’re used in food prep.
| Feature | Gelatin | Collagen Peptides |
|---|---|---|
| Source | Derived from collagen | Processed form of collagen |
| Solubility | Gels when cooled | Fully dissolves in hot or cold liquid |
| Best For | Making jellies, gummies, snacks | Mixing into smoothies, coffee, shakes |
| Texture | Firm, jelly-like | No texture added |
So which is better for this recipe?
👉 Gelatin. It’s specifically what makes this snack set and firm into that familiar gelatin texture. Collagen peptides are great, but they won’t give you the gelled consistency you want here.
Common Mistakes to Avoid
Even the simplest recipes have a few pitfalls. Here’s how to sidestep the most common gelatin mistakes:
❌ Overheating the Juice
- High heat will damage the gelatin’s structure and prevent it from setting.
- Stick to a gentle simmer—not a boil.
❌ Skipping the Bloom Step
- If you don’t bloom the gelatin in cold water first, you’ll get lumpy, rubbery results.
- Always bloom for at least 5 minutes.
❌ Using Sugary or Artificial Juices
- Even “light” juice may contain hidden sugars or calories
- Choose clearly labeled sugar-free juices, or dilute with water
❌ Pouring Into Molds Too Soon
- Make sure the gelatin mixture is smooth and fully dissolved before portioning.
- Whisk well to avoid grainy texture.
Make-Ahead and Meal Prep Tips
Busy week ahead? You can easily prep 5–7 servings in one go, using minimal ingredients and tools.
How to Batch Prep:
- Double or triple the recipe
- Use silicone molds for perfect portions
- Label containers by day for easy tracking
- Pack in portable jars for on-the-go snacking
Meal Prep Pro Tip: Add a different flavor or juice to each batch, so every day feels fresh and different without extra work.
Who Should Use This Recipe (and Who Shouldn’t)
This bariatric gelatin is ideal for:
- Post-op bariatric patients (all surgery types)
- People following low-carb, keto, or intermittent fasting diets
- Those with digestive issues who need gentle, nourishing foods
- Anyone wanting to increase collagen/protein without dense food
⚠️ Caution:
Avoid if you:
- Have a gelatin allergy
- Follow a plant-based or vegetarian diet (gelatin is animal-derived)
- Are in a post-op phase where your surgeon advises against acidic or citrus-based liquids
Always check with your healthcare provider before introducing new foods during post-op recovery.
Conclusion Bariatric Gelatin Recipe for Weight Loss
This bariatric gelatin recipe is more than just a snack—it’s a strategic nutrition tool. Packed with protein, gentle on digestion, and incredibly easy to prepare, it fits seamlessly into your weight loss routine or post-surgery recovery plan.
From the first few days post-op to years down the line, it offers a tasty, satisfying way to hit your protein goals while keeping calories low and flavor high. Plus, it’s fun to make, easy to customize, and always fridge-ready when hunger hits.
So grab your gelatin, pour some juice, and make a batch today. Your body—and your taste buds—will thank you.
FAQs Bariatric Gelatin Recipe for Weight Loss
1. How much protein is in one serving of this gelatin recipe?
Each tablespoon of plain gelatin contains about 5–6g of protein, so one full batch made with 2 tablespoons delivers 10–12g total, divided across several servings.
2. Can I use flavored gelatin packets instead of plain?
It’s best to avoid pre-flavored gelatin packets like Jell-O—they usually contain added sugars, artificial dyes, and fewer nutritional benefits. Stick with plain gelatin and flavor it yourself.
3. Is this safe during the liquid or soft food stage post-op?
Yes! This recipe is perfect for the clear and full liquid stages, and continues to work well during soft foods. Just avoid acidic juices if you’re still healing.
4. How long does it last in the fridge?
Stored in airtight containers, it lasts 5–6 days in the fridge. Great for meal prep!
5. Can I add protein powder or collagen to boost nutrition?
Absolutely. Add unflavored collagen peptides to the warm juice (after blooming gelatin) to increase the protein per serving without affecting texture.

Bariatric Gelatin Recipe for Weight Loss
- Prep Time: 10 minutes
- Cook Time: 5 minutes
- Total Time: 3 hours
- Yield: 4 servings 1x
- Category: Weight loss
- Method: No-Bake
- Cuisine: Bariatric
- Diet: Gluten Free
Description
Light, protein-rich, and easy on the stomach, this bariatric gelatin is a refreshing collagen snack that helps curb cravings, supports gut health, and fits beautifully into weight-loss or post-bariatric meal plans
Ingredients
2 tablespoons plain gelatin powder
1 cup sugar-free fruit juice (cranberry, lemon, or orange)
1 cup cold water
Instructions
Bloom gelatin: Add cold water to a heat-safe bowl, sprinkle gelatin evenly over the top, and let sit for 5 minutes.
Warm juice: In a small pot over gentle heat, warm the sugar-free juice (do not boil).
Combine: Add the bloomed gelatin to the warm juice and whisk until completely dissolved and the mixture looks clear.
Portion: Pour into silicone molds or small cups.
Chill: Refrigerate until set, about 3 hours, then enjoy
Notes
Bloom gelatin first for a smooth texture. Avoid boiling the liquid. For a softer set, use a little less gelatin. Sweeten to taste with stevia or monk fruit. Stir in Greek yogurt for creaminess or add collagen powder for extra protein. Store covered in the fridge for up to 5 days; do not freeze.
Nutrition
- Serving Size: 1 portion
- Calories: 25
- Sugar: 0g
- Sodium: 15mg
- Fat: 0g
- Saturated Fat: 0g
- Unsaturated Fat: 0g
- Trans Fat: 0g
- Carbohydrates: 0g
- Fiber: 0g
- Protein: 3.5g
- Cholesterol: 0mg


