Introduction to Black Forest Mini Cheesecakes
Hey there, fellow dessert lovers! If you’re anything like me, you probably crave something indulgent yet easy to whip up. That’s where these Black Forest Mini Cheesecakes come into play! They’re a delightful balance of creamy cheesecake, rich chocolate, and a burst of cherry flavor. Seriously, who wouldn’t want to dive into these adorable little bites of joy? Perfect for family gatherings, brunches, or even a cozy night in, these mini cheesecakes are bound to impress. Let’s get started on crafting this decadent treat that’s sure to steal the show!
Why You’ll Love This Black Forest Mini Cheesecakes
These Black Forest Mini Cheesecakes are a total game changer in the dessert department! They are incredibly easy to prepare and quick to bake—well, technically they chill, but that just makes it even simpler for busy days. Plus, each bite offers a heavenly mix of flavors: creamy cheesecake, chocolatey goodness, and that sweet tart cherry topping. Trust me, you won’t just love them; they’ll become your go-to dessert for any occasion!
Ingredients for Black Forest Mini Cheesecakes
When it comes to these Black Forest Mini Cheesecakes, each ingredient contributes to that glorious flavor combination. Here’s what you’ll need:
- Oreo cookies: These delightful chocolate cookies form the crust, giving every bite a satisfying crunch.
- Unsalted butter: This helps bind the crushed cookies together, adding richness to the crust.
- Cream cheese: The star of the show! Full-fat cream cheese adds creaminess and a subtle tanginess to the cheesecake filling.
- Sour cream: Just a touch of sour cream enhances the tang and silkiness of the cheesecake.
- Powdered sugar: This sweetens the filling without adding any graininess, creating a smooth texture.
- Vanilla extract: A splash of vanilla amplifies the flavors and adds warmth to the cheesecake.
- Semi-sweet chocolate: Finely chopped, this decadent chocolate brings that rich, chocolatey flavor that pairs beautifully with cherries.
- Heavy whipping cream: Whipped to create lightness and airiness in the filling, and it’s also used for the topping!
- Cherry pie filling: This gives a sweet and tart finish. You can use homemade or store-bought—either way, it’s a delightful topping.
- Chocolate flakes or curls: Optional, but they add a charming touch of elegance to your mini cheesecakes.
If you’re wondering about measurements, don’t fret! All the detailed quantities you’ll need for these irresistible Black Forest Mini Cheesecakes are available at the bottom of the article for your convenience.

How to Make Black Forest Mini Cheesecakes
Now, let’s dive into making these delightful Black Forest Mini Cheesecakes. Follow these simple steps for a deliciously satisfying treat!
Step 1: Prepare the Muffin Tin
Start by lining a 12-cup muffin tin with paper liners. This will make removal a breeze later! Trust me, nothing is worse than a stuck cheesecake!
Step 2: Make the Chocolate Crust
Grab those Oreo cookies and toss them into a food processor. Pulse until you have fine crumbs that resemble sandy soil. Add melted butter and pulse again until the mixture is moistened. Divvy it up into your muffin cups and press down firmly to form a solid crust.
Step 3: Melt the Chocolate
Using a double boiler, melt the semi-sweet chocolate over low heat. Stir gently until it becomes smooth, then let it cool slightly. Make sure it’s lukewarm before adding it to the filling; we don’t want any lumps ruining our cheesecakes!
Step 4: Prepare the Cheesecake Filling
In a large mixing bowl, beat the softened cream cheese, sour cream, powdered sugar, and vanilla extract using a hand mixer. Mix on medium speed until everything is smooth and creamy. This is the heart of your Black Forest Mini Cheesecakes, so make it a good one!
Step 5: Combine and Fold
Once your chocolate has cooled, add it to the cheesecake filling and mix it all together until smooth. Now, it’s time to fold in the whipped cream. Gently stir until you see no more white streaks. This will give your cheesecakes a light, fluffy texture that’s just divine!
Step 6: Fill the Muffin Cups
Evenly distribute the luscious cheesecake filling atop the prepared crust in each muffin cup. Use a spatula to smooth the top, ensuring each mini cheesecake is perfectly formed. Now, in they go to the fridge!
Step 7: Chill and Set
Cover the muffin tin with plastic wrap or foil and refrigerate for at least 8 hours, preferably overnight. This step is crucial for letting the flavors meld and the cheesecakes to firm up perfectly!
Step 8: Whip and Decorate
When you’re ready to serve, whip together the heavy whipping cream and powdered sugar until stiff peaks form. Pipe this creamy delight on top of each cheesecake. Finally, crown each mini cheesecake with a dollop of cherry pie filling and sprinkle with optional chocolate flakes or curls for an extra touch of decadence!
Tips for Success
- Use room temperature cream cheese for smooth mixing without lumps.
- Chill your mixing bowl before whipping cream for the best results.
- Don’t overmix when folding the whipped cream; gentle touches keep it fluffy.
- Prep these Black Forest Mini Cheesecakes a day in advance for easy entertaining.
- Switch up toppings! Fresh berries or different pie fillings work great too.
Equipment Needed for Black Forest Mini Cheesecakes
- Muffin tin: A standard 12-cup tin is ideal, but you can also use a silicone mold for easy release.
- Food processor: Perfect for crushing the Oreos; a zip-top bag and rolling pin also work!
- Mixing bowls: A large bowl for the filling and a medium bowl for whipping cream are essential.
- Hand mixer or whisk: Use a hand mixer for speed, or channel your inner chef with a whisk.
- Spatula: This is great for folding and filling the muffin cups without making a mess.
Variations on Black Forest Mini Cheesecakes
- Gluten-free: Substitute Oreo cookies with gluten-free chocolate cookies for the crust without losing any deliciousness.
- Vegan option: Use vegan cream cheese and whipped coconut cream in place of dairy ingredients for a plant-based twist.
- Fruit variations: Instead of cherry pie filling, try raspberry, strawberry, or blueberry toppings for a fun flavor twist!
- Nutty crunch: Incorporate crushed nuts, like walnuts or pecans, into the crust for added texture and flavor.
- Alternate chocolate: For a richer taste, use dark chocolate in the cheesecake filling instead of semi-sweet chocolate.
Serving Suggestions for Black Forest Mini Cheesecakes
- Pair each mini cheesecake with a scoop of vanilla ice cream for a creamy contrast.
- Serve alongside fresh berries for a burst of color and flavor.
- Pour a drizzle of chocolate sauce over the cheesecakes for a dessert that looks as good as it tastes.
- Complement with a glass of cold milk or a rich cup of coffee.
- Present them on a decorative platter with mint leaves for a touch of elegance!
FAQs about Black Forest Mini Cheesecakes
Can I make Black Forest Mini Cheesecakes in advance?
Absolutely! These mini cheesecakes need some time to chill and set. You can prep them a day in advance, making entertaining easy and stress-free.
What can I substitute for sour cream?
If you don’t have sour cream, Greek yogurt is a great alternative! It offers a similar tanginess, enhancing the overall flavor of your Black Forest Mini Cheesecakes.
How do I store leftovers?
Store any leftovers in an airtight container in the refrigerator. They’ll stay fresh for about 3–4 days. But let’s be honest, they probably won’t last that long!
Can I freeze these mini cheesecakes?
Yes, you can! Just ensure they’re well wrapped in plastic wrap and then foiled. They can be frozen for up to a month. Thaw them in the fridge before serving for the best texture!
Is there a gluten-free option for the crust?
Definitely! Swap out the Oreos for gluten-free chocolate cookies, and you’ll have just as delightful a crust for your Black Forest Mini Cheesecakes.
Final Thoughts
Creating these Black Forest Mini Cheesecakes is more than just a baking endeavor; it’s an experience filled with joy and satisfaction. As you enjoy each creamy, chocolatey bite topped with sweet cherries, you’ll feel the warmth of sharing something special with family and friends. Whether it’s a casual weeknight treat or a highlight at a festive gathering, these delightful mini cheesecakes never fail to bring smiles. So, roll up your sleeves, enjoy the process, and treat yourself and your loved ones to this decadent delight that truly embodies the joy of homemade desserts!
Print
Black Forest Mini Cheesecakes
- Prep Time: 30 minutes
- Cook Time: 0 minutes
- Total Time: 8 hours 30 minutes
- Yield: 12 mini cheesecakes 1x
- Category: Dessert
- Method: Refrigerate
- Cuisine: American
- Diet: Vegetarian
Description
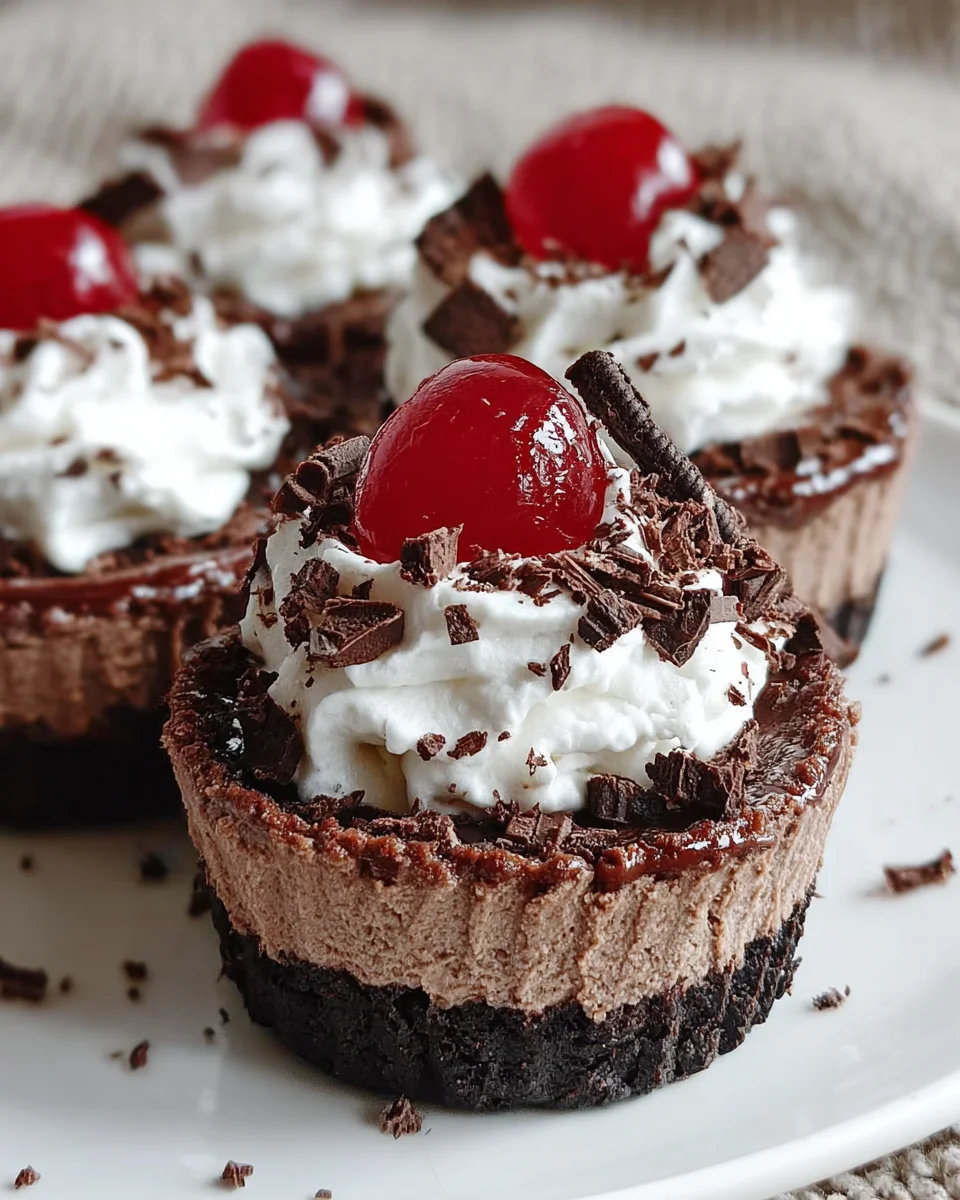
Delicious mini cheesecakes with a chocolate crust, topped with whipped cream and cherry pie filling.
Ingredients
- CRUST
- 16 Oreo cookies, whole (1 1/2 cup crumbs)
- 4 tablespoons unsalted butter, melted (57g)
- CHOCOLATE CHEESECAKE
- 16 ounces cream cheese, full fat, room temperature (450g)
- 1/8 cup sour cream, room temperature
- 1 1/3 cup powdered sugar
- 1 teaspoon vanilla extract
- 6 ounces semi-sweet chocolate, finely chopped (170g)
- 1/2 cup heavy whipping cream
- TOPPING
- 3/4 cup heavy whipping cream
- 3 tablespoons powdered sugar
- 1 cup cherry pie filling, homemade or store-bought
- chocolate flakes or chocolate curls, optional
Instructions
- Line a 12 cup muffin tin with paper liners. Set aside.
- Put Oreo cookies in a food processor and pulse until you get fine crumbs. Add melted, then cooled butter and pulse until the crumbs moisten.
- Divide the mixture among the cups in the muffin tin and press to get a solid layer.
- Melt chocolate using a double boiler method and allow to cool slightly.
- In a large bowl, beat softened cream cheese, sour cream, vanilla and powdered sugar on medium speed until smooth.
- In a separate bowl, whip heavy whipping cream on high speed until stiff peaks form and set aside.
- Add cooled melted chocolate to the cheesecake filling and beat until smooth, then gently fold in whipped cream.
- Divide the cheesecake filling among the cups in the muffin tin and spread evenly over the crust. Refrigerate to set overnight.
- On the day of serving, whip cream with powdered sugar until stiff peaks form and pipe onto mini cheesecakes.
- Top with cherry pie filling and optional chocolate flakes or curls.
Notes
- Ensure the melted chocolate is lukewarm before adding to the filling to prevent lumps.
- Whip the cream in a cold bowl for best results.
- These cheesecake cups can be made a day in advance for convenience.
Nutrition
- Serving Size: 1 mini cheesecake
- Calories: 300
- Sugar: 20g
- Sodium: 250mg
- Fat: 20g
- Saturated Fat: 10g
- Unsaturated Fat: 5g
- Trans Fat: 0g
- Carbohydrates: 30g
- Fiber: 2g
- Protein: 4g
- Cholesterol: 50mg


