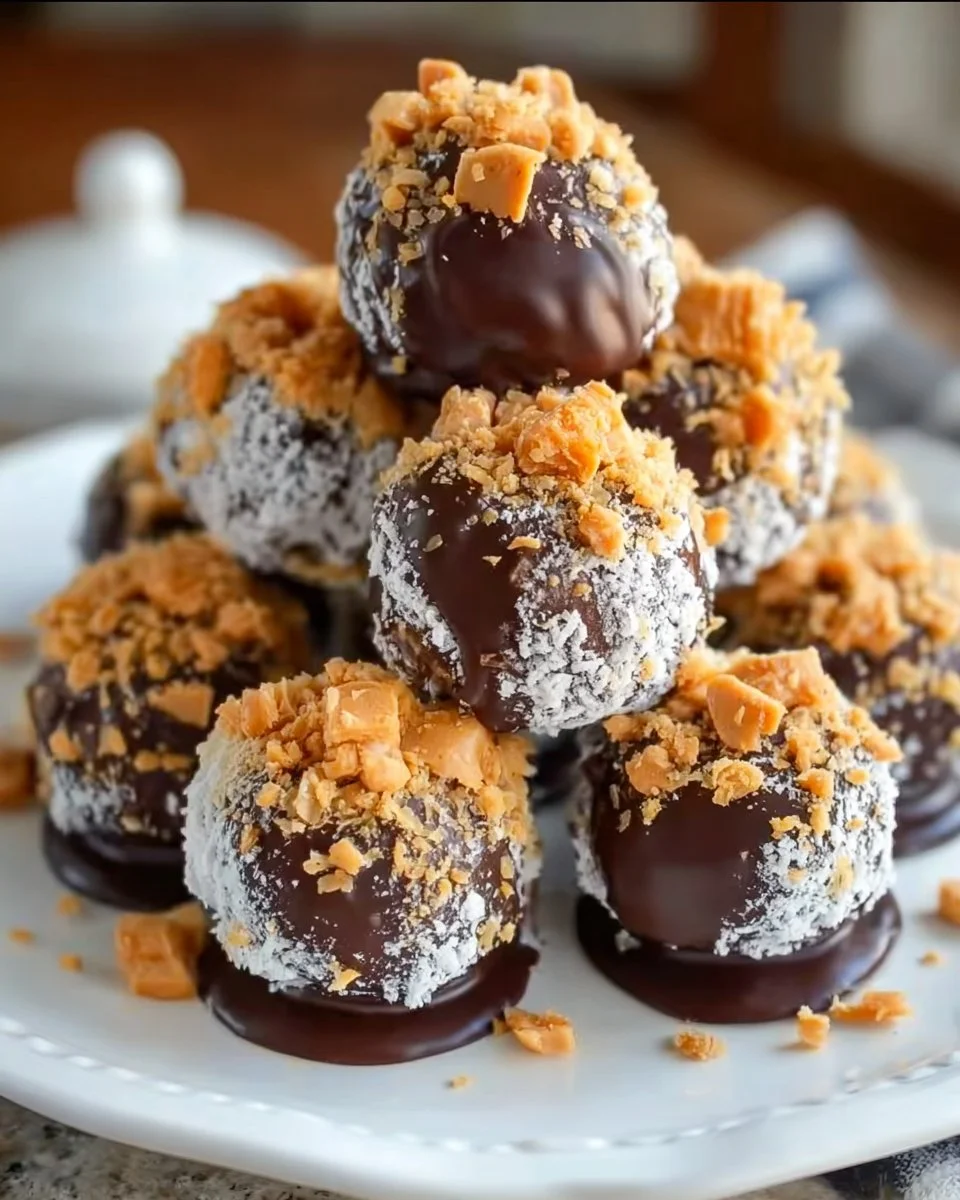
The sweet aroma of freshly whipped peanut butter mingles with the deep, comforting scent of melted chocolate, creating an irresistible invitation to indulge. As you roll creamy, golden morsels into perfectly round balls, you can almost hear the satisfying crunch of Butterfinger candy bars as they are folded into the mixture. Each touch of your hands feels blissful, a promise of delightful treats yet to come. With just one bite, the creamy texture dances on your tongue, instantly vanishing into a sea of sweet, nutty goodness and contrasting heavenly crispness.
Butterfinger Balls are not just treats; they are an experience to share, beloved by kids and adults alike, perfect for gatherings, or simply for treating yourself after a long day. Each morsel transports you back to memories of simpler times, when candy bars were treasures and savoring each bite was a joy. These bite-sized delights combine the rich taste of peanut butter with the sweet crunch of Butterfinger, all wrapped in a luxurious chocolate coating, transforming an ordinary day into a celebration.
Why You’ll Love This Butterfinger Balls
These Butterfinger Balls encapsulate everything you could wish for in a sweet treat. First and foremost, they are incredibly easy to make, requiring minimal ingredients and equipment. In a matter of minutes, you can create delicious bites that will wow your family and friends. Perfect for birthday parties, holiday celebrations, or as a delightful surprise in lunch boxes, Butterfinger Balls bring smiles wherever they appear.
The taste is utterly luxurious. Creamy, nutty peanut butter provides a satisfying base, while the crushed Butterfinger adds a delightful crunch with every bite, offering a sweet caramel-like flavor that harmonizes beautifully with the rich chocolate coat. You won’t be able to resist reaching for just one more. And the best part? They pair beautifully with everything from coffee to milk, making them a versatile treat for any occasion.
Preparation Phase & Tools to Use
Preparation for your Butterfinger Balls doesn’t require any advanced culinary skills—just a few essential tools that make the process smooth and enjoyable. Here’s what you need:
Mixing Bowls: Two medium-sized bowls help keep your ingredients organized. The first is for your peanut butter mixture, and the second can be used for melting the chocolate.
Electric Mixer (Optional): While mixing by hand works wonders, an electric mixer can save time and energy when combining the creamy peanut butter with the other ingredients.
Parchment Paper or Wax Paper: Line your baking sheet with this to prevent the balls from sticking. It also makes for easy cleanup!
Spoon or Cookie Scoop: These are invaluable for portioning the mixture into perfect, bite-sized shapes.
Microwave-safe Bowl or Small Saucepan: For melting your chocolate, you can use either method, but having a suitable bowl or saucepan is crucial for achieving that silky smooth texture.
Preparation Tips:
- Make sure your butter is softened for easy blending.
- Crush the Butterfinger bars into small pieces for optimal incorporation and crunch.
- Focus on rolling uniform-sized balls for even chocolate coating.
Ingredients for Butterfinger Balls
1 cup creamy peanut butter: Provides the base flavor with its rich creaminess. You can substitute with crunchy peanut butter for additional texture.
1/4 cup unsalted butter (softened): Adds a buttery flavor and helps bind the ingredients. If you prefer a dairy-free option, coconut oil can work as a substitute.
2 cups powdered sugar: This sweetener is essential for achieving that perfect, candy-like sweetness. Granulated sugar is too coarse, while brown sugar may change the texture.
1 teaspoon vanilla extract: A splash of vanilla enhances the overall flavor, giving a nod to bakery-style treats. Use real vanilla extract for the best taste.
Pinch of salt: Just a hint of salt balances the sweetness and highlights the flavors.
6 Butterfinger candy bars (finely crushed): The star of the show, providing a delightful crunch and distinctive flavor.
12 ounces semisweet or milk chocolate (chopped, for dipping, optional): Personalize your treat with your favorite chocolate type, whether it’s dark, milk, or even white chocolate for a fun twist.
How to Make Butterfinger Balls
In a mixing bowl, combine the creamy peanut butter, softened unsalted butter, powdered sugar, vanilla extract, and a pinch of salt. Use an electric mixer or spatula to mix everything together until you achieve a smooth, homogenous mixture.
Gently fold in the finely crushed Butterfinger candy bars until they are evenly distributed throughout the peanut butter mixture.
Prepare your baking sheet by lining it with parchment paper or wax paper. This step prevents sticking and simplifies cleanup.
Scoop tablespoon-sized portions of the peanut butter mixture and roll them into smooth balls in your hands. Place these on the lined baking sheet.
If you’re adding a chocolate coating, melt your semisweet or milk chocolate. You can do this in a small saucepan over low heat, stirring constantly, or in the microwave in short 20-second intervals, stirring in between until smooth.
Dip each peanut butter ball into the melted chocolate. Use a fork or dipping tool to coat them evenly. Tap off any excess chocolate before placing them back on the baking sheet.
Refrigerate the baking sheet for about 30 minutes, or until the chocolate coating sets.
Once set, remove the Butterfinger Balls from the refrigerator. Transfer them to an airtight container for storage.
Chef’s Notes & Helpful Tips
Make-ahead Tips: These delicious morsels can be made in advance and kept in the refrigerator for a week. Alternatively, you can freeze them for up to three months in an airtight container.
Cooking Alternatives: Consider experimenting with an air fryer for a unique taste! Cook at 300°F for about 8 minutes for a crispy outer shell without deep-frying.
Customization Ideas: Spice things up by adding a sprinkle of sea salt on top before the chocolate sets, or incorporate other candy bars for a different flavor profile, such as crushed Reese’s or Snickers.
Common Mistakes to Avoid
Using Cold Butter: Always ensure your butter is softened to facilitate smooth mixing. Cold butter results in a clumpy texture that’s hard to blend.
Overmixing: Once you’ve added the crushed Butterfinger, fold gently to avoid breaking them down completely. You want those chocolatey chunks to remain!
Not Letting the Chocolate Set: Resist the urge to taste right away! Letting the chocolate harden in the refrigerator ensures a perfect final texture.
Crowding the Baking Sheet: Space the balls adequately to prevent sticking together, making it easier to dip them in chocolate.
What to Serve With Butterfinger Balls
These delightful treats stand beautifully on their own, but they shine even brighter when paired with others! Here are some delightful companions:
Coffee: The rich bitterness enhances the sweetness of the Butterfinger Balls, creating a balanced flavor experience.
Hot Chocolate: Immerse yourself in a symphony of flavors as both treats play off each other’s sweetness.
Milk: A classic pairing, the creaminess cuts through the rich chocolate and nutty essence.
Ice Cream: Serve them alongside vanilla or chocolate ice cream for an indulgent dessert that brings back childhood memories.
Fruit: Pair with fresh strawberries or banana slices for a fresh balance; the acidity of the fruit complements the richness of the chocolate.
Snack Board: Include them as a star on a dessert board, surrounded by nuts, pretzels, and other chocolates for a festive touch.
Wine: A light dessert wine or a sweeter varietal can elevate the tasting experience, adding an adult twist.
Storage & Reheating Instructions
Store your Butterfinger Balls in an airtight container. They stay fresh for up to a week in the refrigerator, retaining their deliciousness. For longer storage, you can freeze them! When freezing, ensure they’re in a single layer to avoid sticking. To enjoy after freezing, let them thaw in the refrigerator for a couple of hours before indulging.
Estimated Nutrition Information
Approximate values per Butterfinger Ball (based on 20 balls):
- Calories: 150
- Total Fat: 10g
- Saturated Fat: 4g
- Cholesterol: 10mg
- Sodium: 10mg
- Total Carbohydrates: 15g
- Dietary Fiber: 1g
- Total Sugars: 10g
- Protein: 3g
(Disclaimer: Nutrition values are estimates and can vary based on specific brands and ingredients used.)
FAQs
Can I use crunchy peanut butter instead of creamy?
Absolutely! Crunchy peanut butter adds an exciting texture and a nutty bite that enhances the overall experience.
What if I don’t have Butterfinger?
You can substitute with any candy bar that has a crunchy center! Consider using Reese’s or crushed Oreos for a different yet equally delicious variation.
How can I make these dairy-free?
Opt for vegan butter and dark chocolate to create a completely dairy-free version without compromising on flavor.
Can I store these in the freezer?
Yes, they freeze exceptionally well! Just ensure they are in a single layer in an airtight container to avoid sticking.
How long does chocolate take to set?
Typically, letting the coated Butterfinger Balls sit in the refrigerator for about 30 minutes should be sufficient for the chocolate to fully set.
Conclusion
With their creamy, dreamy texture and addictive crunch, Butterfinger Balls promise to electrify your taste buds and become a cherished recipe you reach for time and again. Embrace the joy of making these delightful treats, fostering connections with those you love, whether it’s a cozy family snack or a sweet gift to friends. So go ahead, gather your ingredients, and revel in the magic of creating something truly special. Your taste buds will thank you!
Print
Butterfinger Balls
- Prep Time: 15 minutes
- Cook Time: 30 minutes
- Total Time: 45 minutes
- Yield: 20 servings 1x
- Category: Dessert
- Method: No-Bake
- Cuisine: American
- Diet: Vegetarian
Description
Delightful bite-sized treats combining creamy peanut butter, crunchy Butterfinger bars, and a silky chocolate coating.
Ingredients
- 1 cup creamy peanut butter
- 1/4 cup unsalted butter (softened)
- 2 cups powdered sugar
- 1 teaspoon vanilla extract
- Pinch of salt
- 6 Butterfinger candy bars (finely crushed)
- 12 ounces semisweet or milk chocolate (chopped, for dipping)
Instructions
- Combine the creamy peanut butter, softened unsalted butter, powdered sugar, vanilla extract, and a pinch of salt in a mixing bowl until smooth.
- Fold in the crushed Butterfinger candy bars until evenly distributed.
- Prepare a baking sheet by lining it with parchment paper or wax paper.
- Scoop tablespoon-sized portions of the mixture and roll them into balls.
- Melt the semisweet or milk chocolate in a small saucepan or microwave until smooth.
- Dip each ball into the melted chocolate and tap off the excess.
- Refrigerate the balls for about 30 minutes until the chocolate is set.
- Store the Butterfinger Balls in an airtight container.
Notes
These treats can be made in advance and stored in the refrigerator for a week or frozen for up to three months.
Nutrition
- Serving Size: 1 ball
- Calories: 150
- Sugar: 10g
- Sodium: 10mg
- Fat: 10g
- Saturated Fat: 4g
- Unsaturated Fat: 6g
- Trans Fat: 0g
- Carbohydrates: 15g
- Fiber: 1g
- Protein: 3g
- Cholesterol: 10mg