Introduction to Candy Corn Pudding Cups
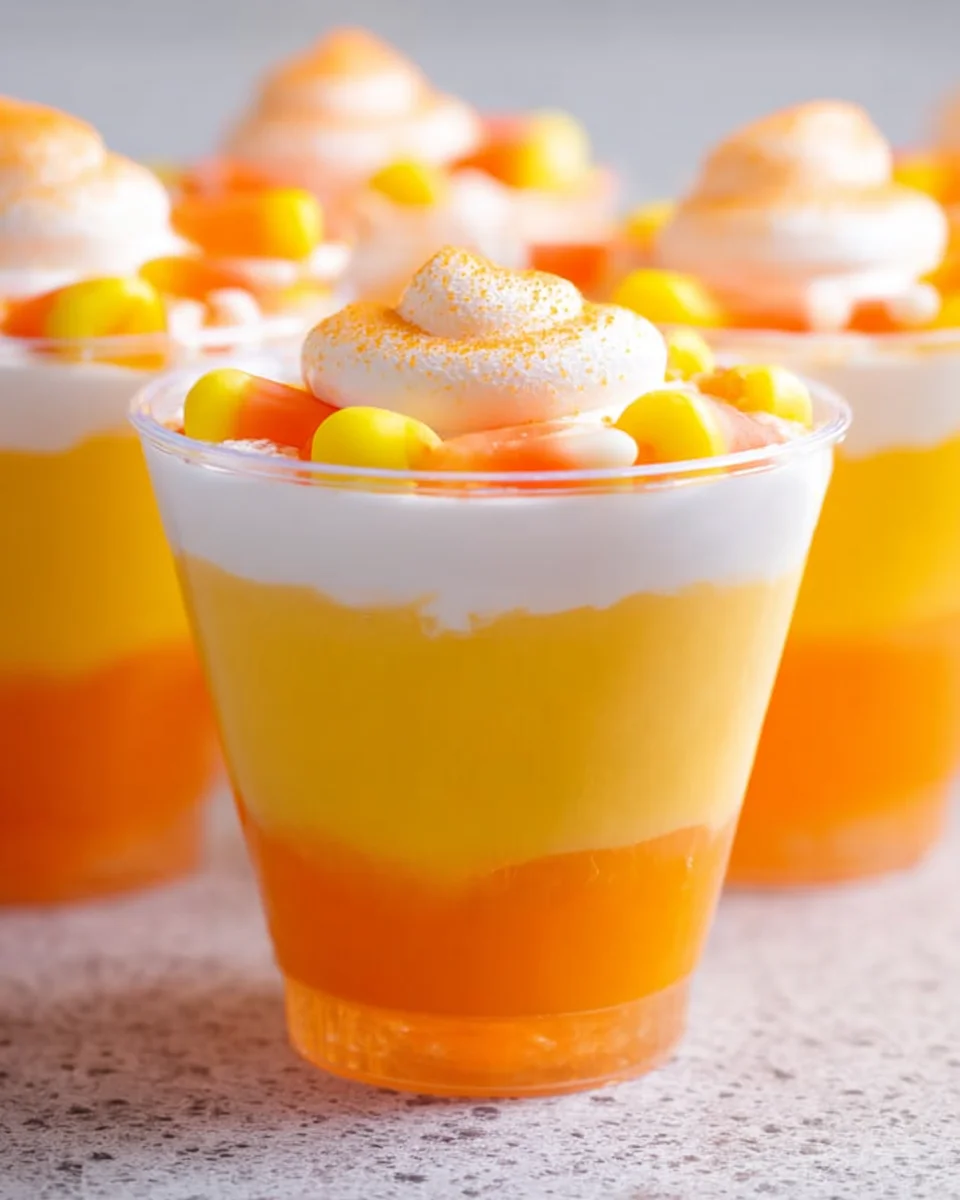
As the leaves turn and the air grows crisp, I crave everything cozy and festive. Candy Corn Pudding Cups capture that feeling perfectly. This playful, no-bake dessert is both delicious and efficient a quick creative project any busy mom can make in minutes. Picture silky layers of vanilla pudding, vibrant color, and a sweet candy-corn crunch on top. Serve it to impress loved ones during Halloween, or enjoy it as a well-earned treat at the end of a long week.
Why You’ll Love This Candy Corn Pudding Cups
Let’s face it life gets hectic, and finding the time to make dessert can feel overwhelming. That’s where these Candy Corn Pudding Cups come in! They’re incredibly easy to make, taking just 15 minutes. Plus, they look adorable and taste amazing! The kids will love the sweetness, while you’ll appreciate how simple they are. This treat brings joy without the fuss what’s not to love?

Ingredients for Candy Corn Pudding Cups
The beauty of Candy Corn Pudding Cups lies in their simplicity. Here’s what you’ll need:
- Vanilla instant pudding: Two packets are essential for that creamy base. Instant pudding makes the process a breeze!
- Cold milk: You’ll need a generous amount to help the pudding set perfectly. Whole milk works best, but you can use any kind you prefer.
- Orange food coloring: A few drops add that festive flair. Adjust the amount to create your perfect shade of orange.
- Cool Whip: This fluffy topping takes the dessert over the top! Thaw it beforehand for ease of use.
- Candy corn: The star ingredient! These sweet little treats add both flavor and fun to our pudding cups.
- Sanding sugar: A colorful touch that gives your dessert a sparkle. Orange and yellow sprinkles not only add sweetness, but also a pop of color!
- Clear plastic cups: Seven cups help showcase the beautiful layers. You can use glass cups if you want to elevate your presentation.
For those wanting to get creative, consider adding layers of crushed graham crackers or whipped cream in between the pudding. If you can’t find orange food coloring, you can even use store-bought orange pudding to save time!
You’ll find detailed ingredient amounts listed at the bottom of this article, so you can easily print them out for your next kitchen adventure.
How to Make Candy Corn Pudding Cups
Creating your Candy Corn Pudding Cups is as delightful as savoring them! Let’s dive into these simple steps. Trust me, once you get started, you’ll wonder why you didn’t make them sooner!
Step 1: Prepare the Pudding
In a large bowl, pour both packages of vanilla instant pudding mix. Add the cold milk and mix according to the package instructions. You’ll want to whip it until it’s smooth and creamy, about two minutes. This magic will create a pudding that feels like a hug in food form!
Step 2: Separate the Pudding
Next, split the pudding mixture into two bowls. Pour two cups of the pudding into one bowl and the remaining four cups into another. This division is essential for creating the vibrant layers that will make your dessert pop!
Step 3: Add Food Coloring
Now comes the fun part! In the bowl with the four cups of pudding, add five drops of orange food coloring. Mix thoroughly after each drop until you achieve your desired shade. Whether it’s a bright pumpkin hue or a soft sunset orange, make it your own!
Step 4: Layer the Pudding
Time to layer! Begin with the clear plastic cups. Spoon four spoonfuls of the yellow vanilla pudding into the bottom. This will be the base layer. Next, add eight spoonfuls of the vibrant orange pudding. Aim for a ratio of about ⅓ yellow and ⅔ orange. This layering creates a beautiful, festive look!
Step 5: Top with Cool Whip
Once your pudding layers are ready, it’s time to add the clouds! Carefully top each cup with a generous dollop of thawed Cool Whip. This fluffy layer not only tastes great but also adds a whimsical touch that everyone loves.
Step 6: Garnish and Serve
The finishing touch is here. Sprinkle candy corn and a generous pinch of sanding sugar on top of the Cool Whip. This will give your Candy Corn Pudding Cups that extra sparkle and crunch! Serve them chilled or let them sit at room temperature for a bit—they’ll be delicious either way.
Tips for Success
- Make sure to whisk the pudding mix thoroughly for a smooth texture.
- Use a spatula to layer the pudding evenly in the cups.
- Chill the dessert for at least an hour before serving; it enhances the flavor.
- Feel free to customize the colors—try green or purple for a spookier twist!
- Have fun with your toppings; think of adding mini marshmallows or chocolate sprinkles!
Equipment Needed
- Large mixing bowl: A standard bowl works perfectly; no need for fancy equipment.
- Plastic or glass cups: Clear cups showcase those vibrant layers well. Use any cups available to you.
- Whisk: Great for mixing pudding; a fork can suffice in a pinch.
- Measuring spoons: For portion control; you can use your regular kitchen spoons if needed.
Variations
- For a chocolate twist, replace one packet of vanilla pudding with chocolate pudding. Layer it with the orange pudding for a fun surprise!
- Try using almond milk or coconut milk for a dairy-free version. It offers a unique flavor and caters to different dietary needs.
- Add a sprinkle of cinnamon or nutmeg to the vanilla pudding for an extra layer of warm flavor.
- For a healthy spin, swap out candy corn for fresh fruit like mandarin oranges or diced peaches on top!
- Use flavored Cool Whip, such as pumpkin spice or vanilla bean, to add a twist to the whipped topping.
Serving Suggestions
- Pair these Candy Corn Pudding Cups with spooky-themed cookies for a festive dessert table.
- Serve alongside warm apple cider for a cozy fall treat.
- Display them on a colorful, Halloween-themed tray to enhance presentation.
- Add a cute label or tag to each cup for extra flair.
FAQs about Candy Corn Pudding Cups
Curious about these delightful Candy Corn Pudding Cups? Here are some common questions I get asked, along with answers to help guide your pudding-making journey.
Can I make Candy Corn Pudding Cups ahead of time?
Absolutely! These pudding cups can be prepared a day in advance. Just cover them tightly with plastic wrap and keep them refrigerated until you’re ready to serve. This makes them a great option for parties or busy weeknights.
What can I use instead of Cool Whip?
If you prefer a homemade option, you can whip up some heavy cream with a bit of sugar and vanilla extract. It’s a delicious alternative that adds a personal touch to your Candy Corn Pudding Cups!
Can I use a different flavor of pudding?
Yes! Get creative by swapping vanilla pudding for chocolate or butterscotch. Each variation adds fun flavors while keeping the festive appeal. The candy corn will still shine brightly on top!
How do I store leftovers?
Any leftover Candy Corn Pudding Cups should be stored in an airtight container in the fridge. They typically last for about 5-7 days. Just remember to enjoy them quickly—they’re so good they won’t last long!
Are these cups suitable for dietary restrictions?
While the basic recipe is vegetarian, you can easily adapt it for various dietary needs. Use dairy-free milk and a suitable topping for those with lactose intolerance or vegan preferences. The options are endless!
Final Thoughts
Making Candy Corn Pudding Cups is more than just a kitchen project; it’s a delightful experience filled with creativity and sweetness. As you watch the vibrant layers come together, you’ll feel that joyous connection to seasonal festivities. It’s the simple moments, like enjoying these colorful cups with loved ones, that create lasting memories. Plus, the smiles on your kids’ faces when they see these festive treats are priceless! So, gather your ingredients, unleash your inner chef, and enjoy the process. This recipe is sure to bring a sprinkle of happiness into your home, one cup at a time!
Print
Candy Corn Pudding Cups
- Prep Time: 15 minutes
- Cook Time: 0 minutes
- Total Time: 15 minutes
- Yield: 7 servings 1x
- Category: Dessert
- Method: No-Bake
- Cuisine: American
- Diet: Vegetarian
Description
Candy Corn Pudding Cups are a fun and easy dessert that combines layers of creamy vanilla pudding with vibrant colors, topped with Cool Whip, candy corn, and sanding sugar.
Ingredients
- 2 packages vanilla instant pudding 5.1-ounce each
- 6 cups cold milk
- Orange food coloring
- 8 ounces Cool Whip thawed
- Candy corn
- Orange and yellow sanding sugar
- 7 9-ounce clear plastic cups
Instructions
- In a large bowl, pour both packages of instant vanilla pudding mix and add the milk. Then mix according to package instructions. This will make 6 cups of pudding.
- Divide the pudding so there are 2 cups of pudding in one bowl and 4 cups of pudding in another.
- In the bowl with the 4 cups of pudding, add 5 drops of orange food coloring, mixing between each drop until desired orange color is achieved. No need to color the pudding in the other bowl.
- In a plastic cup, add 4 spoonfuls of the yellow vanilla pudding for the bottom layer. Then 8 spoonfuls of the orange-colored vanilla pudding for the second layer.
- The pudding ratio should be about ⅓ yellow and ⅔ orange, with a little extra room for the cool whip on top.
- Cover the top with the thawed cool whip.
- Add candy corn and sanding sugar on top of the cool whip.
- Serve chilled or at room temperature.
- Store any leftover pudding in an airtight container for 5-7 days.
Notes
- Adjust the amount of orange food coloring to achieve the desired color.
- Can be made a day in advance for convenience.
Nutrition
- Serving Size: 1 cup
- Calories: 250
- Sugar: 20g
- Sodium: 150mg
- Fat: 10g
- Saturated Fat: 5g
- Unsaturated Fat: 3g
- Trans Fat: 0g
- Carbohydrates: 35g
- Fiber: 0g
- Protein: 3g
- Cholesterol: 20mg


