Cheesy garlic bread is the kind of comfort food that hits all the right notes—crispy on the outside, soft and gooey on the inside, with bold garlic flavor and a generous helping of melted cheese. Whether you’re serving it as a starter, snack, or side dish, this classic favorite always draws a crowd. The best part? You can make cheesy garlic bread at home with just a few simple ingredients and no fancy equipment.
In this post, we’re diving deep into everything cheesy garlic bread—from the perfect loaf and cheese combinations to step-by-step baking methods that guarantee golden edges and molten centers. We’ll also explore fun variations, storage tips, and what delicious dishes pair perfectly with this irresistible bread.

Table of Contents
Why Cheesy Garlic Bread Is the Internet’s Favorite Side Dish
What Makes Cheesy Garlic Bread So Irresistible?
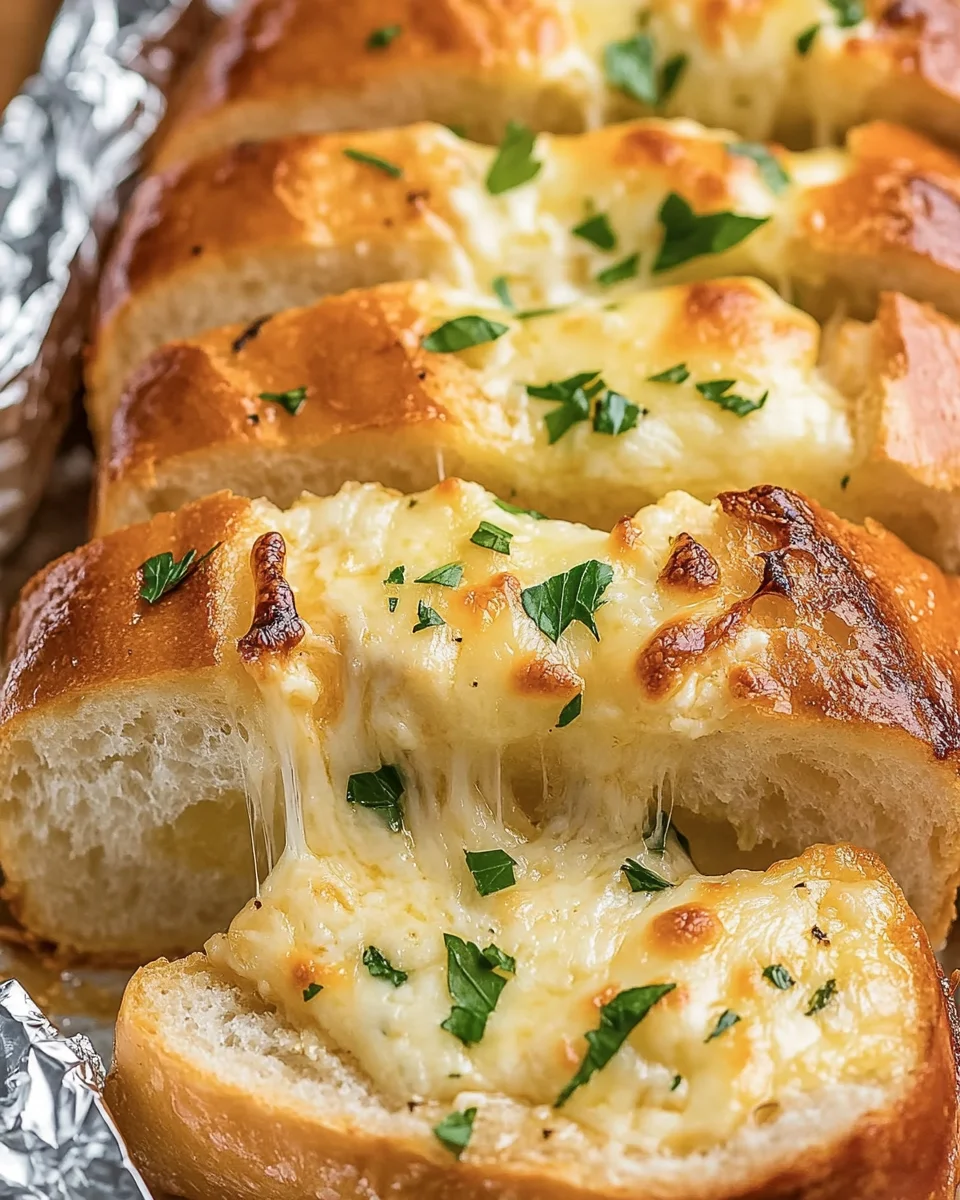
There’s something about the combination of warm bread, melted cheese, and rich garlic butter that appeals to just about everyone. It’s the crunch of the crust meeting the stretch of mozzarella, seasoned with aromatic herbs and a hint of spice. The moment it’s pulled apart—especially when baked just right—you get that satisfying cheese pull that’s practically made for social media.
But this dish isn’t just about looks. It delivers deep, comforting flavors in every bite. Garlic stimulates your appetite, cheese satisfies your cravings, and butter ties it all together in one mouthwatering experience.
Plus, it’s highly adaptable. You can serve cheesy garlic bread with pasta, soups, stews, salads—or enjoy it as a late-night snack. It’s not just a side; it’s a star in its own right.
A Brief History of Garlic Bread and Its Cheesy Evolution
Garlic bread traces its roots to ancient Rome, where people rubbed garlic and olive oil on toasted bread as a simple yet flavorful staple. Fast forward to mid-20th-century America, where Italian-American cuisine popularized garlic bread alongside pasta dishes.
The cheesy upgrade came later, driven by the American love for all things rich and indulgent. By adding mozzarella—or even cheddar—cheesy garlic bread became a more decadent dish perfect for sharing at parties or pairing with robust meals.
Today, it’s a menu staple at Italian restaurants, pizza chains, and even fine dining establishments. But no version is quite as good as the one you pull straight from your own oven—fresh, hot, and custom-built for your cravings.

Essential Ingredients for the Best Cheesy Garlic Bread
Bread Choices: French, Italian, or Sourdough?
The bread you use can make or break your cheesy garlic bread. It’s not just a vehicle for cheese and garlic—it’s the base that gives structure, crunch, and chewiness to every bite. Here are the top contenders:
| Bread Type | Texture | Flavor Notes | Best For |
|---|---|---|---|
| French Loaf | Light and crisp crust | Neutral, soft interior | Classic garlic bread prep |
| Italian Bread | Slightly chewy | Slightly sweet and airy | Great for absorbing butter blend |
| Sourdough | Tangy, crusty shell | Stronger, rustic flavor | Pairs well with rich cheeses |
Tip: No matter which you choose, avoid overly soft sandwich bread—it’ll fall apart under the weight of melted butter and cheese.
Must-Have Toppings: Garlic, Mozzarella, Butter & Herbs
A truly memorable cheesy garlic bread starts with quality toppings. Let’s break them down:
- Fresh Garlic: Nothing beats the punch of minced fresh garlic. Pre-minced garlic or powders can dull the flavor.
- Mozzarella Cheese: This is your go-to for the stretchy, gooey texture. Low-moisture, part-skim mozzarella works best for melt and structure.
- Butter & Olive Oil: Softened butter provides richness, while a splash of olive oil prevents burning and adds a subtle fruity depth.
- Fresh Parsley: Adds color, brightness, and cuts through the richness.
- Red Pepper Flakes (optional): Just a touch elevates the flavor and gives it a gentle kick.
Here’s the ideal combo based on your provided recipe:
- 1 Loaf of Bread (French, Italian, or Sourdough)
- 3 cloves of Minced Garlic
- 1/4 cup Chopped Fresh Parsley
- 1/2 cup Butter (softened)
- 1 Tablespoon Olive Oil
- 1 1/4 cup Mozzarella Cheese (shredded)
- 1/2 tsp Red Pepper Flakes (optional)

Cheesy Garlic Bread – The Best Homemade Recipe with Gooey Cheese
- Prep Time: 11 minutes
- Cook Time: 29 minutes
- Total Time: 40 minutes
- Yield: 8 servings 1x
- Category: Side Dish
- Method: Baking
- Cuisine: American
- Diet: Vegetarian
Description
Cheesy garlic bread is the kind of comfort food that hits all the right notes—crispy on the outside, soft and gooey on the inside, with bold garlic flavor and a generous helping of melted cheese. Whether you’re serving it as a starter, snack, or side dish, this classic favorite always draws a crowd. The best part? You can make cheesy garlic bread at home with just a few simple ingredients and no fancy equipment.
Ingredients
1 loaf of bread (French, Italian, or sourdough)
3 cloves garlic, minced
¼ cup fresh parsley, chopped
½ cup butter, softened
1 tablespoon olive oil
1¼ cup mozzarella cheese, shredded
½ teaspoon red pepper flakes (optional)
Instructions
Preheat the oven to 425°F (220°C).
Prepare the bread: Place the loaf on a cutting board. Slice it into 1-inch sections using a serrated knife — don’t cut all the way through.
Make the filling: In a small bowl, mix together the softened butter, olive oil, minced garlic, chopped parsley, mozzarella cheese, and red pepper flakes.
Stuff the loaf: Carefully spoon the cheese mixture between each slice.
Wrap and bake: Wrap the stuffed loaf in aluminum foil and place it on a baking tray.
Bake covered for 20 minutes
Then uncover and bake for 10 more minutes until golden and bubbly.
Serve warm: Gently pull apart the slices and enjoy!
Notes
Storage:
Refrigerate leftovers in a sealed container for up to 2 days.
To reheat, simply wrap the leftover garlic bread in foil and warm it in the oven at 350°F for 10–15 minutes.
How to freezer garlic bread:
After stuffing the cheese mixture between the slices of bread, place the bread in a freezer bag or foil. Freeze the garlic bread for up to 3 months.
When ready to bake, follow the recipe card for baking instructions. It may take a few extra minutes if the bread is frozen.
Nutrition
- Serving Size: 1 slice
- Calories: 277 kcal
- Sugar: 9g
- Sodium: 535mg
- Fat: 9g
- Saturated Fat: 3g
- Unsaturated Fat: 5g
- Trans Fat: 0.03g
- Carbohydrates: 39g
- Fiber: 1g
- Protein: 10g
- Cholesterol: 11mg
Step-by-Step Guide to Making Homemade Cheesy Garlic Bread
Prepping the Bread Loaf Like a Pro
Preparation is key to nailing the perfect texture and flavor. Before diving into garlic butter bliss, let’s start with slicing your bread the right way.
- Choose a solid loaf – Not pre-sliced. Go for something with structure like French or sourdough.
- Use a serrated knife – This ensures clean cuts without crushing the loaf.
- Cut 1-inch slices across the loaf, but don’t go all the way through. The goal is to create deep slits that hold the garlic butter and cheese but still keep the loaf intact.
This “accordion-style” cut creates those signature pull-apart pieces once baked, allowing every slice to soak up flavor while keeping the whole loaf easy to serve.
Mixing and Spreading the Garlic Butter Mixture
Now it’s time for the flavor bomb—the cheesy, garlicky, buttery blend that makes this bread unforgettable.
In a small bowl, combine:
- 1/2 cup softened butter
- 1 tablespoon olive oil
- 3 minced garlic cloves
- 1/4 cup chopped fresh parsley
- 1 1/4 cups shredded mozzarella cheese
- 1/2 tsp red pepper flakes (optional for a spicy kick)
Instructions:
- Blend until smooth. A fork works fine—no mixer needed.
- Stuff it between the slices. Using a butter knife or spoon, gently spread the mixture into each cut, making sure the cheese gets tucked inside as well.
- Wrap in foil. Once fully stuffed, wrap the loaf snugly in aluminum foil. This traps moisture, ensuring the inside gets melty while the crust crisps up later.
Baking Techniques for Crispy Yet Gooey Cheesy Garlic Bread
Foil-Wrapped vs. Open-Baked: What’s the Difference?
The way you bake your cheesy garlic bread impacts more than just doneness—it affects texture, flavor concentration, and cheese melt quality.
Here’s a breakdown of the two most popular methods:
| Method | Texture Result | When to Use |
|---|---|---|
| Foil-Wrapped | Soft interior, moist cheese | Ideal for first 20 minutes of baking |
| Open-Baked | Crisp crust, browned cheese top | Best for the final 10 minutes (after unwrapping) |
Pro Tip: Start with foil to melt the cheese and lock in the garlic flavor. Then, remove the foil and bake uncovered for those perfectly golden, bubbling tops.
Baking Time and Temperature Tips for Melty Cheese
To achieve cheesy garlic bread that’s crunchy outside and gooey inside, here’s the oven strategy:
- Preheat your oven to 425°F (218°C) – A hot oven helps toast the outer layer fast without drying out the center.
- Place the foil-wrapped loaf on a baking sheet – This prevents dripping and ensures even heat distribution.
- Bake for 20 minutes wrapped – Let the butter and cheese melt into the bread.
- Uncover and bake for 10 more minutes – This final step creates that irresistible, golden top with crisp edges.
Delicious Variations of Cheesy Garlic Bread
Spicy, Herby, or Extra Cheesy? Flavor Twists to Try
Sure, the classic version is amazing—but sometimes, adding a flavorful twist can take your cheesy garlic bread from tasty to unforgettable. Here are some crowd-pleasing variations to experiment with:
1. Spicy Jalapeño Garlic Bread
Add finely chopped fresh jalapeños or a pinch of cayenne to the garlic butter mix. It brings just the right amount of heat and pairs perfectly with pasta dishes or barbecue mains.
2. Triple Cheese Explosion
Go beyond mozzarella! Mix in parmesan for saltiness and provolone for creamy melt. Use 1 cup mozzarella + 1/4 cup parmesan + 1/4 cup provolone for maximum cheese pull.
3. Herbed Garlic Bread
Toss in dried Italian seasoning, basil, or thyme with the butter mixture. Not only does it add aroma, but it enhances the garlic’s flavor without overpowering it.
4. Cheddar and Green Onion Combo
This one’s a winner for game nights. The sharpness of cheddar and mild bite of green onions bring something different to the table.
5. Everything Bagel-Style Garlic Bread
Sprinkle the loaf with everything bagel seasoning before baking. It adds crunch, flavor, and a trendy twist that’s perfect for brunch.
Gluten-Free, Vegan, and Dairy-Free Options
For those with dietary restrictions, there’s no need to miss out. Here’s how to adapt cheesy garlic bread for specific needs:
Gluten-Free Version
- Use a gluten-free baguette or bread loaf (look for sturdy textures to mimic the crunch).
- All other ingredients remain the same.
Vegan Cheesy Garlic Bread
- Swap butter with vegan margarine or olive oil spread.
- Use plant-based cheese alternatives like almond or soy mozzarella shreds.
- Skip the parmesan or find a vegan-friendly substitute.
Dairy-Free (But Still Gooey!)
- Try coconut oil-based butter.
- Choose dairy-free mozzarella made from cashews or potatoes. Melt quality has improved greatly in recent years.
What to Serve With Cheesy Garlic Bread
Classic Pairings: Pasta, Soups, and More
Cheesy garlic bread is the ultimate companion to many main courses. When served warm and golden, it enhances both texture and flavor in meals. Here are the timeless combinations:
1. Pasta Dishes
Whether it’s spaghetti, fettuccine alfredo, or baked ziti, cheesy garlic bread is the go-to carb-on-carb indulgence. It helps scoop up sauces and offers a satisfying crunch beside soft pasta.
2. Tomato-Based Soups
Think creamy tomato basil soup or rustic minestrone. The sharpness of garlic and richness of cheese complements the acidity in tomatoes.
3. Caesar or Garden Salads
Pair it with a crisp salad to balance the richness. Add a vinaigrette-based dressing to cut through the butter and cheese.
4. Lasagna or Baked Eggplant Parmesan
These oven-baked Italian-style dishes demand a buttery, cheesy sidekick—and cheesy garlic bread is just the ticket.
5. BBQ Ribs or Grilled Chicken
Use garlic bread as a fun, unexpected twist for hearty, smoky dishes. It acts as a sweet-savory contrast to BBQ sauces.
Unexpected Combos That Just Work
You don’t have to stick to Italian night to enjoy cheesy garlic bread. Here are some pairings that might surprise you—but absolutely work:
1. Breakfast Boards
Use cheesy garlic bread in place of toast. Top it with eggs, avocado, or leftover roasted veggies for a power-packed start.
2. Hearty Stews and Chili
The bread soaks up the thick, spicy goodness of chili and adds a creamy bite thanks to the cheese.
3. Tapas or Small Plates
Slice it into mini pieces and serve with dips like spinach artichoke, hummus, or creamy feta spreads.
4. Potato Sausage
As covered in this detailed article on potato sausage, the hearty, spiced flavor of Swedish-style potato sausage pairs surprisingly well with garlic and cheese bread—especially when served as part of a cozy winter dinner plate.
Storage, Reheating, and Leftover Hacks
Best Way to Store and Reheat Without Losing the Crunch
Cheesy garlic bread is best enjoyed hot and melty—but that doesn’t mean leftovers have to go to waste. With a few smart storage and reheating tricks, you can bring back that crispy-cheesy magic the next day.
How to Store:
- Short-term (1–2 days): Wrap the bread tightly in foil and place it in the fridge. Avoid plastic wrap, which traps moisture and makes the bread soggy.
- Long-term (up to 1 month): Wrap the slices in foil, then place them in a freezer-safe bag. Label and freeze.
How to Reheat (and Keep It Crunchy):
| Method | Time | Instructions |
|---|---|---|
| Oven | 10 mins @ 375°F | Place directly on the rack or a sheet; foil optional |
| Air Fryer | 5–7 mins @ 350°F | Perfect for restoring crispiness |
| Toaster Oven | 6–8 mins @ 375°F | Works well for single servings |
| Avoid Microwave | — | Makes the bread rubbery and soggy—skip it completely |
Pro Tip: For frozen garlic bread, let it thaw for 15–20 minutes before reheating to ensure even heat distribution.
Creative Ways to Use Leftover Garlic Bread
Leftovers don’t have to be boring. Turn your cheesy garlic bread into something brand new with these easy hacks:
1. Cheesy Croutons
Cube leftover bread, bake until crisp, and toss over salads or soups for a cheesy crunch.
2. Garlic Bread Grilled Cheese
Use two slices as sandwich bread—stuff with extra mozzarella or meats for a buttery, melty lunch.
3. Breakfast Base
Top reheated slices with a fried egg, spinach, or even avocado for a fast, filling breakfast.
4. Mini Pizza Boats
Spoon some marinara into each slice slit, add pepperoni or veggies, and bake again. Instant snack win!
Cheesy garlic bread is too good to waste—so stretch every crumb with these clever makeovers.
Comparing Homemade vs. Store-Bought Cheesy Garlic Bread
Cost, Flavor, and Customization Differences
While store-bought cheesy garlic bread offers convenience, it rarely competes with the flavor and texture of a homemade version. Here’s a head-to-head breakdown:
| Feature | Homemade | Store-Bought |
|---|---|---|
| Flavor | Fresh, customizable, bold garlic & cheese | Often bland, overly salty or artificial |
| Texture | Crunchy crust, gooey interior | Usually soggy or rubbery after reheating |
| Ingredients | Whole foods, no preservatives | Contains additives and stabilizers |
| Cheese Quality | Choose your favorites—mozzarella, cheddar | Low-grade cheese or cheese blends |
| Prep Time | ~10 mins prep, ~30 mins total | Ready to heat (but less impressive results) |
| Cost per Serving | Lower over time, especially for families | Higher cost per ounce, less value overall |
| Customization | Endless: herbs, spice, vegan, gluten-free | Limited—what’s in the box is what you get |
It’s clear: homemade cheesy garlic bread wins in both taste and value.
Store-bought is great in a pinch, but if you’re feeding a crowd or want a show-stopping side, there’s no substitute for the real thing.
Why Homemade Wins (Almost) Every Time
With homemade cheesy garlic bread, you control the flavor profile, the crisp level, and the cheese melt. You can even upgrade the butter with roasted garlic, swap in different herbs, or blend cheeses like gruyère or parmesan.
Plus, homemade means fewer preservatives and better nutrition. For example, using olive oil instead of margarine cuts down on saturated fat, while fresh herbs boost antioxidants.
Nutritional Info & Ingredient Substitutes
Healthier Swaps Without Losing Flavor
Cheesy garlic bread isn’t exactly health food—but with a few smart substitutions, you can enjoy the same rich taste with fewer calories and less fat.
Here are healthy swaps for each major ingredient:
| Ingredient | Healthier Substitute | Benefit |
|---|---|---|
| Regular Butter | Olive oil spread or light butter | Less saturated fat, heart-healthier fats |
| Full-fat Mozzarella | Part-skim mozzarella or vegan cheese | Lower fat, fewer calories |
| White Bread | Whole grain or gluten-free loaf | More fiber and nutrients |
| Cheese Blend | Nutritional yeast (for vegan option) | Adds savory, cheesy flavor without dairy |
| Red Pepper Flakes | Smoked paprika or turmeric | Adds color and anti-inflammatory benefits |
Pro Tip: Even using just half the usual cheese and blending it with herbs can still create a rich, satisfying experience—especially when baked to golden perfection.
Caloric Breakdown and Serving Sizes
Here’s an estimate for one serving (roughly 1/6 of a full cheesy garlic bread loaf):
- Calories: ~280–320 (depending on cheese and butter used)
- Fat: 18–22g
- Carbs: 22–28g
- Protein: 6–9g
- Sodium: ~450–600mg
FAQs
What is a potato sausage?
Potato sausage is a traditional sausage blend made from ground meat (often pork), potatoes, onions, and spices. It’s especially popular in Swedish and Finnish cuisines, where it’s called potatis korv. The inclusion of potatoes gives it a softer texture and milder flavor compared to standard sausages.
What do you eat with potato sausage?
Potato sausage pairs well with rustic side dishes like mashed potatoes, sauerkraut, or roasted vegetables. For a modern twist, try serving it with cheesy garlic bread. The crispy bread and rich garlic butter complement the mild, hearty flavors of the sausage.
Where did potato sausage originate?
Potato sausage originated in Sweden, particularly in the province of Värmland. It was a cost-effective way for rural families to stretch meat by blending it with local staples like potatoes and onions. Over time, it became a beloved holiday food and comfort dish.
What are the ingredients in Swedish potato sausage?
Classic Swedish potato sausage is made with:
Ground pork or beef
Grated or finely chopped potatoes
Yellow onion
Salt and black pepper
Sometimes allspice or other mild spices
It’s typically stuffed into natural casings and simmered before serving. It’s hearty, warming, and pairs beautifully with sides like our cheesy garlic bread.
Conclusion
Cheesy garlic bread is more than a side dish—it’s an experience. Whether you’re baking it for pasta night, adding it to your appetizer spread, or reinventing leftovers the next day, this versatile, flavorful bread earns its place at the table.
From the simplicity of its ingredients to the golden crunch of its final bake, making cheesy garlic bread at home is rewarding, budget-friendly, and endlessly customizable. Want it spicy? Add jalapeños. Need a dairy-free version? Swap the cheese. There’s a variation for every taste and occasion.
Don’t miss our what is the pink salt trick recipe for a detox follow-up to balance your cheesy indulgence.
For more creative baking inspiration and marketing ideas, explore the Pinterest


