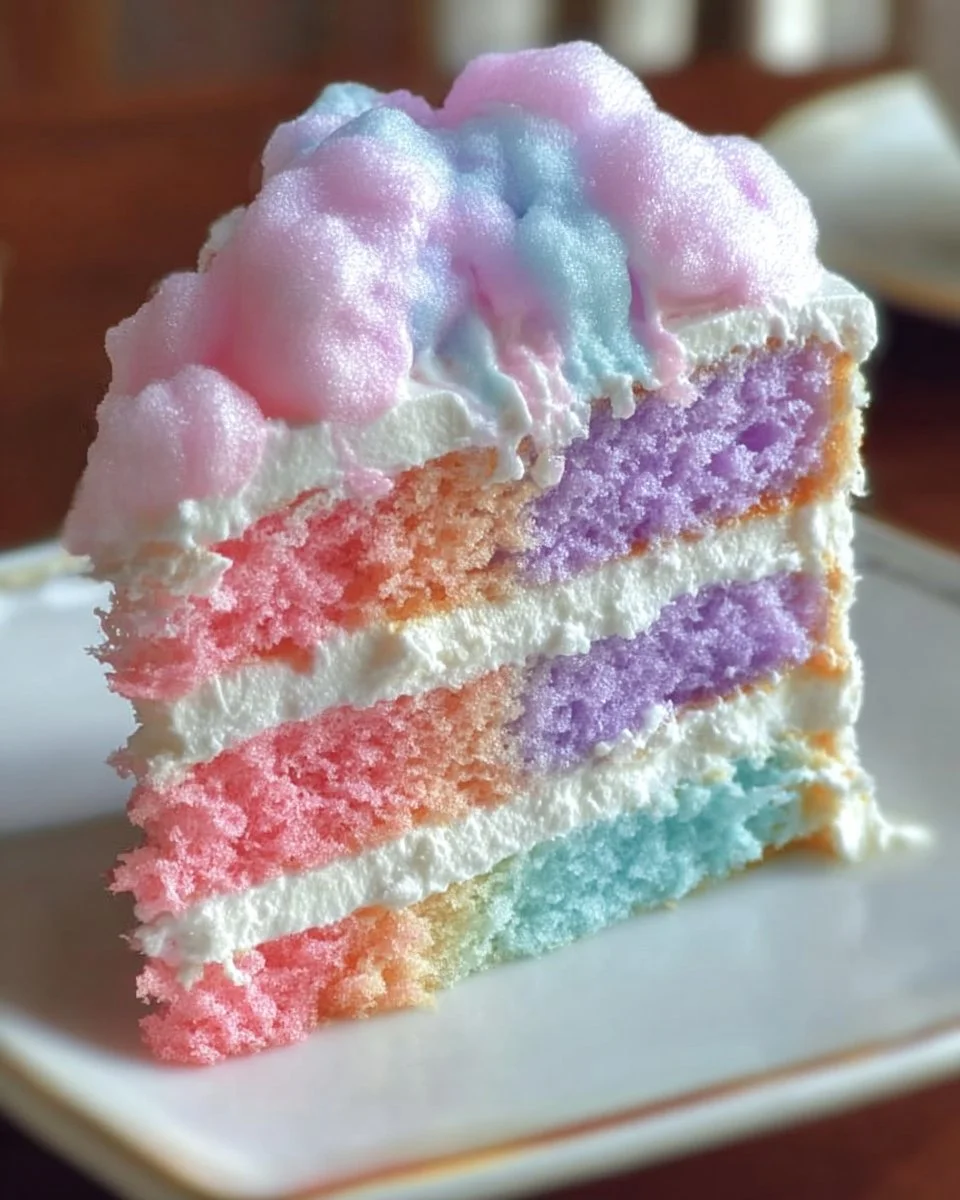
Pin by kk.booga on Pins by you | Cotton candy cakes, Candy cakes, Eat cake — I remember the first time I saw this photo: a wobble of pink and blue, a tiny carnival in cake form, and I knew I had to try it.
That rainy Saturday I pulled out my old mixer and some boxed cake mix and got to work. I made this the first time when my niece wanted a “cotton candy birthday” and honestly, it was a hit. In my kitchen, this works better when you chill the layers briefly before you frost them. One thing I noticed is the cotton candy topping melts into the frosting if you leave the cake out too long.
If you want a fun drink to match, try a playful twist like a cotton candy margarita alongside this cake. Keep reading — this part matters…
Short direct answer (featured snippet)
This Pin by kk.booga on Pins by you | Cotton candy cakes, Candy cakes, Eat cake is a whimsical, layered pink-and-blue cake topped with cotton candy; it’s simple to make at home using basic cake ingredients, a light buttercream, and spun-sugar for garnish. Quick, fun, and perfect for parties.
Why You’ll Love This Pin by kk.booga on Pins by you | Cotton candy cakes, Candy cakes, Eat cake
- It’s playful and nostalgic — like a trip to the fair.
- Easy to customize: color, flavor, and size.
- Great for birthdays, baby showers, or just because.
Here’s the thing…
Most people miss this step: chill the layers before stacking. It makes frosting so much easier.
Preparation Phase & Tools to Use
Tools:
- 8 or 9-inch round cake pans (2 or 3 depending on layers)
- Electric mixer (hand or stand)
- Rubber spatula
- Cooling racks
- Offset spatula for frosting
- Piping bag (optional)
- Instant-read thermometer (optional)
Prep time tips:
- Preheat your oven and line pans first.
- Measure flour by spooning into the cup — don’t pack it.
- Let eggs come to room temp for a fluffier crumb.
Quick tip: don’t skip this step.
Ingredients for Pin by kk.booga on Pins by you | Cotton candy cakes, Candy cakes, Eat cake
- 2 1/2 cups all-purpose flour
- 1 3/4 cups granulated sugar
- 1 cup unsalted butter, softened
- 4 large eggs
- 1 cup whole milk
- 1 tbsp baking powder
- 1/2 tsp salt
- 2 tsp vanilla extract
- Pink and blue gel food coloring
- 4 cups buttercream frosting (recipe below)
- Cotton candy for garnish (fresh, not pre-melted)
Buttercream:
- 1 cup unsalted butter, room temp
- 4 cups powdered sugar, sifted
- 2–3 tbsp milk or cream
- 1 tsp vanilla
How to Make Pin by kk.booga on Pins by you | Cotton candy cakes, Candy cakes, Eat cake at Home
- Preheat oven to 350°F (175°C). Grease and line pans.
- Cream butter and sugar until light, about 3–4 minutes.
- Add eggs one at a time, mixing well. Stir in vanilla.
- Whisk flour, baking powder, and salt in a bowl.
- Add dry and milk alternately to the butter mixture, beginning and ending with dry.
- Divide batter into two bowls. Tint one pink, one blue. If making three layers, reserve a strip uncolored or mix a lighter shade.
- Bake 20–25 minutes or until a toothpick comes out clean. You might need an extra minute depending on your oven.
- Cool in pans 10 minutes then transfer to racks. chill 20 minutes to firm up.
Frosting:
- Beat butter until fluffy.
- Slowly add powdered sugar and milk, mixing to spreadable consistency.
- Frost each layer, chill briefly between layers for stability.
- Top with a loose mound of fresh cotton candy right before serving.
Don’t rush this step. The cotton candy goes from gorgeous to sad fast.
Pro Tips for Best Results
- Chill layers 10–20 minutes between frosting; it prevents crumbs.
- Use gel coloring — it doesn’t thin the batter.
- For extra stability, insert a few dowels for taller cakes.
- Stir often so it doesn’t stick when making any caramel or sugar garnish.
- It thickens more as it cools; trust me, cooling rules.
Warning: cotton candy will melt if you refrigerate the cake with it on top. Add it right before guests arrive.
Variations & Customization Ideas
- Flavor swap: replace vanilla with strawberry extract for extra pink flavor.
- Funfetti: fold in sprinkles for a party cake twist.
- Mini cakes: bake in muffin tins and top each with a puff of cotton candy.
- Vegan option: use plant-based butter and milk, and an egg replacer.
Common Mistakes to Avoid
- Overmixing batter — makes a dense cake.
- Putting cotton candy on too early — it will dissolve.
- Using liquid food coloring — can change batter texture.
- Not leveling layers — cake will lean.
What to Serve With Pin by kk.booga on Pins by you | Cotton candy cakes, Candy cakes, Eat cake
- Light sparkling wine or a cotton candy margarita (see link above).
- Fresh berries to cut sweetness.
- Vanilla ice cream for a dreamy combo.
Storage & Reheating Instructions
- Store unfrosted cake layers in an airtight container in the fridge for up to 3 days.
- Frosted cakes without cotton candy: refrigerate up to 3 days. Bring to room temp before serving.
- Do NOT refrigerate with cotton candy topper.
- Reheat slices gently in a warm oven for a minute if desired. Don’t microwave — it ruins texture.
Estimated Nutrition Information (per slice, 12 slices)
- Calories: ~420
- Fat: 22g
- Carbs: 55g
- Protein: 4g
- Sugar: 36g
(Estimate only — varies with portion size and frosting amount.)
FAQs
Q: Can I make this cake from scratch?
A: Absolutely. Use your favorite vanilla cake recipe, then tint the batter. Nothing complicated here.
Q: How long does the cotton candy stay fresh on top?
A: Only a few minutes. Add it right before serving for the best look.
Q: Can I make the frosting ahead?
A: Yes — store refrigerated for up to 3 days and whip again before using.
Q: Is there a gluten-free version?
A: Yes, swap in a 1:1 gluten-free flour blend and check consistency.
Q: How can I transport this cake?
A: Freeze slightly to firm it, box it, and travel carefully. Use non-skid mat in your car.
Expert Tips for the Best Pin by kk.booga on Pins by you | Cotton candy cakes, Candy cakes, Eat cake
- Use a crumb coat first — a thin layer of frosting that traps crumbs. Chill, then finish.
- Keep cotton candy in a sealed bag until the last minute to prevent moisture.
- For extra wow, sprinkle edible glitter or clear sanding sugar around the base.
- If frosting seems runny, add powdered sugar a tablespoon at a time.
Ever had this happen?
You think it’s perfect, then the cotton candy melts five minutes before guests arrive. Learn from me — wait to add it.
Keep reading, this part matters…
There’s one mistake that can ruin this: using humid ingredients or a warm kitchen. It makes everything weep. So yeah, cool your layers and keep the room dry.
Save this recipe for later. Try it and see how it turns out — I’d love to hear what colors you pick.
Conclusion
This Pin by kk.booga on Pins by you | Cotton candy cakes, Candy cakes, Eat cake recipe is perfect for quick meals, easy snacks, or special occasions. If you want a little fun reading while your layers cool, check out this classic Garfield comic text for a tiny distraction while you wait.
Print
Cotton Candy Cake
- Prep Time: 30 minutes
- Cook Time: 25 minutes
- Total Time: 55 minutes
- Yield: 12 slices 1x
- Category: Dessert
- Method: Baking
- Cuisine: American
- Diet: Vegetarian
Description
A whimsical layered pink-and-blue cake topped with cotton candy; simple to make at home using basic cake ingredients and a light buttercream.
Ingredients
- 2 1/2 cups all-purpose flour
- 1 3/4 cups granulated sugar
- 1 cup unsalted butter, softened
- 4 large eggs
- 1 cup whole milk
- 1 tbsp baking powder
- 1/2 tsp salt
- 2 tsp vanilla extract
- Pink and blue gel food coloring
- 4 cups buttercream frosting
- Cotton candy for garnish
Instructions
- Preheat oven to 350°F (175°C). Grease and line pans.
- Cream butter and sugar until light, about 3–4 minutes.
- Add eggs one at a time, mixing well. Stir in vanilla.
- Whisk flour, baking powder, and salt in a bowl.
- Add dry and milk alternately to the butter mixture, beginning and ending with dry.
- Divide batter into two bowls. Tint one pink, one blue.
- Bake for 20–25 minutes or until a toothpick comes out clean.
- Cool in pans for 10 minutes then transfer to racks. Chill for 20 minutes.
- Beat butter for frosting until fluffy.
- Slowly add powdered sugar and milk, mixing to a spreadable consistency.
- Frost each layer and chill briefly for stability.
- Top with cotton candy right before serving.
Notes
Chill layers 10-20 minutes between frosting; don’t refrigerate with cotton candy on top.
Nutrition
- Serving Size: 1 slice
- Calories: 420
- Sugar: 36g
- Sodium: 200mg
- Fat: 22g
- Saturated Fat: 10g
- Unsaturated Fat: 8g
- Trans Fat: 0g
- Carbohydrates: 55g
- Fiber: 2g
- Protein: 4g
- Cholesterol: 80mg