Introduction to Creamy Chipped Beef Cheese Ball
Welcome, fellow food lovers! If you’re looking for a delightful appetizer that will wow your guests, look no further than this Creamy Chipped Beef Cheese Ball. I remember the first time I made it for a gathering; it disappeared faster than I could say “cheese!” This recipe strikes the perfect balance between simplicity and flavor, making it a fantastic quick solution for busy days. Whether you’re hosting friends for game night or making snacks for a family event, this cheese ball is sure to impress and satisfy. Trust me, your taste buds will be singing!
Why You’ll Love This Creamy Chipped Beef Cheese Ball
This creamy delight is perfect for any occasion, and the best part? It comes together in just 30 minutes! As a busy mom, I treasure snacks that are not only fast to prepare but also packed with flavor. The combination of savory chipped beef and creamy cheese will elevate any gathering. Plus, it’s a crowd-pleaser, ensuring everyone will come back for seconds. Trust me, you’ll want this one in your recipe repertoire!
Ingredients for Creamy Chipped Beef Cheese Ball
Gathering the right ingredients is key to making your Creamy Chipped Beef Cheese Ball a hit. Here’s what you’ll need:
- Cream Cheese: The star of the show! Use two packages of softened cream cheese for that luscious, rich base. Make sure it’s softened for easy mixing.
- Chipped Dried Beef: Typically found in the deli section, this adds a unique savory flavor. Use half in the mixture and save the other half for coating.
- Worcestershire Sauce: Just a splash adds depth and umami. It’s like a secret handshake for flavor!
- Garlic Powder: A hint of garlic elevates the taste without overpowering it. Perfect for garlic lovers like myself!
- Onion Powder: Adds a subtle sweetness and seasoning kick, marrying well with the cream cheese.
- Green Onions: Fresh and vibrant, they not only enhance the flavor but also add a nice pop of color. Plus, you can use more for garnish!
- Ritz Crackers: For serving, these buttery beauties are perfect for dipping. Their crunchiness pairs beautifully with the creamy cheese ball.
If you’re feeling adventurous, consider adding a splash of hot sauce for extra zing or swapping in some herbs for freshness. Feel free to mix it up! For precise quantities and a handy printable version, check the end of the article.

How to Make Creamy Chipped Beef Cheese Ball
Now comes the fun part—making your Creamy Chipped Beef Cheese Ball! With just a few simple steps, you’ll have a crowd-pleasing appetizer ready in no time. Let’s dive into the delicious details!
Step 1: Prepare the Base Mixture
Start by grabbing a large bowl. In it, mix together the softened cream cheese with half of the chopped chipped beef. Add a splash of Worcestershire sauce, along with the garlic and onion powders. Toss in the finely chopped green onions.
Mix everything together until it’s beautifully smooth—this should take about 5 minutes. It’s like blending a delicious cream cheese magic potion that everyone will love!
Step 2: Shape Your Cheese Ball
Once your mixture is creamy and combined, lay out some plastic wrap on your counter. Transfer your mixture onto the wrap and form it into a ball. Wrap it tightly, ensuring it’s well sealed.
Now comes the chilling part! Pop it in the fridge for about 20 minutes. This allows it to firm up, making it easier to coat with the remaining beef.
Step 3: Add the Finishing Touch
After the chilling time, unwrap your cheese ball. Take the remaining chopped chipped beef and gently press it all over the outside of the ball.
This step is like giving your cheese ball a cozy, beefy blanket! Make sure it sticks evenly; this adds that delicious savory crunch. This should only take about 5 minutes, and soon, you’ll have a beauty ready to impress.
Step 4: Serve
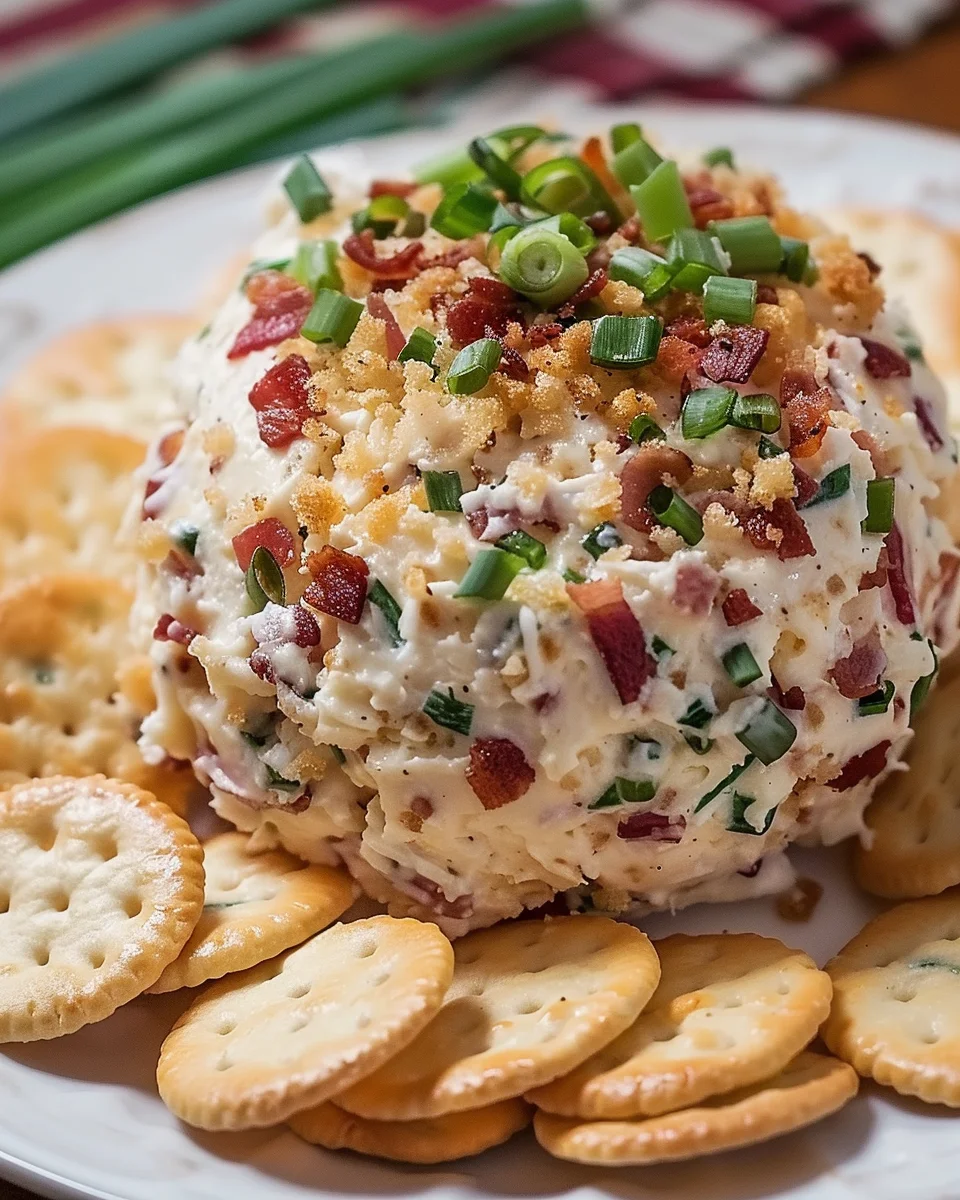
Finally, it’s time for the grand reveal! Place your cheese ball on a serving platter. Sprinkle some extra green onions on top for that fresh look. Serve it with buttery round crackers.
It’s a quick and easy setup that takes just about 2 minutes! Grab your favorite cracker and take a bite—trust me; it’s a party in your mouth.
Tips for Success
- Always use softened cream cheese for easier mixing.
- Chill the cheese ball thoroughly; this enhances its texture and flavor.
- Feel free to mix in your favorite herbs or spices for a personal twist.
- For extra crunch, try adding finely chopped nuts to the exterior.
- Serve alongside a variety of crackers and veggie sticks for a fun platter!
Equipment Needed
- Large Bowl: For mixing ingredients. A mixing bowl in various sizes will do.
- Plastic Wrap: Essential for shaping the cheese ball. Parchment paper can be an alternative.
- Serving Platter: To display your masterpiece. Any large plate will work just fine.
- Mixing Spoon: For combining ingredients. A spatula or electric mixer could also be handy.
Variations of Creamy Chipped Beef Cheese Ball
- Herbed Cheese Ball: Mix in fresh herbs like dill or parsley for an aromatic twist that brightens the flavors.
- Spicy Kick: Add a dash of hot sauce or a sprinkle of cayenne pepper to wake up your taste buds.
- Nutty Delight: Roll the cheese ball in finely chopped nuts like pecans or almonds for added crunch and flavor.
- Smoky Flavor: Incorporate smoked paprika or some crumbled bacon for a savory, smoky taste.
- Vegetarian Twist: Substitute the chipped beef with finely diced sun-dried tomatoes or black olives for a fabulous vegetarian option.
Serving Suggestions for Creamy Chipped Beef Cheese Ball
- Pair with assorted crackers, such as buttery Ritz or whole grain options for variety.
- Include fresh vegetable sticks like celery, carrots, or bell peppers for a crunchy contrast.
- Serve alongside a selection of cheeses and cured meats for a delightful charcuterie board.
- Offer a refreshing dip, like ranch or hummus, for extra flavor diversity.
- Consider a light white wine or sparkling water to complement the creamy richness!
FAQs about Creamy Chipped Beef Cheese Ball
Can I make this Creamy Chipped Beef Cheese Ball ahead of time?
Absolutely! Making it a day in advance is a great idea. Just store it wrapped tightly in the fridge. This helps the flavors meld beautifully. When it’s time to serve, simply add the finishing touches and enjoy!
What can I use if I can’t find chipped dried beef?
If chipped dried beef is hard to find, you can substitute it with chopped deli ham or turkey. Just remember to adjust the seasoning slightly, as these meats have different flavor profiles.
Is this cheese ball suitable for a gluten-free diet?
<pYes! This Creamy Chipped Beef Cheese Ball is gluten-free if paired with gluten-free crackers. Always check the labels of any pre-packaged ingredients, just to be sure!
How long does the cheese ball last in the fridge?
Typically, it lasts about 3 to 5 days when stored properly in an airtight container. However, I suggest you consume it sooner for the best flavor and texture.
Can I freeze the Creamy Chipped Beef Cheese Ball?
You can freeze it, but be aware that the texture might change once thawed. If you plan to freeze it, skip coating it with beef until just before serving.
Final Thoughts on Creamy Chipped Beef Cheese Ball
This Creamy Chipped Beef Cheese Ball is more than just an appetizer; it’s a small beacon of joy for any gathering. Each bite brings a delightful blend of flavors that warms the soul and fuels laughter around the table. Whether you’re sharing it during a cozy family night or a lively party, this cheese ball serves as a reminder of the simple pleasures in food. It’s easy to prepare, easy to love, and easily adaptable for any occasion. So, roll up your sleeves and create this rich, savory delight that will surely make memories with loved ones.
Print
Creamy Chipped Beef Cheese Ball
- Prep Time: 10 minutes
- Cook Time: 0 minutes
- Total Time: 30 minutes
- Yield: 12 servings 1x
- Category: Appetizer
- Method: No-Cook
- Cuisine: American
- Diet: Gluten Free
Description
A rich and savory cheese ball made with chipped beef, cream cheese, and spices, perfect for parties and gatherings.
Ingredients
- 2 packages (8 oz each) cream cheese, softened 🧀
- 1 package (8 oz) chipped dried beef, finely chopped and divided 🥩
- 1½ teaspoons Worcestershire sauce 🌶️
- ½ teaspoon garlic powder 🧄
- ½ teaspoon onion powder 🧅
- 3 green onions, finely chopped (plus extra for garnish) 🌿
- Ritz crackers, for serving 🥨
Instructions
- In a large bowl, combine softened cream cheese, half of the chopped chipped beef, Worcestershire sauce, garlic powder, onion powder, and green onions. Mix until smooth and fully blended (5 minutes) 🥣
- Transfer the mixture onto plastic wrap, wrap tightly, and shape into a smooth ball. Refrigerate until firm (20 minutes) ❄️
- Unwrap the chilled cheese ball and gently press the remaining chopped chipped beef all over the outside so it sticks evenly (5 minutes) ✨
- Place the cheese ball on a serving platter, sprinkle with extra green onions, and serve with buttery round crackers (2 minutes) 🎉
Notes
- Make sure the cream cheese is well softened for easy mixing.
- Let the cheese ball chill thoroughly before serving for the best texture.
- Garnish with additional green onions for a fresh look.
Nutrition
- Serving Size: 1 oz
- Calories: 90
- Sugar: 1g
- Sodium: 300mg
- Fat: 7g
- Saturated Fat: 4g
- Unsaturated Fat: 2g
- Trans Fat: 0g
- Carbohydrates: 3g
- Fiber: 0g
- Protein: 4g
- Cholesterol: 20mg


