Looking to rejuvenate your skin naturally without spending a fortune on spa treatments? This DIY salt scrub recipe will become your new go-to for silky-smooth skin. Whether you’re a skincare enthusiast or someone new to homemade beauty, making your own exfoliating salt scrub at home is simple, effective, and incredibly satisfying.
In this guide, we’ll dive into every aspect of creating a DIY salt scrub recipe—from selecting the right type of salt and oils to understanding the best essential oils for benefits like detoxification, relaxation, and invigoration. We’ll walk you through each step with expert tips, pro techniques, and the exact ingredient list used by recipe crafters for maximum results.
You’ll also learn whether salt or sugar scrubs are better, how to tweak the formula to suit your needs, and what ingredients to avoid if you have sensitive skin. Before wrapping up, we’ll answer top questions like:
- How do you make homemade salt scrub?
- What oil is best for homemade salt scrub?
- Is sugar or salt better for exfoliation?
- How can you make an effective scrub with just 3 ingredients?

Table of Contents
Understanding the Basics of a DIY Salt Scrub Recipe
What is a Salt Scrub and Why Use It?
Salt scrubs are natural exfoliators that help slough off dead skin cells, improve circulation, and detoxify the skin. They’ve been used for centuries in wellness rituals due to their mineral-rich content and skin-smoothing abilities. Unlike chemical exfoliants, salt scrubs provide immediate tactile results, making skin feel softer and look brighter after just one use.
Benefits of Making Your Own Salt Scrub at Home
Creating your own DIY salt scrub recipe gives you full control over the ingredients—no synthetic chemicals, artificial fragrances, or preservatives. It’s cost-effective, customizable, and eco-friendly. Plus, you can tailor the scent, texture, and strength of the exfoliation depending on your skin type and preferences.
Print
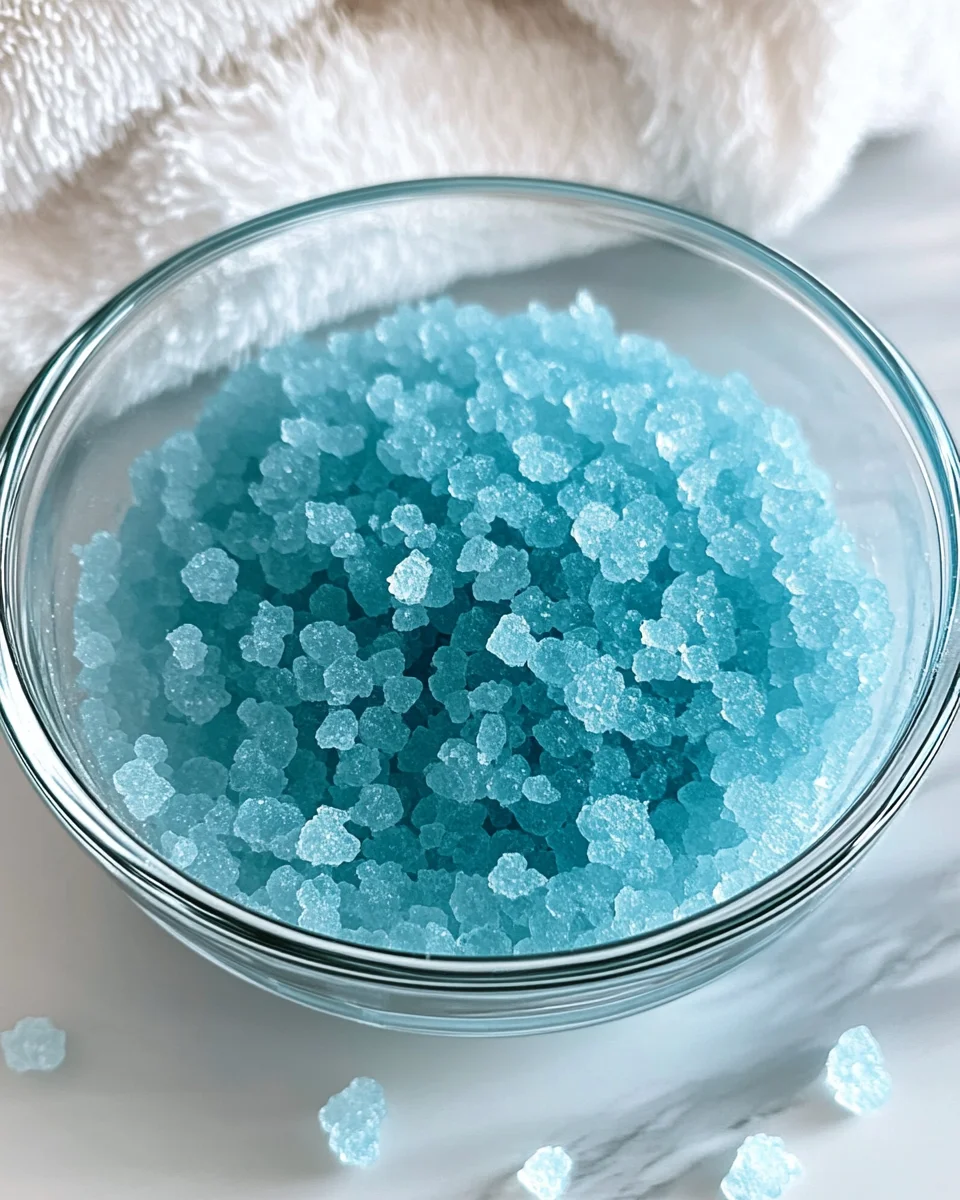
DIY Salt Scrub Recipe
- Prep Time: 15 minutes
- Cook Time: 0 minutes
- Total Time: 15 minutes
- Yield: Approximately 1 cup of scrub 1x
- Category: Skincare
- Method: Mixing
- Cuisine: N/A
- Diet: Vegan
Description
Looking to rejuvenate your skin naturally without spending a fortune on spa treatments? This DIY salt scrub recipe will become your new go-to for silky-smooth skin. Whether you’re a skincare enthusiast or someone new to homemade beauty, making your own exfoliating salt scrub at home is simple, effective, and incredibly satisfying.
Ingredients
1/2 cup / 180 g / 6.3 oz fine grain salt (e.g. Pink Himalayan, Pacific, Dead Sea salt or Epsom salt)
4 tbsp / 50 g / 1.7 oz fractionated coconut oil
2 tbsp / 30 g / 1 oz shea butter
3 tbsp / 15 g / 0.5 oz Olivem 1000
1/2 tsp blue spirulina powder
24 drops lemon essential oil (steam distilled)
15 drops lime essential oil (steam distilled)
10 drops spearmint essential oil
10 drops blue cypress essential oil
Instructions
Optionally, place the salt in a food processor or blender and pulse a couple of times. Extra fine salt is gentler on the skin. Beware of the dust cloud when opening the food processor.
Put the shea butter and Olivem 1000 in a heat-proof measuring cup and melt in a warm water bath until liquid. Protect your hands when handling hot tools.
Add the fractionated coconut oil, essential oils and spirulina powder. Mix until well-combined.
Fill the sea salt into a large mixing bowl. Pour the oil base over the salt and whisk until well combined.
Transfer the salt scrub recipe into an airtight jar or storage container.
Notes
Store the scrub in a cool, dry place for best results.
Test a small amount on your skin to ensure no allergic reactions.
Use within 6 months for optimal freshness.
Nutrition
- Serving Size: 1 tablespoon
- Calories: 40
- Sugar: 0 g
- Sodium: 0 g
- Fat: 5 g
- Saturated Fat: 4 g
- Unsaturated Fat: 1 g
- Trans Fat: 0 g
- Carbohydrates: 0 g
- Fiber: 0 g
- Protein: 0 g
- Cholesterol: 0 mg
Key Ingredients in the Perfect DIY Salt Scrub Recipe
Choosing the Right Type of Salt for Exfoliation
The foundation of any DIY salt scrub recipe starts with the salt. And choosing the right type makes all the difference in texture and skin benefits. Let’s explore the best options for your homemade blend:
- Pink Himalayan Salt – Loaded with trace minerals, it enhances your scrub’s detoxifying effects.
- Dead Sea Salt – A favorite for soothing sore muscles and improving circulation.
- Epsom Salt – Rich in magnesium, perfect for calming inflamed skin and ideal for recovery days.
- Pacific Sea Salt – Mild and mineral-rich, suitable for sensitive skin types.
If you want a gentler DIY salt scrub recipe, try processing the salt in a blender for a finer grain. A smoother texture is especially helpful for people with delicate or dry skin.
Moisturizing Oils: Fractionated Coconut Oil
Every good DIY salt scrub recipe needs a base oil to deliver moisture and smoothness. Fractionated coconut oil is ideal because it’s lightweight, non-greasy, and absorbs quickly into the skin. Plus, it has a neutral scent that blends well with essential oils.
If coconut oil isn’t your favorite, you can also use:
- Sweet almond oil for hydration
- Jojoba oil for acne-prone or oily skin
- Grapeseed oil for a fast-absorbing finish
Shea Butter: The Hydration Hero
Adding shea butter to your DIY salt scrub recipe brings a rich, luxurious texture. It deeply moisturizes, restores the skin barrier, and works wonders on dry areas like elbows and heels. Melting it before mixing ensures it blends well with your other ingredients.
Olivem 1000: A Natural Emulsifier
One of the secrets to a stable DIY salt scrub recipe is Olivem 1000. It helps bind oils and butters together for a consistent, creamy scrub that doesn’t separate over time. Derived from olive oil, it’s gentle and safe for most skin types.
Essential Oils for Skin and Scent
This DIY salt scrub recipe uses four powerhouse essential oils to boost skin benefits and enhance your self-care ritual:
- Lemon Oil – Cleanses and brightens
- Lime Oil – Tones and energizes
- Spearmint Oil – Cools and refreshes
- Blue Cypress Oil – Soothes and reduces redness
These oils also provide mood-lifting aromas that make your salt scrub feel like a spa experience at home.
Blue Spirulina Powder: Colorful Superfood Boost
Want a vibrant blue tone and antioxidant benefits? Add blue spirulina powder to your DIY salt scrub recipe. Not only does it look beautiful, but it also fights free radicals and supports healthy skin.
Step-by-Step Instructions to Make Your DIY Salt Scrub Recipe
Step 1: Prep Your Salt for the Perfect Texture
Before mixing your ingredients, decide how coarse or fine you want your scrub to be. For sensitive skin, extra-fine salt is best. Here’s how to get it:
- Place ½ cup fine-grain salt in a food processor or blender.
- Pulse 2–3 times to make it finer.
- Caution: When opening the processor, let the salt dust settle to avoid inhaling it.
This ensures the scrub is gentle enough for regular use while still being effective in exfoliating dead skin.
Step 2: Melt the Shea Butter and Olivem 1000
In a heat-proof glass measuring cup, combine:
- 2 tbsp shea butter
- 3 tbsp Olivem 1000
Place the cup in a warm water bath (double boiler style) and let it melt slowly, stirring occasionally. Be careful when removing it—use oven mitts or a thick cloth to protect your hands.
Step 3: Combine the Oils and Color
Once melted, add the following:
- 4 tbsp fractionated coconut oil
- ½ tsp blue spirulina powder
- Essential Oils (24 drops lemon, 15 lime, 10 spearmint, 10 blue cypress)
Stir thoroughly until everything is evenly distributed. This mixture should be smooth and fragrant.
Step 4: Blend the Salt and Oil Base
Pour your prepared salt into a large mixing bowl, then slowly add the oil-butter base while stirring with a whisk or spatula.
Mix well until the scrub has a uniform, creamy consistency. This step ensures the oils coat the salt evenly and the product stays balanced.
Step 5: Store the Scrub Properly
Transfer the mixture into a clean, airtight glass jar or container. A dark amber jar is ideal if you want to preserve the integrity of the essential oils. Store in a cool, dry place away from direct sunlight.
Pro Tip: Label your scrub with the ingredients and date. It’ll stay fresh for up to 3 months if kept sealed and uncontaminated by water.
How to Use Your DIY Salt Scrub for Maximum Results
How Often Should You Use a Salt Scrub?
When used correctly, a DIY salt scrub recipe can work wonders. But overuse can lead to irritation, especially on sensitive skin. Here’s a general guideline:
| Skin Type | Recommended Use |
|---|---|
| Normal to Oily | 2–3 times per week |
| Dry or Sensitive | 1 time per week |
| Combination Skin | 1–2 times per week |
Always listen to your skin. If it feels tender or overly dry, give it time to recover before the next use.
Best Application Techniques for Smooth, Glowing Skin
For optimal results, follow these steps:
- Shower first to open pores and soften the skin.
- Scoop out a small amount of the scrub using a clean spoon or spatula (never dip wet fingers into the jar).
- Apply the scrub in circular motions starting from your feet and working upward—this promotes circulation and lymphatic drainage.
- Focus on rough areas like knees, elbows, and heels.
- Rinse off thoroughly with warm water—no need for soap afterward.
- Pat skin dry with a towel and follow with a light moisturizer or body oil.
What Areas of the Body Should You Exfoliate?
You can use this DIY salt scrub recipe on:
- Legs and arms (great before shaving)
- Back and shoulders (helps unclog pores)
- Hands and feet (perfect for spa-like results)
- Avoid using it on the face unless you’ve finely ground the salt and tested for skin sensitivity.
Aftercare Tips for Lasting Glow
Post-exfoliation care is just as important as the scrub itself:
- Apply a fragrance-free, hydrating lotion or body oil after rinsing.
- Avoid direct sun exposure for a few hours after use.
- Drink plenty of water to support skin hydration from the inside out.
- Don’t exfoliate irritated, sunburned, or broken skin.
Salt vs. Sugar Scrub – Which One Is Better for Your Skin?
What’s the Difference Between Salt and Sugar Scrubs?
Both salt and sugar scrubs exfoliate the skin, but they serve slightly different purposes based on their texture and mineral content.
| Feature | Salt Scrub | Sugar Scrub |
|---|---|---|
| Texture | Coarse and abrasive | Fine and gentle |
| Mineral Content | High – rich in magnesium, calcium, potassium | Low – mostly carbohydrate-based |
| Best For | Oily, acne-prone, or rough skin | Sensitive skin, facial exfoliation |
| Detox Benefits | Excellent for drawing out toxins | Mild detox, mostly hydrating |
| Frequency of Use | 1–3 times/week | Up to 4 times/week (if skin tolerates it) |
So, is sugar or salt better for a scrub? The answer depends on your skin:
- Use sugar scrubs if you have sensitive, dry, or mature skin.
- Use salt scrubs for rough patches, oily skin, or detoxifying routines.
Why Salt Scrubs Reign Supreme in Detox and Circulation
Salt scrubs, especially those made with mineral-rich salts like Himalayan or Dead Sea, do more than just exfoliate:
- Detoxify the skin by drawing out impurities.
- Stimulate circulation and reduce puffiness.
- Soothe sore muscles when made with Epsom salt.
- Provide a deep clean that’s hard to achieve with sugar-based products.
That’s why a DIY salt scrub recipe is often the top pick for spa-quality at-home treatments.
When to Choose Sugar Over Salt
Sugar is softer, making it ideal for more frequent use and delicate areas like:
- Face and neck
- Décolletage
- Inner arms or thighs
However, sugar dissolves quicker in warm water, meaning it may offer a shorter exfoliation window during showers.
Essential Oils Breakdown – Benefits and Aromatherapeutic Uses
Why Use Essential Oils in Your DIY Salt Scrub Recipe?
Essential oils do more than make your salt scrub smell amazing. Each oil offers therapeutic benefits for both skin and mood. In this DIY salt scrub recipe, a careful blend of four essential oils enhances skin care while providing a spa-like sensory experience.
Let’s break down each one.
Lemon Essential Oil (24 Drops)
Main Benefits:
- Natural brightener
- Antioxidant-rich
- Helps reduce excess oil
- Boosts mood and focus
Lemon oil is a natural astringent that purifies and tightens the skin. It also has antibacterial properties that help with body breakouts or acne-prone areas.
Lime Essential Oil (15 Drops)
Main Benefits:
- Tones and tightens skin
- Rich in vitamin C
- Energizes your senses
- Lightens age spots and pigmentation
Steam-distilled lime oil provides a refreshing, citrusy aroma. It revitalizes dull, tired skin and adds an extra zing to your morning scrub routine.
Spearmint Essential Oil (10 Drops)
Main Benefits:
- Cools and soothes skin
- Calms irritation
- Invigorates the senses
- Antibacterial and anti-inflammatory
Spearmint oil adds a refreshing twist. It provides a cooling sensation that’s perfect after workouts, hot days, or stressful events.
Blue Cypress Essential Oil (10 Drops)
Main Benefits:
- Anti-inflammatory powerhouse
- Strengthens skin barrier
- Helps reduce redness and irritation
- Earthy, grounding aroma for relaxation
Blue cypress oil is unique because of its calming yet restorative qualities. It brings balance to the formula—perfect for nighttime use or wind-down routines.
Why the Blend Works Together
The mix of citrus and mint oils delivers both uplifting and calming effects. The lemon and lime brighten and energize, while the spearmint and blue cypress bring a cooling and grounding finish.
Customizing Your DIY Salt Scrub Recipe for Skin Types Customizing Your DIY Salt Scrub Recipe for Skin Types and Preferences
How to Adapt Your Salt Scrub for Sensitive Skin
Not all skin types respond the same to exfoliation, which is why it’s so helpful to customize your DIY salt scrub recipe. If you deal with sensitivity or irritation, you can still enjoy the benefits of a homemade scrub—just with the right adjustments.
Here’s how to tailor your DIY salt scrub recipe for delicate skin:
- Use a super-fine salt grain like powdered Himalayan or even baking salt.
- Lower the quantity of essential oils or choose soothing options like lavender, chamomile, or blue tansy.
- Swap blue spirulina for colloidal oatmeal—great for reducing inflammation.
- Choose jojoba oil instead of coconut oil for a lighter, skin-mimicking texture.
These modifications will help you get all the benefits of a salt scrub—without compromising skin comfort.
Ingredient Substitutions Based on What You Have
Running low on ingredients? Your DIY salt scrub recipe doesn’t have to suffer. Here are some effective swaps you can make with items you might already have in your kitchen or cabinet:
| Original Ingredient | Substitute | Skin Benefits |
|---|---|---|
| Fractionated Coconut Oil | Sweet almond oil or grapeseed oil | Light, non-greasy hydration |
| Shea Butter | Cocoa butter or mango butter | Deep moisturization and softness |
| Blue Spirulina Powder | Matcha or rose clay | Antioxidants and detox properties |
| Olivem 1000 | Beeswax (small amount) | Creamy texture and binding agent |
Making smart substitutions ensures your DIY salt scrub recipe stays functional and effective, even when you’re low on certain items.
Add-Ins to Boost Skin Benefits
Want to supercharge your DIY salt scrub recipe? Consider incorporating add-ins that enhance the experience and improve your skin:
- Vitamin E oil – Protects skin and extends shelf life
- Ground coffee – Energizes and boosts circulation
- Dried rose petals – Adds gentle exfoliation and a luxurious feel
- Activated charcoal – Great for oily or acne-prone skin
Just be sure to test new ingredients in small batches.
Scent Profiles to Suit Your Mood
Another great part about your DIY salt scrub recipe? The scent is entirely up to you. Different essential oil combinations let you match the vibe of your self-care session.
| Desired Effect | Oils to Try |
|---|---|
| Relaxation | Lavender, cedarwood, bergamot |
| Energy Boost | Grapefruit, peppermint, rosemary |
| Romantic Blend | Ylang ylang, sandalwood, sweet orange |
| Skin Soothing | Chamomile, helichrysum, frankincense |
Adjust your essential oil blend to make each DIY salt scrub recipe batch feel fresh and tailored to the moment.
FAQs
How do you make homemade salt scrub?
Making a homemade salt scrub is simple and rewarding. You’ll need:
A base exfoliant: fine-grain salt (like Himalayan or Dead Sea salt)
A carrier oil: fractionated coconut oil, jojoba, or sweet almond oil
An emollient: shea butter or mango butter
Add-ins: essential oils, blue spirulina powder, and an emulsifier like Olivem 1000
Steps:
Blend or pulse salt for a finer grain.
Melt your butter and emulsifier using a warm water bath.
Stir in oils, spirulina, and essential oils.
Pour over salt in a mixing bowl and stir.
Store in an airtight jar.
This makes enough for multiple applications and can last up to 3 months without preservatives if kept clean and dry.
Is sugar or salt better for a scrub?
Salt scrubs are best for:
Detoxifying the skin
Targeting rough patches
Stimulating circulation
Sugar scrubs are more gentle and suitable for:
Sensitive or dry skin
Facial exfoliation
Frequent use (3–4 times weekly)
So if you’re looking for a deeper clean or muscle relief, salt wins. For softer exfoliation, sugar is your go-to.
What oil is best for homemade salt scrub?
The best oils for a DIY salt scrub recipe depend on your skin type:
Fractionated coconut oil – Lightweight, antimicrobial, and non-comedogenic
Sweet almond oil – Great for dry or irritated skin
Jojoba oil – Mimics natural skin oils, good for acne-prone skin
Avocado oil – Rich and deeply hydrating for mature skin
Fractionated coconut oil is a popular choice because it doesn’t solidify and keeps the scrub smooth and easy to use.
How to make body scrub with 3 ingredients?
You can easily make a minimalist 3-ingredient body scrub using:
½ cup salt (fine grain)
4 tbsp coconut oil
10–15 drops essential oil (like lavender or peppermint)
Mix in a bowl and store in a small container. It won’t last as long as an emulsified version, but it’s perfect for quick use and small batches.
Final Thoughts on Crafting the Perfect DIY Salt Scrub Recipe
Key Takeaways for a Successful Salt Scrub
Creating your own DIY salt scrub recipe isn’t just a fun craft—it’s a holistic wellness ritual. Let’s recap what makes it so powerful:
- Customizable formula to suit any skin type
- Therapeutic essential oils for both body and mind
- Affordable, natural ingredients that deliver spa-level results
- Easy to make at home with simple tools and minimal experience
- Adaptable texture and scent for any mood or purpose
With the right combination of salt, oils, and botanical elements, you can exfoliate, hydrate, and rejuvenate your skin in under five minutes.
Storage and Safety Tips
- Always store in an airtight, clean glass jar
- Avoid getting water into the scrub to prevent spoilage
- Use a wooden spoon or spatula to scoop out product
- Patch test if using new essential oils or if you have sensitive skin
- Keep out of direct sunlight to preserve color and scent
Final Boost for Your Natural Routine
Whether you’re making this scrub as a treat for yourself or a thoughtful gift, you’re tapping into the power of nature to elevate your skincare. Consistency is key—use the scrub weekly, and pair it with hydration and self-care practices for glowing results.
Looking for inspiration? Try our Pink Salt Trick Recipe that aligns with your beauty and wellness lifestyle perfectly.
For more creative baking inspiration and marketing ideas, explore the Pinterest


