Introduction to Grinch Mini Cheesecakes
As the holiday season rolls in, my kitchen becomes a whirlwind of delicious aromas and festive delights. One treat that never fails to bring joy is Grinch Mini Cheesecakes. These little bites of happiness are not just visually delightful with their vibrant green hue, but they also taste incredible! If you’re a busy mom or professional, I promise you’ll appreciate how quick and easy they are to whip up. With just a few ingredients and a sprinkle of holiday spirit, you can create a dessert that will impress everyone during your celebrations!
Why You’ll Love This Grinch Mini Cheesecakes
These Grinch Mini Cheesecakes are a lifesaver during the busy holiday season! Not only are they quick to prepare, but their rich, creamy flavor paired with that irresistible Oreo crust is sheer perfection. They’re great for gatherings, family get-togethers, or simply a festive treat for yourself. Plus, who can resist a dessert that brings festive cheer and smiles? Perfectly portioned, they make indulgence guilt-free.
Ingredients for Grinch Mini Cheesecakes
Gathering the right ingredients makes the baking process more enjoyable. For these Grinch Mini Cheesecakes, you’ll need some common items that pack a flavorful punch!
- Oreo Crumbs: These provide that irresistible, chocolatey crust. Feel free to use gluten-free Oreos if needed.
- Butter: Melted butter binds the crust together. It adds richness to the Oreo mixture, elevating the flavor.
- Cream Cheese: The star of the show! Make sure it’s softened to ensure a smooth, luscious texture in the batter.
- Sugar: Sweeten up the cheesecake. You can also experiment with alternative sweeteners if you’re looking to lighten things up.
- Eggs: They add structure and creaminess to the cheesecake. For a vegan version, consider using flax eggs or silken tofu.
- Vanilla: A splash of vanilla extract enhances the overall flavor. You can use pure vanilla for a more intense taste.
- Neon Green Food Coloring: This ingredient brings the holiday spirit alive! Adjust the amount to get your desired “Grinchy” shade.
Check out the bottom of the article for exact quantities of these ingredients, along with a handy print option!

How to Make Grinch Mini Cheesecakes
Now that you’ve gathered your ingredients, it’s time to dive into the fun part—making these delightful Grinch Mini Cheesecakes! Trust me, this process is straightforward and quite enjoyable. Let’s go step by step, shall we?
Step 1: Preheat Your Oven
First things first, let’s get that oven preheated to 350 degrees Fahrenheit.
This step is crucial because an evenly preheated oven ensures your cheesecakes bake properly, giving them a lovely, creamy texture. No one wants a dry or undercooked cheesecake, right? So, turn that knob and let it warm up while you prepare the crust!
Step 2: Prepare the Oreo Crust
Now it’s time to make the crust! Grab about 10-11 Oreos and toss them into a food processor.
Pulse those tasty cookies into fine crumbs, then add in your melted butter. This mixture should look like wet sand. It’s the secret to a delicious, rich base. Next, take your cupcake pan, line it with liners, and evenly divide the Oreo mixture among the cups. Press the crumbs down firmly—this helps create a solid base that holds everything together!
Step 3: Mix the Cheesecake Batter
In a medium-sized bowl, beat those softened cream cheese and sugar together until it’s smooth and creamy.
Make sure there are no lumps! Then, beat in the eggs and vanilla extract. Incorporating these ingredients well creates a velvety texture. There’s something magical about the creamy goodness of cheesecake batter, isn’t there?
Step 4: Add the Grinchy Green Color
Here comes the fun part—adding your neon green food coloring!
Slowly mix it in until you achieve that vibrant Grinchy shade. Feel free to go wild with the color; it’s the holidays after all! Watching that batter transform is like a little holiday magic in your kitchen.
Step 5: Fill the Cupcake Liners
Now, let’s fill those lined cups with your delicious cheesecake batter. Use a spoon to add about 1/4 cup into each!
Tip: this is a great moment for portion control. Try to keep it even across all your cups so they bake uniformly. It’s all about fairness, right? Everyone deserves a perfectly sized treat!
Step 6: Bake the Cheesecakes
Time for the oven! Slide your pan into the preheated oven.
Bake for about 15 to 17 minutes. You’ll know they’re done when the centers are slightly jiggly but not liquidy. A little jiggle means they’ll firm up as they cool, resulting in that dreamy cheesecake texture we love!
Step 7: Cool and Refrigerate
Once done, remove the cheesecakes from the oven and let them cool in the pan.
Cooling is important because it helps set the cheesecake fully. After letting them cool to room temperature, pop them into the fridge for at least two hours. Trust me, the chill time is crucial for achieving that perfect slice!
Step 8: Add the Fun Toppings
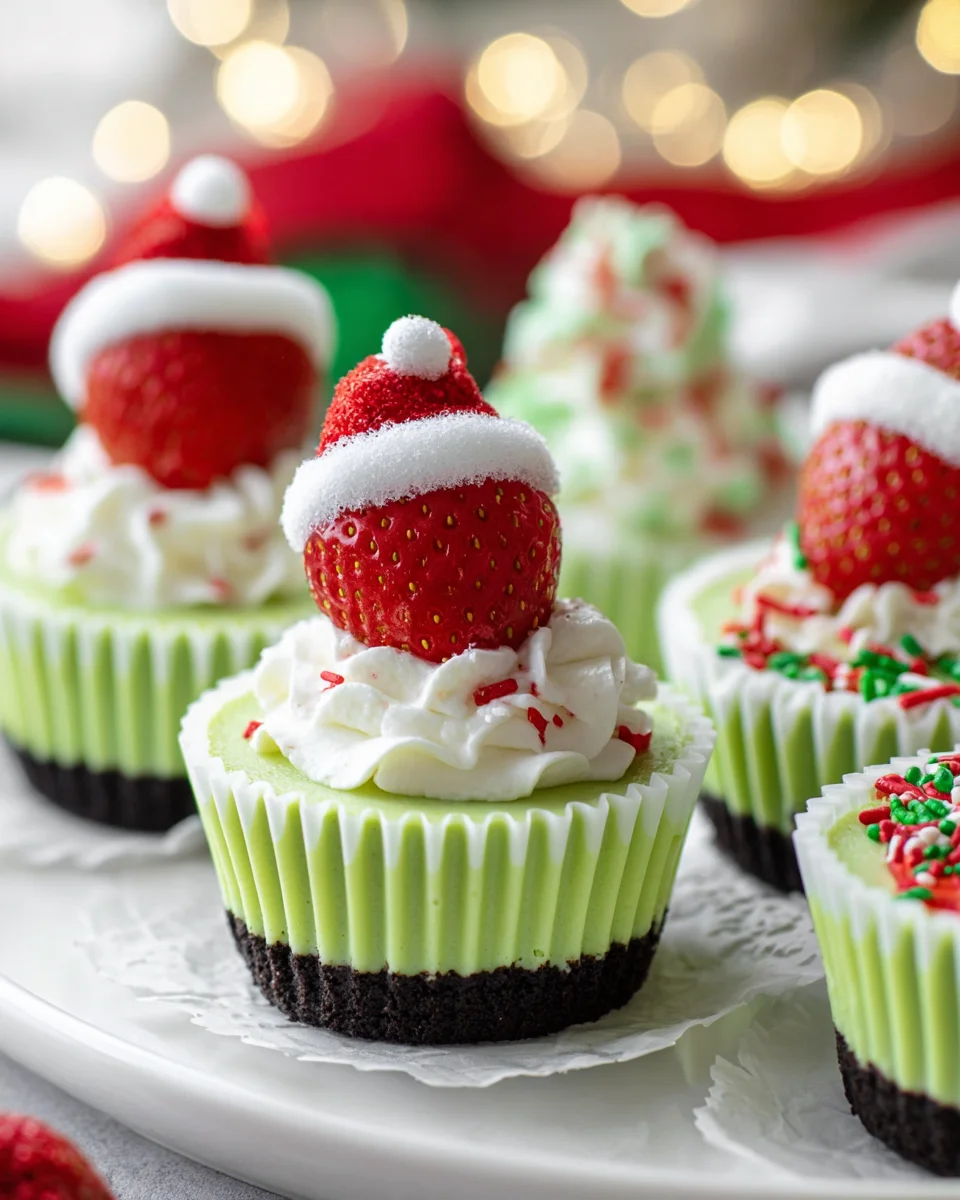
The final touch: toppings! Once your cheesecakes are chilled and firm, it’s time to decorate.
Whipped cream, red sprinkles, or festive berries can add extra flair. Those little touches bring your Grinch Mini Cheesecakes to life, making them even more delightful!
Tips for Success
- Make sure your cream cheese is at room temperature for a smooth batter.
- Don’t skip the chilling time; it’s key for that perfect texture.
- Use a cookie scoop for easy and even filling of the cupcake liners.
- Keep an eye on the baking time; every oven is a little different!
- Let your creativity shine with toppings—have fun decorating!
Equipment Needed
- Oven: Essential for baking your mini cheesecakes. A toaster oven can work in a pinch!
- Food Processor: Perfect for crushing Oreos. A ziplock bag and rolling pin will do if you don’t have one.
- Cupcake Pan: Vital for shaping your treats. Consider silicone molds for easy removal!
- Mixing Bowls: You’ll need these for combining ingredients. Any large bowl will suffice!
- Measuring Cups: Handy for precise measurements. You can always use your best guess if you’re in a rush!
Variations of Grinch Mini Cheesecakes
- Chocolate Ganache Topping: Drizzle some rich chocolate ganache over the chilled mini cheesecakes for a delicious contrast to the lime flavor.
- Gluten-Free Option: Swap regular Oreos for gluten-free Oreos to make this treat suitable for gluten-sensitive friends.
- Fruit-Filled Mini Cheesecakes: Add a layer of raspberry or strawberry jam on top before serving to bring a fruity twist.
- Vegan Version: Use vegan cream cheese and substitute eggs with flax eggs or a commercial egg replacer for a plant-based delight.
- Minty Grinch Flavor: Incorporate a dash of mint extract into the cheesecake batter for a refreshing seasonal flair.
Serving Suggestions for Grinch Mini Cheesecakes
- Pair with hot cocoa topped with marshmallows for a cozy holiday treat.
- Serve alongside a platter of fresh fruit for a colorful contrast.
- Present on a festive platter with Christmas decorations for an inviting display.
- Top with crushed candy canes for an added seasonal crunch.
- Offer a scoop of vanilla ice cream for an indulgent twist!
FAQs about Grinch Mini Cheesecakes
As you dive into making these delightful Grinch Mini Cheesecakes, you may have a few questions. I’m here to help with some common queries!
Can I make the Grinch Mini Cheesecakes ahead of time?
Absolutely! These mini cheesecakes can be made a day or two in advance. Just store them in the fridge until you’re ready to serve. They taste even better after chilling overnight!
How do I prevent the cheesecake from cracking?
To prevent cracks, make sure not to overbeat the batter. Also, cool the cheesecakes gradually to room temperature before refrigeration. This helps them set nicely without cracking.
Can I use different colors for the cheesecakes?
Of course! While the Grinchy green is festive, feel free to use any food coloring you like. Fun colors can match your holiday theme or your mood!
What can I use instead of cream cheese?
If you’re looking for a dairy-free option, vegan cream cheese works wonders! You can also try cashew cream for a nut-based alternative. Just be mindful of your flavoring adjustments.
Are Grinch Mini Cheesecakes suitable for kids?
Absolutely! These mini cheesecakes are a fun, bite-sized treat that’s perfect for kids. They’ll love the vibrant color, and you can control the sweetness. Just maybe skip the coffee for a later bedtime!
Final Thoughts on Grinch Mini Cheesecakes
These Grinch Mini Cheesecakes aren’t just desserts; they’re mini bursts of joy that embody the festive spirit of the season. Making them is a delightful experience, filled with laughter, color, and deliciousness. As I watch friends and family light up with each bite, it warms my heart. They truly are a fantastic way to celebrate the holidays—perfect for gatherings or a sweet indulgence for yourself. So, gather your loved ones, whip up a batch, and share the magic of these festive treats. Here’s to sweet moments together, one green cheesecake at a time!
Print
Grinch Mini Cheesecakes
- Prep Time: 20 minutes
- Cook Time: 17 minutes
- Total Time: 2 hours 37 minutes (including refrigeration)
- Yield: 12 mini cheesecakes 1x
- Category: Dessert
- Method: Baking
- Cuisine: American
- Diet: Vegetarian
Description
Delicious mini cheesecakes with a festive Grinch-inspired green color, perfect for holiday celebrations.
Ingredients
- 1 cup Oreo Crumbs
- 2 1/2 tbsp Butter, Melted
- 2 (8 oz) Cream Cheese, Softened
- 1/2 cup Sugar
- 2 Eggs
- 1 tsp Vanilla
- Neon Green Food Coloring
Instructions
- Preheat oven to 350 degrees. Line a cupcake pan with liners.
- Pulse about 10-11 Oreos in a food processor to make crumbs. Then pulse in melted butter until well combined.
- Divide crumbs evenly between each liner and press down firmly.
- In a medium size bowl, beat softened cream cheese and sugar until smooth. Beat in eggs and vanilla.
- Mix in neon green food coloring until the desired Grinchy color is reached.
- Spoon about 1/4 cup mixture into each cup, filling them evenly.
- Bake for 15-17 minutes. The centers of the cheesecakes should be slightly jiggly.
- Remove from oven and let completely cool in the pan, then refrigerate until firm.
- Top with whipped cream and sprinkles if desired.
Notes
- Ensure the cream cheese is softened for a smooth mixture.
- Chill the cheesecakes for at least 2 hours for the best texture.
Nutrition
- Serving Size: 1 mini cheesecake
- Calories: 200
- Sugar: 14g
- Sodium: 180mg
- Fat: 12g
- Saturated Fat: 7g
- Unsaturated Fat: 3g
- Trans Fat: 0g
- Carbohydrates: 22g
- Fiber: 1g
- Protein: 3g
- Cholesterol: 60mg


