Introduction to Halloween Candy Apples
With the changing of the leaves and that crisp edge to the air, I can hardly contain my glee for Halloween. One of the most enjoyable traditions I have with my children is making Halloween Candy Apples. There’s something very magical about taking plain apples and dipping them in color and sugar to bring a smile to all ages. This easy recipe keeps us bonding in the kitchen as we celebrate the season of spooking. And come on, who can turn down candy-coated apples with a sweet crunch? Come along with me and get into an enjoyable, family-friendly kind of adventure that encourages imagination and sweetness to your Halloween!
Why You’ll Love This Halloween Candy Apples
Making Halloween Candy Apples is a joyous and simple activity that everyone can enjoy. The process is quick, allowing you to whip up these delightful treats in just 30 minutes. I love how my kids shine when they help dip and decorate their own apples, making memories that last long after Halloween. Plus, the delicious crunch of a tart apple enveloped in sweet candy is a charming combination that will delight every palate!
Ingredients for Halloween Candy Apples
To craft these spooky, sweet delights, we start with large Granny Smith apples. Their tartness contrasts beautifully with the candy coating, creating a satisfying bite. Next up is caster sugar, which brings that delightful sweetness and ensures a smooth texture. Liquid glucose, or light corn syrup, is key for achieving that glossy finish we all adore. A splash of white vinegar helps maintain the perfect candy consistency. Finally, don’t forget the food coloring! It adds a festive touch, turning your apples into vibrant, Halloween masterpieces! You can find exact quantities at the bottom of the article.
How to Make Halloween Candy Apples
Now that we have all our ingredients ready, let’s dive into the magic of making Halloween Candy Apples! Each step is simple and straightforward, making it a breeze for busy moms like us to fit into our hectic schedules. Plus, who doesn’t love a little kitchen fun with the kids? Here’s how to create your spooky treats:
Prepare Your Workspace
Line the Baking Sheet
Start by lining a large baking sheet with baking paper. This will prevent sticking and make for an easy cleanup later. Trust me, your future self will thank you! Using a sheet with edges helps to capture any drips from the candy coating. Set it aside; we’ll revisit it soon!
Prep the Apples
Wash and Dry Skills
Let’s give those apples a good wash! Make sure to scrub off any wax, which can interfere with the coating. The last thing you want is a shiny impostor instead of a candy apple. After washing, dry them thoroughly. Remove the stems and insert a thick skewer or popsicle stick into each apple for easy dipping. This step is essential, as it will let us create our masterpiece!
Make the Candy Coating
Combine Ingredients
In a large, heavy-based saucepan, combine the sugar, water, glucose, and white vinegar. Stir constantly over low heat until the sugar dissolves completely. This is the foundation of our sweet coating, so hang in there! Once it’s combined, watch as it transforms into something magical.
Boil to Hard Crack Stage
Now, crank up the heat and bring the mixture to a boil. Attach a candy thermometer to the side of the pan and keep a keen eye on it. We’re aiming for the hard crack stage at about 302°F (150°C). This is when it starts to look like a shiny, sugary dream. If you see any sugar crystals forming on the sides, use a wet pastry brush to gently wash them down. This prevents graininess in our coating!
Coat Your Apples
Dip and Decorate
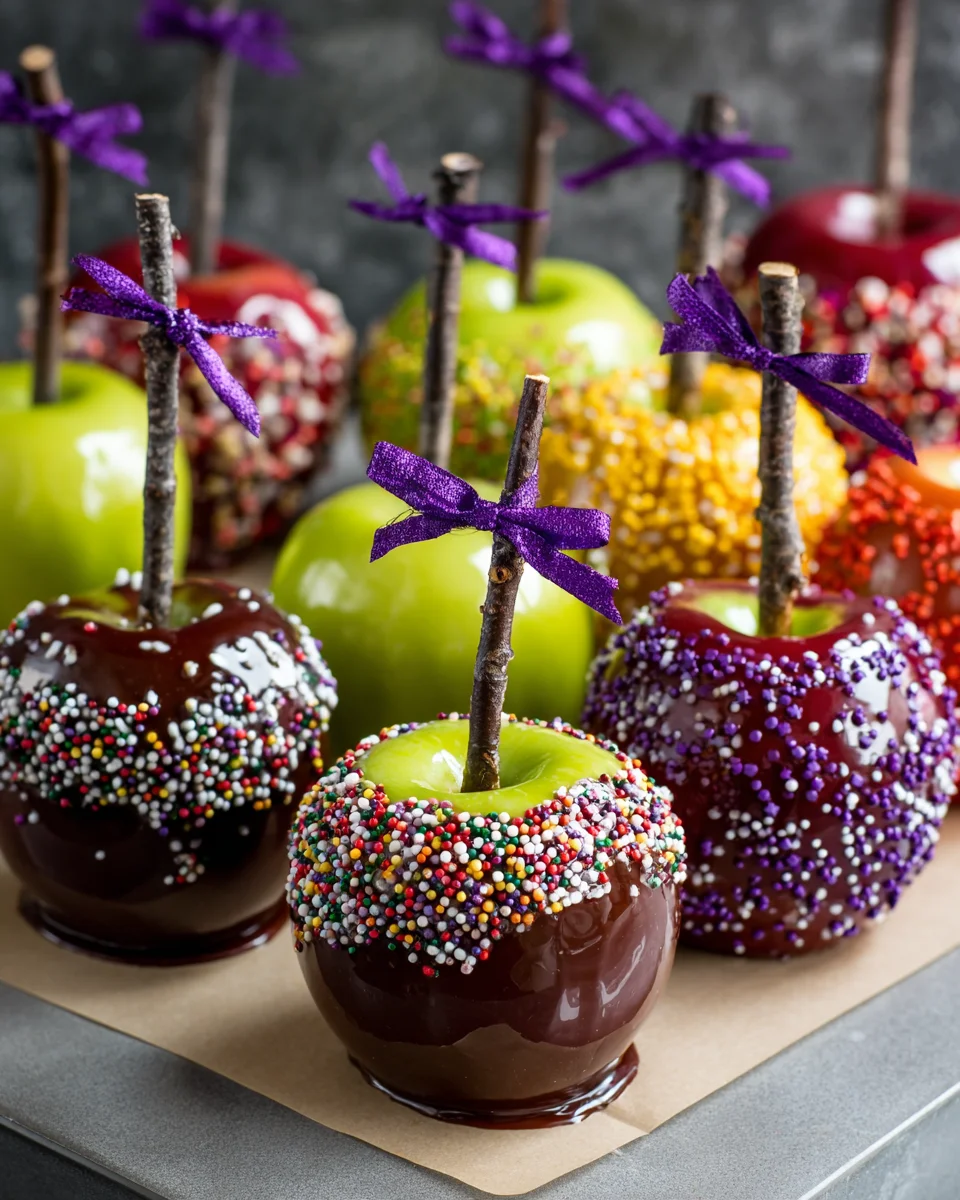
Once you’ve reached that glorious temperature, remove the saucepan from the heat. Now it’s showtime! Mix in any food coloring you desire, letting the bubbles settle. Then, dip each apple into the syrup, ensuring a good coat while allowing excess to drain off. Here’s a pro tip: work quickly but carefully, as the candy hardens fast! After dipping, roll the apples in sprinkles or attach fun decorations before the candy cools completely.
Let Them Set
Storing Tips
Place your beautiful candy-coated apples on the lined baking tray to set for a few minutes. They’ll firm up nicely and usually take about 20 minutes to fully harden. Store them at room temperature, away from humidity. If you want to keep them fresh for a bit longer, wrap them individually in cellophane, and enjoy these delightful treats within two days!
Tips for Success
- Always wash apples thoroughly to remove wax for better candy adherence.
- Use a candy thermometer for precise temperature tracking during boiling.
- Work quickly when dipping to ensure the candy doesn’t harden too soon.
- Let the syrup cool slightly before use for easier handling.
- Experiment with different sprinkles or toppings for a unique touch!
Equipment Needed
For this fun Halloween Candy Apples adventure, you’ll need a few basic kitchen tools. Gather a large heavy-based saucepan for boiling, a candy thermometer for accuracy, and a baking sheet lined with baking paper. Skewers or popsicle sticks will help us dip those apples like pros. Don’t forget a wet pastry brush to keep things smooth!
Variations on Halloween Candy Apples
Let’s get creative with some fun and flavorful twists on traditional Halloween Candy Apples! The great thing about these treats is that you can customize them to fit every taste and dietary need. Here are some delightful variations to consider:
- Try different apple varieties! Honeycrisp or Fuji apples add a sweeter flavor, while tart Granny Smith remains a classic choice.
- Make them festive with themed decorations like orange and black sprinkles or even mini candy pumpkins!
- For a healthier twist, swap regular sugar for organic cane sugar or coconut sugar.
- For gluten-free options, check your sprinkles and decorations to ensure they’re gluten-free friendly!
- Create a caramel candy apple by adding a layer of caramel sauce under the candy coating for an extra gooey treat.
- Add spices like cinnamon or nutmeg to the candy coating for a festive fall flavor.
Serving Suggestions for Halloween Candy Apples
These Halloween Candy Apples shine on their own, but pairing them with other treats can elevate your spooky spread! Consider serving them alongside crunchy popcorn balls or spooky ghost-shaped cookies. For drinks, hot apple cider or pumpkin spice lattes are festive favorites. Display your apples on a spooky-themed platter, complete with fake cobwebs and mini pumpkins for a fun Halloween touch!
FAQs about Halloween Candy Apples
As I perfected my Halloween Candy Apples, I stumbled upon a few common questions that many fellow home cooks have. Here are some of the most frequently asked queries about making and storing these delightful treats:
Can I use any type of apple for candy apples?
While Granny Smith apples are popular for their tartness, you can absolutely experiment with varieties like Honeycrisp or Fuji. They add a sweeter touch that many love!
How should I store candy apples?
Store your candy apples at room temperature, away from any humidity. This helps maintain their crunchy coating. If you’re wrapping them, use cellophane for easy transport.
What if the candy coating is grainy?
If your coating turns out grainy, it means the sugar didn’t dissolve fully or crystallized during cooking. Make sure to stir constantly and watch for the solid sugar formations. Don’t shy away from using that wet pastry brush!
How long do candy apples last?
For the best taste, enjoy your spooky treats within 2 days. However, they can last up to a week if stored properly. Just watch out for any humidity!
Can I melt the candy coating again if it hardens?
If you find the coating hardening too quickly while decorating, gently reheat it on low heat until it becomes smoother again. Just be cautious, as overheating can lead to unwanted results!
Final Thoughts
Creating Halloween Candy Apples with my family is a cherished tradition that brings us closer together. There’s a unique kind of magic in watching my kids’ eyes light up as they dip their apples and sprinkle them with colorful decorations. Each apple becomes a canvas for creativity, and I adore the laughter and joy that fills our kitchen during this fun activity. Enjoying these delightful treats together stretches the sweetness beyond just the candy itself. So, gather your loved ones, roll up your sleeves, and dive into making these festive confections. Happy Halloween, and may your celebrations be filled with joy!
Print
Halloween Candy Apples
- Prep Time: 15 minutes
- Cook Time: 15 minutes
- Total Time: 30 minutes
- Yield: 8 apples 1x
- Category: Dessert
- Method: Stovetop
- Cuisine: American
- Diet: Vegetarian
Description
Make spooky and delicious Halloween Candy Apples at home with this simple recipe that kids and adults will love!
Ingredients
- 8 large Granny Smith apples
- 3 cups caster sugar (superfine sugar) (600g / 1 ⅓ pounds)
- ⅓ cup water (80ml)
- ¼ cup liquid glucose (or light corn syrup) (60ml)
- 1 teaspoon white vinegar
- Food colouring of your choice
Instructions
- Line a large baking sheet with baking paper and set aside.
- Prepare bowls of sprinkles that are slightly larger than the apples for easy dipping.
- Wash the apples thoroughly, removing any wax, and dry well. Remove the stems and insert a thick skewer or popsicle stick into each apple.
- In a large heavy-based saucepan, combine sugar, water, glucose, and vinegar over low heat. Stir constantly until the sugar completely dissolves.
- Bring the mixture to a boil, and attach a candy thermometer to the side of the pan. Boil until reaching the hard crack stage (150C / 302F). Use a wet pastry brush to remove any sugar crystals forming on the sides.
- Once at the desired temperature, remove from heat and mix in food colouring, allowing bubbles to subside.
- Dip each apple into the syrup, ensuring they are well coated, and let the excess drip off.
- Quickly dip the coated apples into sprinkles or attach larger decorations, using a kitchen blowtorch if needed.
- Place the coated apples on the prepared baking tray and let them set, which takes a few minutes to become firm and fully hardens in about 20 minutes.
- Store at room temperature in a non-humid area, and if desired, wrap individually in cellophane to enjoy within 2 days.
Notes
- Ensure apples are wax-free before dipping.
- If using twigs instead of sticks, ensure they are clean and safe to use.
- Use a candy thermometer for accurate temperature measurement.
Nutrition
- Serving Size: 1 apple
- Calories: 300
- Sugar: 60g
- Sodium: 5mg
- Fat: 0g
- Saturated Fat: 0g
- Unsaturated Fat: 0g
- Trans Fat: 0g
- Carbohydrates: 75g
- Fiber: 3g
- Protein: 1g
- Cholesterol: 0mg


