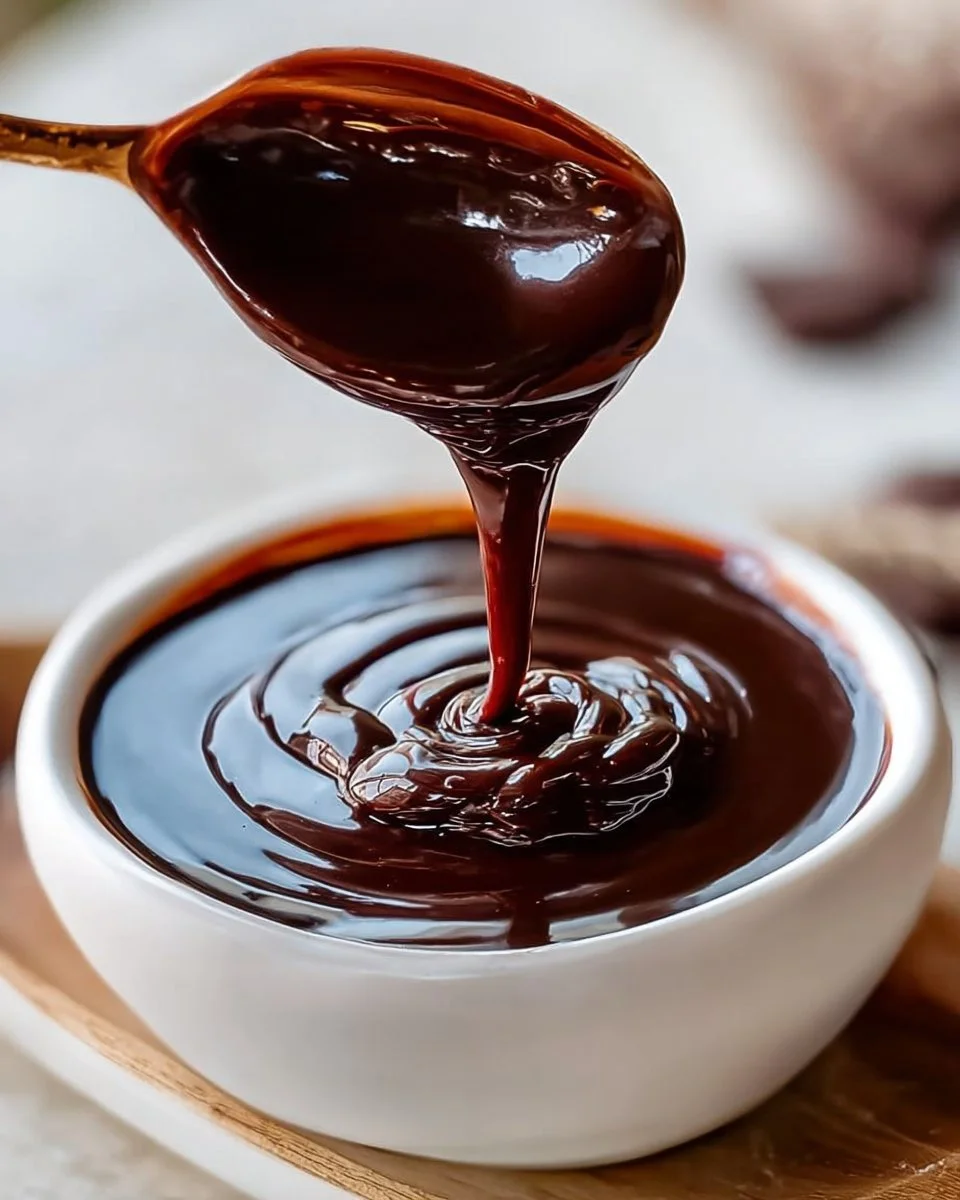
Indulging in the velvety embrace of homemade chocolate syrup transforms the ordinary into the extraordinary. Picture drizzling this luscious dark elixir over a scoop of creamy vanilla ice cream, watching it cascade down like a rich, glossy waterfall. Or imagine stirring a spoonful into your morning coffee, where the deep cocoa notes swirl with a bittersweet aroma, instantly elevating your day. Each spoonful embodies the essence of lovingly crafted desserts, offering a flavor that supermarket bottles simply can’t replicate.
The texture of this chocolate syrup captivates, balancing a perfect pourability with a thick, luxurious feel. It clings to pancakes, inviting each bite to burst with an intense burst of chocolate delight. This is not just syrup; it’s a simple indulgence that brings a sense of nostalgia, awakening cherished memories of childhood treats and late-night kitchen escapades. Creating this syrup at home invites you to be a part of that warm memory-making process, filling your kitchen with the comforting aroma of melted chocolate and sugar caramelizing beautifully together.
Why You’ll Love This Homemade Chocolate Syrup
Imagine the delight when you tell your friends and family that the rich chocolate syrup gracing your desserts is a product of your own kitchen! Homemade chocolate syrup stands out for several compelling reasons. First, its flavor bears unmatched intensity—tantalizingly sweet yet richly bitter—a perfect balance that commercial varieties often lack. You control the sweetness by adjusting sugar levels, allowing for a precise taste that aligns with your personal preference.
This syrup shines on various occasions, from festive gatherings to everyday breakfasts. Drizzle it over pancakes on lazy Sunday mornings, dip strawberries during a romantic dinner, or pour it into your child’s milk for a special after-school treat. The versatility of this homemade syrup adds a touch of luxury to your meals, making everyday moments feel extraordinary.
Preparation Phase & Tools to Use
Before diving into this delicious adventure, gather a few essential tools that will make the process effortless and enjoyable:
- Saucepan: A sturdy, medium-sized saucepan is vital as it allows even heat distribution while combining your ingredients.
- Whisk or Wooden Spoon: Stirring the ingredients continuously prevents any sticky clumps from forming. A whisk gives a lovely mix, while a wooden spoon offers a sturdy grip.
- Measuring Cups: Precision is key in baking and cooking, so use reliable measuring cups to ensure the right ingredient ratios.
- Storage Bottles: Once you create your syrup, you’ll want to store it in a clean squeeze bottle or glass jar for easy access.
As you prepare, remember to measure your ingredients ahead of time so that the process flows smoothly, letting the aroma of melting sugar fill your kitchen long before the syrup is ready.
Ingredients for Homemade Chocolate Syrup
To conjure this chocolate delight, gather the following:
- 1 cup sugar: Sugar forms the syrup’s sweetness backbone, but feel free to experiment with alternatives like coconut sugar for a unique flavor.
- 1 cup water: Water acts as the base, helping to dissolve the sugar evenly and create that luscious, syrupy consistency.
- 1/2 cup unsweetened cocoa powder: Use high-quality cocoa for a rich chocolate experience; if you prefer a sweeter syrup, you can opt for Dutch-processed cocoa.
- 1/4 teaspoon salt: A pinch of salt enhances sweetness and brings out the chocolate flavor.
- 1 teaspoon vanilla extract: This final touch adds depth and a comforting aroma, complementing the chocolate beautifully.
How to Make Homemade Chocolate Syrup
-
Combine the Ingredients: In your saucepan, combine the sugar, water, unsweetened cocoa powder, and salt. Make sure to whisk it well to incorporate all the dry ingredients evenly.
-
Heat the Mixture: Place the saucepan over medium heat and bring the mixture to a gentle boil. Stir continuously to help the sugar dissolve completely and avoid scorching.
-
Simmer the Sauce: Once boiling, reduce the heat slightly and let it simmer for about 5 minutes. Stir occasionally. The mixture will thicken as it simmers, so keep an eye on it!
-
Add the Vanilla: Remove the saucepan from the heat and stir in the vanilla extract, letting its warm aroma fill the air.
-
Cool and Store: Allow the syrup to cool at room temperature before transferring it to a bottle for storage. Don’t forget to keep it refrigerated, where it can last for several weeks.
Chef’s Notes & Helpful Tips
- Make-Ahead Tips: You can make this syrup well in advance. It works wonderfully stored in the fridge for up to a month, allowing you to savor that homemade flavor whenever you desire.
- Cooking Alternatives: Although stovetop preparation is simple, consider using a microwave. Combine all ingredients in a microwave-safe bowl, whisking to combine. Heat in increments, stirring until the mixture is hot and slightly thickened.
- Customization Ideas: Add a pinch of cinnamon or chili powder for a warm spice twist. Infusing with orange zest or peppermint extract can create seasonal variations that delight both the palate and senses.
Common Mistakes to Avoid
Creating the perfect chocolate syrup is straightforward, but a few mishaps can occur:
- Burning the Sugar: Always stir continuously while the mixture heats. Sugar can burn quickly, leaving a bitter taste. If you see dark brown bits, it’s best to start over.
- Inadequate Mixing of Cocoa: Ensure that cocoa powder is fully incorporated before bringing the mixture to a boil to prevent clumps. Using a whisk can help in achieving a smooth consistency.
- Overcooking: Monitor the syrup closely! Cooking it for too long can lead to a syrup that is overly thick after cooling, bringing its pourability down.
What to Serve With Homemade Chocolate Syrup
Let your creativity soar with potential pairings for this indulgent syrup. Here are some delicious ideas:
- Ice Cream: A classic combination. Pour the syrup over a rich scoop of chocolate or vanilla ice cream and add sprinkles for kids.
- Milkshakes: Swirl a generous amount in your blender before adding vanilla ice cream and milk for a chocolate lover’s dream.
- Pancakes & Waffles: Elevate your breakfast by drizzling syrup over fluffy pancakes or crispy waffles, adding an extra layer of decadence.
- Fruit Dipping: Fresh strawberries, bananas, and apple slices make for perfect dippable options when paired with chocolate syrup.
- Cake & Cupcakes: Use this syrup to glaze chocolate cakes or as a decorative drizzle atop cupcakes before serving.
- Coffee or Hot Cocoa: Stir into your morning brew for a caffeine boost that combines an irresistible sweetness with rich flavor.
- Homemade Cheesecake: A drizzle over a slice of cheesecake adds a standout touch and turns dessert into a breathtaking presentation.
- Brownies: Amp up that fudgy brownie experience by serving it warm with an extra splash of syrup.
Storage & Reheating Instructions
Store your chocolate syrup in a sealed bottle or jar in the refrigerator. It can last for up to a month. To use it, simply shake the bottle to mix any settling that may occur. If you want to enjoy it warm, microwave it in 10-15 second increments, stirring in between until it reaches your desired temperature.
Estimated Nutrition Information
Each tablespoon of this homemade chocolate syrup contains approximately:
- Calories: 50
- Total Fat: 0g
- Carbohydrates: 13g
- Sugars: 12g
- Protein: 0g
(The values are estimated and may vary based on specific ingredients used. For personalized dietary information, always refer to nutritional labels or consult a registered dietitian.)
FAQs
Can I use dark chocolate or milk chocolate instead of cocoa powder?
Yes, you can melt dark or milk chocolate into the syrup instead of cocoa, but this will change the overall texture and sweetness. Reduce sugar accordingly to balance the sweetness.
How can I make this syrup healthier?
Consider substituting sugar with alternatives like agave nectar or stevia, or reducing the amount of sweetener used while increasing cocoa powder for a more intense flavor.
Can I freeze chocolate syrup?
Absolutely! Pour the syrup into ice cube trays and freeze. Once frozen, transfer the chocolate cubes to a ziplock bag for future uses.
What if my syrup is too thick?
To thin out your syrup, gently reheat it and stir in a tablespoon of water, adding more as needed until you achieve your desired consistency.
Is homemade chocolate syrup safe for kids?
Yes, this syrup is perfectly safe for kids, just be mindful of the sugar content and adjust portions accordingly for younger ones.
Conclusion
Homemade chocolate syrup is not just a delightful ingredient; it’s a charming addition to your family meals, turning everyday moments into something special. With its rich flavor and luscious texture, it invites you to create, to celebrate, and to indulge. Beyond being a scrumptious treat, it’s a nostalgic bliss that beckons your taste buds and ignites your cooking creativity. So grab your apron, allow the sweet aroma of chocolate to envelop your kitchen, and immerse yourself in the pleasure of creating your very own chocolate magic—your taste buds will be eternally grateful!
Print
Homemade Chocolate Syrup
- Prep Time: 10 minutes
- Cook Time: 5 minutes
- Total Time: 15 minutes
- Yield: 1 cup 1x
- Category: Condiment
- Method: Stovetop
- Cuisine: American
- Diet: Vegetarian
Description
Rich and velvety homemade chocolate syrup, perfect for drizzling over desserts or mixing into drinks.
Ingredients
- 1 cup sugar
- 1 cup water
- 1/2 cup unsweetened cocoa powder
- 1/4 teaspoon salt
- 1 teaspoon vanilla extract
Instructions
- In a medium saucepan, combine the sugar, water, cocoa powder, and salt. Whisk well to incorporate.
- Place the saucepan over medium heat and bring the mixture to a gentle boil, stirring continuously.
- Once boiling, reduce the heat slightly and let it simmer for about 5 minutes, stirring occasionally.
- Remove from heat and stir in the vanilla extract.
- Allow the syrup to cool at room temperature before transferring to a storage bottle or jar.
Notes
Store in the refrigerator for up to a month. Shake before using. To reheat, microwave in 10-15 seconds increments.
Nutrition
- Serving Size: 1 tablespoon
- Calories: 50
- Sugar: 12g
- Sodium: 1mg
- Fat: 0g
- Saturated Fat: 0g
- Unsaturated Fat: 0g
- Trans Fat: 0g
- Carbohydrates: 13g
- Fiber: 1g
- Protein: 0g
- Cholesterol: 0mg