Introduction to How To Freeze Sourdough Starter
Sup, homies in the kitchen? Maybe not just like me, but I know that your kitchen sees a lot of action, especially when you are a busy mom or a professional. So here is why, knowing how to freeze sourdough starter is such a cool changer for those chaotic days. Maybe you are gearing up for some last-minute baking or just intending to extend your magical starter, it should ensure that you are that much closer to indulging in fresh-baked magic whenever the craving hits again — and with no fear about waste or taking care of the starter, but just time enough to win the magic of fresh bread!
Why You’ll Love This How To Freeze Sourdough Starter
A single simple method is a time and life-saver for those working in chaotic kitchens at home. Freeze your sourdough starter, take all of the stress out of needing to bake often, and then it’s quick to freeze and saves you time to have fresh, flavorful bread whenever you want. And keep pleasing your loved ones with tasty home-baked loaves!

Ingredients for How To Freeze Sourdough Starter
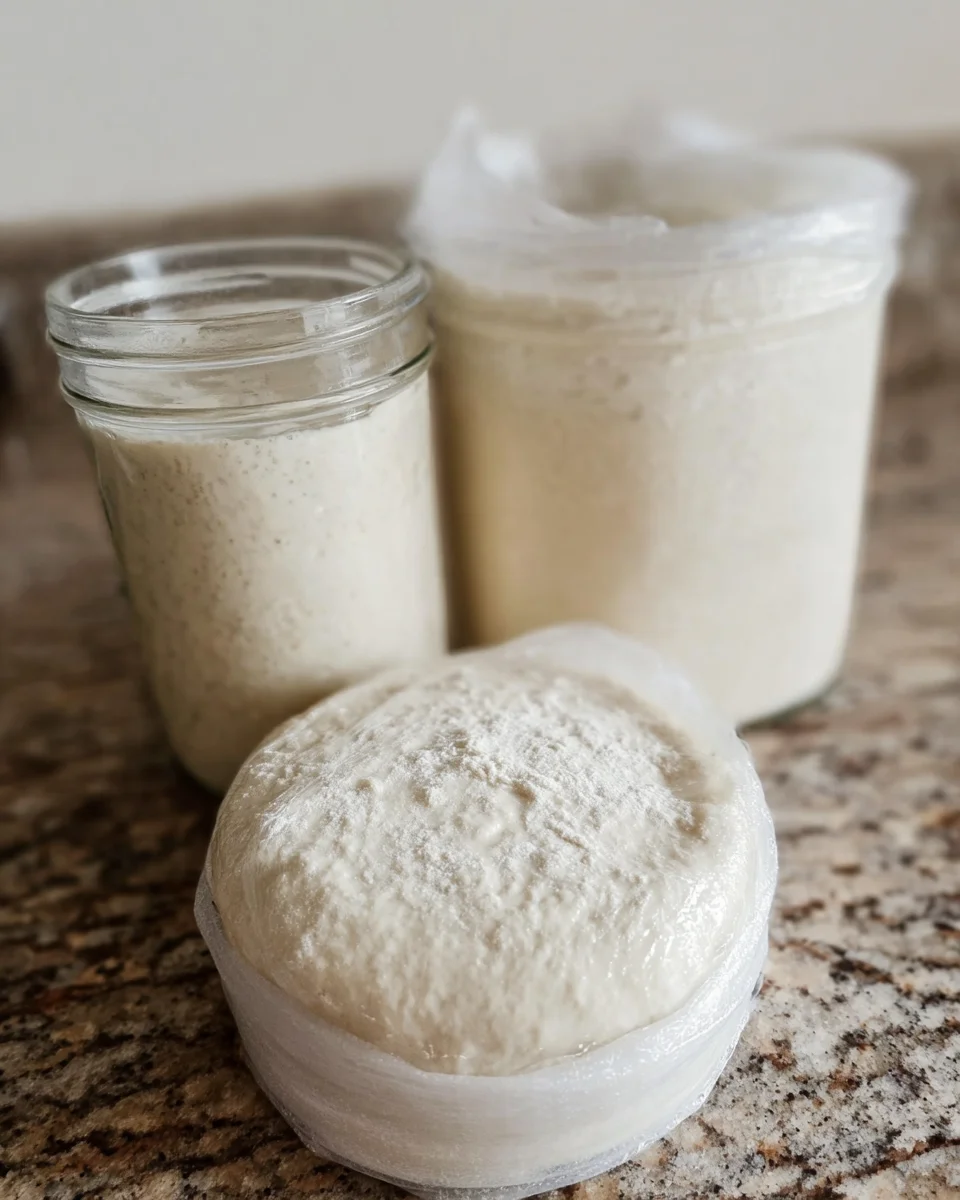
Gathering the right ingredients for freezing sourdough starter is straightforward, and you may already have these on hand!
- Active sourdough starter: This is your lifeline to delicious homemade bread! Make sure it’s bubbly and well-fed before you freeze.
- Freezer bags: A must for keeping that starter safe from freezer burn. Look for heavy-duty options to ensure it’s airtight.
- Silicone molds (optional): These are perfect if you prefer to freeze smaller portions. They make it easy to pop out individual servings whenever you need them!
For those wondering about substitutes or variations, I always suggest sticking with active starters. After all, that’s where the magic lies. You can find these ingredients at local grocery stores or even online. If you need exact quantities, scroll down to the end of the article for a handy print-friendly version!
How to Make How To Freeze Sourdough Starter
Step 1 – Prepare Your Sourdough Starter
Before we get freezing, let’s start with a healthy, active sourdough starter. Feed your starter and wait for it to become bubbly and lively. Typically, this takes about 4 to 6 hours. Trust me, this step is essential. A strong starter ensures a successful revival later on. Just envision it — that frothy mix bubbling like the excitement of your favorite cake in the oven!
Step 2 – Portion the Starter
Once your starter is ready, grab a clean, freezer-safe container. This could be a freezer bag or a small airtight container. Measure out about ¼ to ½ cup of that beautiful starter. Remember, the joy of sourdough lies in its versatility. Feel free to adjust your portions according to your future baking plans!
Step 3 – Pack It Safely
Now it’s time to pack up your starter for its icy adventure! If you’re using a freezer bag, flatten it to create a thin layer of starter. This helps it freeze evenly and faster. Gently press out as much air as possible. If you’re using a container, seal it tightly, making sure no air escapes. It’s like wrapping up a precious gift — only, this gift will keep on giving for months!
Step 4 – Label and Freeze
Don’t skip this crucial step! Label your container or bag with the date and the hydration level. Trust me, future-you will thank you when you dig through the freezer looking for that perfect starter! Then pop it into your freezer. You can store it there for up to 12 months, but for the best results, I recommend using it within 6 months. That way, you keep that fresh, tangy flavor intact!
Step 5 – Reviving Your Starter
When you’re ready to bake, it’s revival time! Thaw the frozen starter overnight in the fridge or at room temperature. Then, feed it with a 1:10:10 ratio. That’s 10 grams of starter, 100 grams of flour, and 100 grams of water. Give it time to wake up. Leave it at room temperature until it bubbles up again. This usually takes around 8 to 12 hours, depending on the warmth of your kitchen. Repeat the feeding every 12 to 24 hours until it’s strong enough to bake with. Remember to discard half of the starter each time — it’s part of the cycle of love that keeps your sourdough journey alive and thriving!
Tips for Success
- Always use an active starter for better freezing results.
- Consider freezing in smaller portions for easier thawing.
- Label your containers clearly to avoid confusion later.
- Don’t rush the revival process; patience yields the best results!
- If you’re uncertain, keep a backup starter in the fridge.
Equipment Needed
- Freezer bags: Heavy-duty ones are best, but any freezer-safe bag can work.
- Airtight containers: Glass or plastic containers will help keep air out.
- Measuring cups: Essential for accurate portioning of your starter.
- Labels: Stickers or masking tape help keep everything organized!
Variations
- Whole Wheat Starter: Use whole wheat flour instead of all-purpose for a heartier flavor and nutritional boost!
- Gluten-Free Option: Try a gluten-free flour blend to create a gluten-free sourdough starter. Just remember to monitor hydration levels as they can differ.
- Herb-Infused Starter: Add dried herbs like rosemary or thyme to the starter before freezing for a delightful twist in your future loaves.
- Sweet Sourdough Starter: Incorporate a bit of honey or sugar for those who prefer a touch of sweetness in their bread.
- Mix of Flours: Experiment with a combination of different flours like rye, spelt, or even oat to create unique flavors and textures!
Serving Suggestions
- Serve fresh sourdough with creamy butter and a sprinkle of sea salt for a simple treat.
- Pair it with a hearty vegetable soup or stew — a classic combo that warms the soul!
- Try a charcuterie board featuring your homemade bread alongside cheeses, olives, and cured meats for an impressive appetizer.
- Enjoy slices toasted with avocado and poached eggs for a trendy brunch feast!
FAQs about How To Freeze Sourdough Starter
Can I freeze my sourdough starter at any stage?
It’s best to freeze your sourdough starter when it’s active and bubbly. This ensures it can reignite the joy of baking when you’re ready to use it again!
How long can I store my frozen sourdough starter?
You can keep your frozen starter for up to 12 months, but for the freshest taste, aim to use it within 6 months. Those first few months yield a tastier revival!
How do I know if my revived starter is strong enough to bake?
A healthy starter will bubble up and double in size after each feeding, usually within 8 to 12 hours. If it has a pleasant sour smell and is active, you’re set for baking!
What should I do with the sourdough discard?
Don’t let it go to waste! Save your sourdough discard in the fridge for delicious recipes like pancakes, waffles, or even pizza dough. It’s a waste not to use it!
Can I freeze it in smaller portions?
Absolutely! Freezing in smaller portions can make it easier to thaw exactly what you need for your baking projects. Less mess, more fun!
Final Thoughts
Freezing sourdough starter opens a world of convenient baking possibilities! It eases the pressure of daily meal prep while allowing you to savor the delightful aroma of homemade bread. Each time you revive your starter, a little piece of your kitchen’s magic comes alive again. With just a few simple steps, you can ensure that fresh, warm slices are always within reach. So go ahead, embrace the joy of sourdough baking! It’s not just about bread; it’s about creating memories and delicious moments with your loved ones, one slice at a time.
Print
How To Freeze Sourdough Starter
- Prep Time: 10 minutes
- Cook Time: N/A
- Total Time: 6 months (for optimal use after freezing)
- Yield: ½ cup active sourdough starter
- Category: Baking
- Method: Freezing
- Cuisine: American
- Diet: Vegetarian
Description
Learn how to freeze sourdough starter for long-lasting use and easy future baking.
Ingredients
- Active sourdough starter
- Freezer bags
- Silicone molds (optional)
Instructions
- Feed your starter and wait until it is bubbly and active (4–6 hours).
- Transfer ¼ to ½ cup of active starter into a clean, freezer-safe airtight container or freezer bag.
- Flatten or seal the bag/container to create a thin layer of starter and press out as much air as possible.
- Label the container or bag with the date and hydration level, then freeze.
- Store in the freezer for up to 12 months; use within 6 months for best results.
- To revive, thaw the frozen starter overnight in the fridge or at room temperature.
- Feed it using a 1:10:10 ratio (e.g., 10 g starter, 100 g flour, 100 g water).
- Let it sit at room temperature until bubbly (8-12 hours depending on the temperature).
- Repeat feeding every 12–24 hours until the starter is strong again (usually 2–3 feedings), remembering to discard half of the starter each time.
Notes
- Do not discard the sourdough discard; save it in the fridge for other recipes.
Nutrition
- Serving Size: 1 tablespoon
- Calories: 30
- Sugar: 0 g
- Sodium: 0 g
- Fat: 0 g
- Saturated Fat: 0 g
- Unsaturated Fat: 0 g
- Trans Fat: 0 g
- Carbohydrates: 6 g
- Fiber: 0 g
- Protein: 1 g
- Cholesterol: 0 mg


