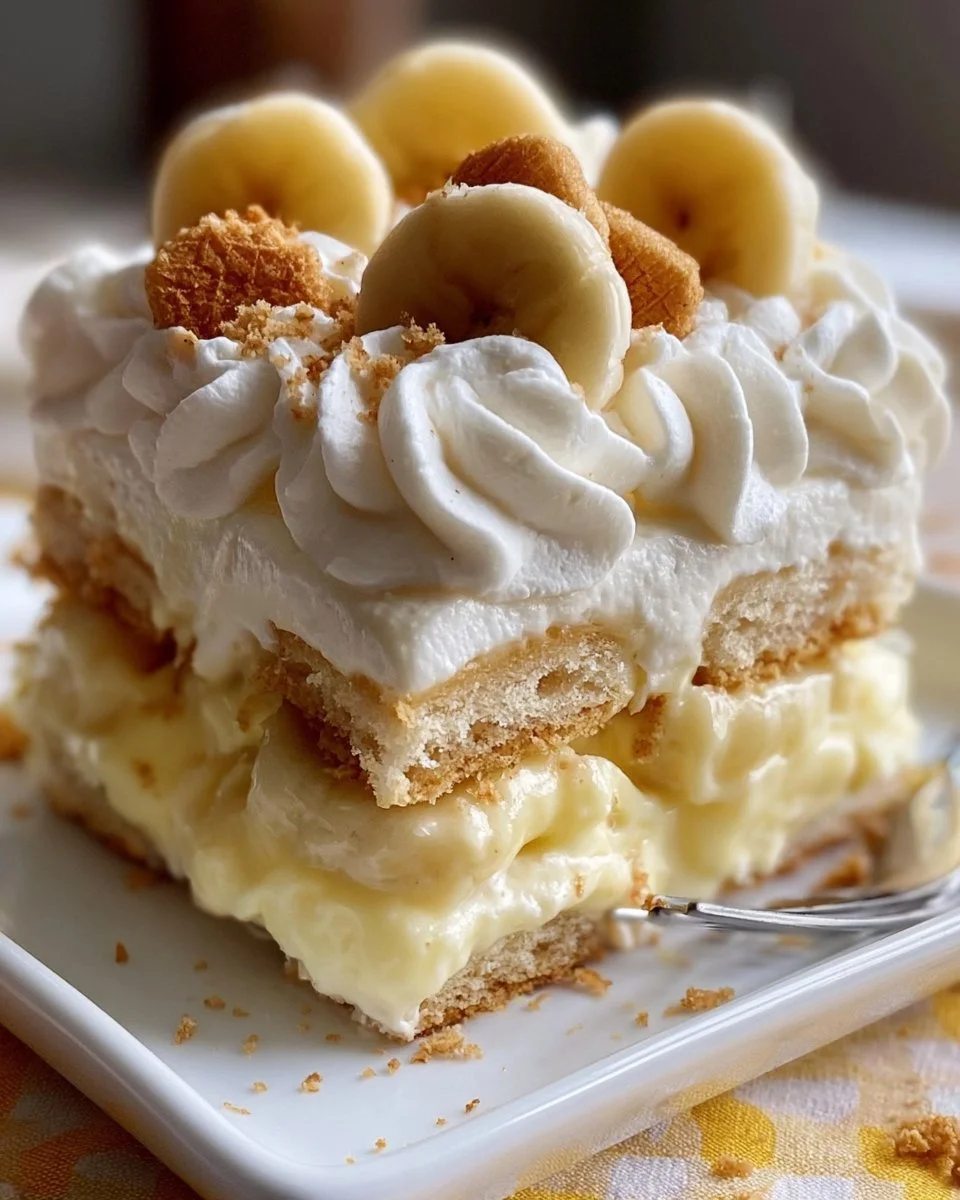
Nestled somewhere between classic comfort and its delightful modern twist, Not Yo Mama’s Banana Pudding captures the essence of nostalgia while bursting with a vibrant, contemporary flair. Picture a warm summer day; you sit on a cozy porch, a gentle breeze brushing against your skin, and in front of you sits a crystal dish brimming with luscious banana pudding. As you dip your spoon into the smooth layers of creamy vanilla and soft, ripe banana, the rich aroma dances around you, teasing your senses. This pudding is not just a dessert; it’s an experience, a celebration of flavors and textures that invite you to take a moment and savor each delightful bite.
What makes this banana pudding different—better, one might say—is the light-hearted humor and creativity that infuse this recipe. While it may nod to the beloved classic that we’ve all grown up with, it offers a velvety indulgence that whisk you away to dessert paradise. Each layer showcases the mad science of culinary alchemy: whipped topping melds with sweetened condensed milk to create a cloud-like creaminess, while the vanilla wafers introduce a delightful crunch, offsetting the smoothness. How could something so simple be so utterly enchanting?
Why You’ll Love This Not Yo Mama’s Banana Pudding
You’ll adore this twist on a beloved classic for many reasons. First, it’s a crowd-pleaser; the silky texture and perfect balance of flavors make it ideal for any gathering, be it a holiday barbecue, birthday bash, or just a lazy Sunday afternoon with friends. Second, this pudding requires no baking, making it not just quick to prepare but also freeing up your precious oven space for other mouthwatering creations. Plus, it’s entirely adaptable, allowing you to add your personal touches—think layers of caramel drizzle, crushed cookies, or perhaps even a hint of chocolate to mix things up!
The luscious layers of banana and vanilla combine so beautifully; it’s almost like the flavors are dancing in perfect harmony. Each spoonful delivers comfort and joy, reminding you of family gatherings and good times spent with loved ones. And let’s not forget the wow factor! When you unveil a stunning dish of this ridiculously delicious pudding at your next event, prepare to receive an exuberant round of applause from delighted guests.
Preparation Phase & Tools to Use
Creating Not Yo Mama’s Banana Pudding is wonderfully accessible, and you only need a few key tools to make magic happen.
You’ll want:
- Mixing Bowls: Essential for combining your ingredients; choose a large bowl to accommodate all the whisking action.
- Whisk: This simple tool transforms your ingredients into a silky pudding; a good whisk ensures just the right amount of aeration and smooth consistency.
- Spatula: A rubber spatula helps you fold in the whipped topping gently, preserving that light texture that is so essential.
- Serving Dish: A glass trifle dish or a large glass bowl works beautifully; showcasing the beautiful layers is part of the fun!
Preparation tips include ensuring your bananas are perfectly ripe—they should be bright yellow with a few spots for optimal sweetness. Take a moment to chill your mixing bowls and ingredients before starting, as this can help your pudding set up better.
Ingredients for Not Yo Mama’s Banana Pudding
- 2 cups of milk
- 1 (3.4 oz) package instant vanilla pudding mix
- 1 can (14 oz) sweetened condensed milk
- 1 tub (8 oz) whipped topping
- 4 ripe bananas, sliced
- 1 box vanilla wafers
These simple yet heavenly ingredients work together beautifully. The instant vanilla pudding mix streamlines the process, offering an effortlessly creamy texture. Sweetened condensed milk adds a luxurious sweetness, making the pudding decadent without being overpowering. For those who prefer a lighter version, try using low-fat milk or substituting a portion of the sweetened condensed milk with Greek yogurt for a protein boost.
How to Make Not Yo Mama’s Banana Pudding
- In a mixing bowl, combine the milk and the instant vanilla pudding mix. Whisk together until thickened, about 2 minutes.
- Add the sweetened condensed milk and continue mixing until the mixture is smooth and luscious.
- Gently fold in the whipped topping until well combined, ensuring you keep all that wonderful airiness intact.
- In a large serving dish, layer the vanilla wafers, followed by slices of banana, and then the pudding mixture. Repeat the layers until your ingredients are fully used, finishing with a generous layer of pudding on top.
- Cover with plastic wrap and refrigerate for at least 4 hours, or, if time allows, overnight for maximum flavor infusion.
- Serve chilled and delight in the creamy goodness that awaits!
Chef’s Notes & Helpful Tips
- Make-ahead tips: This pudding is perfect for preparing a day in advance, allowing flavors to meld together beautifully. Just keep it well-covered to maintain freshness.
- Cooking alternatives: While there’s no baking involved, you can add a luxurious twist by using caramel or chocolate sauce between the layers for an extra layer of richness.
- Customization ideas: Feel free to experiment! Consider adding crushed pineapple, sliced strawberries, or a sprinkle of cinnamon for a different flavor profile.
Common Mistakes to Avoid
One common mistake is using overripe bananas. These tend to be overly mushy and can turn brown too quickly. Aim for just ripe bananas with a firm texture that will hold up well in the layers. Additionally, avoid skimping on the chilling time; this pudding truly shines when given the chance to set—it develops the perfect creamy texture that you crave.
What to Serve With Not Yo Mama’s Banana Pudding
Pair this decadent dessert with:
- Fresh berries: A sprinkle of tart freshness complements the sweetness.
- Coffee: A rich, dark brew balances the lightness of the pudding.
- Grilled fruit: Grilled peaches or pineapple add a smoky undertone that’s simply delightful.
- Ice cream: Vanilla or caramel would be delightful as a side companion.
- Chocolate chip cookies: Their crunchiness offers a contrasting texture.
- Fresh mint leaves: A small garnish can enhance the presentation and provide a refreshing bite.
Storage & Reheating Instructions
Store any leftovers in an airtight container in the fridge for up to 3 days. This pudding tastes even better the next day as the flavors continue to meld! It isn’t recommended for freezing, as the texture may become compromised once thawed.
Estimated Nutrition Information
Each serving of Not Yo Mama’s Banana Pudding (approximately 1/2 cup) contains around:
- Calories: 250
- Total Fat: 10g
- Saturated Fat: 5g
- Sodium: 140mg
- Carbohydrates: 39g
- Sugars: 25g
- Protein: 3g
(Nutrition values are approximate and may vary based on specific ingredients used.)
FAQs
Can I use fresh whipped cream instead of whipped topping?
Absolutely! Fresh whipped cream adds an incredible lightness and texture, just ensure it’s gently folded in at the end.
How long can I keep this pudding in the fridge?
This luscious dessert lasts for about 3 days in the fridge, though we doubt it will last that long once you share it with loved ones!
Can I make this recipe gluten-free?
Yes, simply swap out the vanilla wafers for gluten-free cookies or graham crackers, and everyone can indulge!
What other flavors pair well with banana pudding?
Chocolate, peanut butter, or even a sprinkle of coconut can elevate your banana pudding experience!
What if my pudding doesn’t thicken?
If it seems too runny, check that you’ve whisked it long enough after adding the pudding mix. Allowing it to chill properly will help it set up, too.
Conclusion
Embrace the deliciousness of Not Yo Mama’s Banana Pudding and bask in the smiles it brings to your family and friends. With its creamy layers, delightful crunch, and sweet banana goodness, this recipe promises not only to satisfy cravings but also to create cherished moments around the table. Whip up a batch today, and let the indulgence begin. Each bite will transport you to that warm summer porch, reminding you that life’s simple pleasures are often the most rewarding. Enjoy!
Print
Not Yo Mama’s Banana Pudding
- Prep Time: 15 minutes
- Cook Time: 0 minutes
- Total Time: 240 minutes
- Yield: 8 servings 1x
- Category: Dessert
- Method: No Bake
- Cuisine: American
- Diet: Vegetarian
Description
A delightful twist on a classic banana pudding, featuring creamy layers of vanilla and banana with a crunchy texture from vanilla wafers.
Ingredients
- 2 cups of milk
- 1 (3.4 oz) package instant vanilla pudding mix
- 1 can (14 oz) sweetened condensed milk
- 1 tub (8 oz) whipped topping
- 4 ripe bananas, sliced
- 1 box vanilla wafers
Instructions
- Combine the milk and the instant vanilla pudding mix in a mixing bowl. Whisk together until thickened, about 2 minutes.
- Add the sweetened condensed milk and continue mixing until smooth.
- Fold in the whipped topping gently until well combined.
- Layer the vanilla wafers in a large serving dish, followed by slices of banana and the pudding mixture. Repeat the layers until all ingredients are used.
- Cover with plastic wrap and refrigerate for at least 4 hours or overnight.
- Serve chilled and enjoy!
Notes
This pudding can be made a day in advance for better flavor infusion. Avoid using overripe bananas for best texture.
Nutrition
- Serving Size: 1/2 cup
- Calories: 250
- Sugar: 25g
- Sodium: 140mg
- Fat: 10g
- Saturated Fat: 5g
- Unsaturated Fat: 3g
- Trans Fat: 0g
- Carbohydrates: 39g
- Fiber: 1g
- Protein: 3g
- Cholesterol: 10mg