Introduction to Snowball Cookies Recipe
Every holiday season, I find myself embraced by the warmth of familiar traditions and delightful treats. One of my absolute favorites is the Snowball Cookies Recipe. These delightful, tender cookies are not just a feast for the taste buds; they’re a reminder of cozy moments spent with family. Perfect for busy afternoons or holiday gatherings, these little gems bring smiles faster than I can bake them! Their simplicity and melt-in-your-mouth goodness make them a go-to recipe for impressing loved ones, and I bet they’ll soon become a cherished treat in your home as well.
Why You’ll Love This Snowball Cookies Recipe
This Snowball Cookies Recipe is a lifesaver for busy moms and professionals! It comes together in just 10 minutes of prep time, so you can whip them up quickly, even on hectic days. With a rich buttery flavor and a dusting of powdered sugar, these cookies are a delightful treat that everyone will adore. Plus, they’re easily customizable, making them a perfect addition to your holiday cookie platters.

Ingredients for Snowball Cookies Recipe
Gathering your ingredients is half the fun! Here’s what you’ll need for this Snowball Cookies Recipe:
- Flour: You can use all-purpose, spelt, whole wheat pastry, or even gluten-free flour. Each type will lend a unique texture to your cookies.
- Nuts: Finely chopped walnuts, almonds, or pecans add a lovely crunch and flavor. They’re optional, but trust me, they make a difference!
- Powdered Sugar: This sweet snow-like coating gives the cookies their signature look. You can also opt for sugar-free powdered sugar if you’re watching your sugar intake.
- Butter: A rich source of flavor, butter is the heart of these cookies. You can replace it with coconut oil for a dairy-free version.
- Additional Powdered Sugar or Cocoa Powder: For a fun twist, roll your cookies in cocoa powder instead of powdered sugar, transforming them into a chocolatey delight!
For exact measurements and tips on substitutions, check the bottom of the article. Happy baking!

How to Make Snowball Cookies Recipe
Creating these delightful Snowball Cookies is a breeze, and I’ll walk you through each step to ensure your baking adventure is both joyful and successful. Trust me, once you get the hang of these magical little bites of goodness, they’ll become a holiday staple!
Step 1: Preheat the Oven
Start by preheating your oven to 325 degrees Fahrenheit. This is crucial! A properly heated oven ensures that your cookies bake evenly, giving you that lovely golden edge. While it’s warming up, you can gather your ingredients and tools.
Step 2: Cream the Butter and Sugar
Grab a medium bowl or your stand mixer and add the softened butter alongside the powdered sugar. Beat them together until the mixture is smooth and creamy. This creaming process is key; it incorporates air, making your cookies light and tender. Remember, a fluffy mixture equals delightful cookies!
Step 3: Combine the Dry Ingredients
In a separate bowl, mix the flour with your finely chopped nuts. Stir it all together until the flour and nut mixture are well combined. This step is important because it ensures the nuts are evenly distributed in the dough, adding that perfect crunch!
Step 4: Form the Dough
Slowly add the flour-nut mixture to your creamed butter and sugar. Mix gently until you form a soft dough that holds together. You want it just right—not too crumbly, or your cookies won’t hold shape. Don’t be afraid to use your hands to knead the dough a little bit if needed!
Step 5: Shape the Cookies
Now it’s time to shape your cookies! Take small portions of dough, about an inch in diameter, and roll them into balls. This step is fun! Make sure to place the cookies evenly spaced on your baking sheet to allow for spreading as they bake.
Step 6: Bake the Cookies
Slide the baking sheet into your preheated oven and bake for about 25 minutes. Keep an eye on them; they should be lightly browned at the edges but still soft in the center. If you catch a whiff of that heavenly aroma, you know they’re almost done!
Step 7: Coat with Powdered Sugar
As soon as your cookies are out of the oven, gently roll them in a bowl of powdered sugar while they’re still warm. This is where the magic happens, turning those golden balls into snow-kissed gems! Make sure every surface is coated for that signature snowy effect.
Step 8: Cool and Serve
Transfer your freshly coated cookies onto a wire rack to cool completely before serving or storing. Letting them cool is essential! Otherwise, they might crumble and lose that lovely powdered sugar coating. Once cooled, they’re ready to steal the show at your holiday gatherings.
Tips for Success
- Make sure your butter is softened for easy creaming; it shouldn’t be melted.
- Chill your dough for about 30 minutes if it feels soft; this helps in shaping.
- Use a cookie scoop for uniform sizes—this makes baking more consistent.
- Experiment with the nuts; each type brings its own unique flavor.
- Don’t rush the cooling process; it’s vital for texture and flavor!
Equipment Needed for Snowball Cookies Recipe
- Baking Sheet: A standard baking sheet works perfectly, but any flat surface will do.
- Mixing Bowls: Use a medium bowl for mixing and a large one for combining ingredients.
- Stand Mixer or Hand Mixer: A hand mixer is just fine if you don’t have a stand mixer.
- Wire Rack: Essential for cooling cookies, but a plate will work in a pinch!
- Cookie Scoop: Optional, but helps ensure uniform cookie sizes for even baking.
Variations on Snowball Cookies Recipe
- Chocolate Snowball Cookies: Replace powdered sugar with cocoa powder for a chocolatey twist that chocolate lovers will adore.
- Nut-Free Option: Omit nuts entirely or substitute with sunflower seeds if allergies are a concern.
- Spiced Snowball Cookies: Add a pinch of cinnamon or nutmeg to the dough for a warm, cozy flavor perfect for the holidays.
- Gluten-Free Version: Use a high-quality gluten-free flour blend to ensure everyone can enjoy these treats.
- Switch Up the Sugars: Try using coconut sugar instead of powdered sugar in the dough for a deeper flavor and slightly healthier option.
Serving Suggestions for Snowball Cookies Recipe
- Pair with Hot Cocoa: These cookies are perfect with a steaming cup of hot cocoa for a cozy treat.
- Festive Platter: Arrange them on a decorative holiday platter, dusted with extra powdered sugar for that snow-kissed look.
- Gift Them: Pack cookies in festive tins or bags for charming homemade gifts!
- Enjoy with Tea: Serve alongside a warm cup of tea for a delightful afternoon snack.
FAQs about Snowball Cookies Recipe
Can I use a different type of flour for the Snowball Cookies Recipe?
Absolutely! This Snowball Cookies Recipe is versatile. You can use spelt, whole wheat pastry, or even gluten-free flour. Each type will give your cookies a unique flavor and texture.
How do I store Snowball Cookies after baking?
To keep your cookies fresh, store them in an airtight container at room temperature. They should stay delicious for up to one week—if they last that long!
Can I make the dough ahead of time?
Yes! You can prepare the dough ahead and refrigerate it. Just make sure to let it sit at room temperature for about 10 minutes before shaping and baking.
What can I substitute for walnuts in this recipe?
If you’re looking for an alternative, pecans or almonds work wonderfully. If nuts are an issue, feel free to leave them out altogether for a plain cookie.
Can I freeze Snowball Cookies?
Definitely! These cookies freeze beautifully. Just make sure they are fully cooled, then place them in an airtight freezer container. They can be frozen for up to three months.
Final Thoughts
Baking these Snowball Cookies brings me incredible joy, blending simple ingredients into something magical. They represent so much more than just a treat; they’re a bridge to cherished memories and cozy gatherings with loved ones. Every bite feels like a warm hug wrapped in powdered sugar. So whether you’re a busy mom or a professional juggling life’s demands, this recipe fits seamlessly into your routine. Share them with family, gift them to friends, or indulge on a quiet evening—they’re sure to brighten your day! I truly hope you enjoy every crumb of these delightful cookies.
Print
Snowball Cookies
- Prep Time: 10 minutes
- Cook Time: 25 minutes
- Total Time: 35 minutes
- Yield: 24 cookies 1x
- Category: Dessert
- Method: Baking
- Cuisine: American
- Diet: Vegetarian
Description
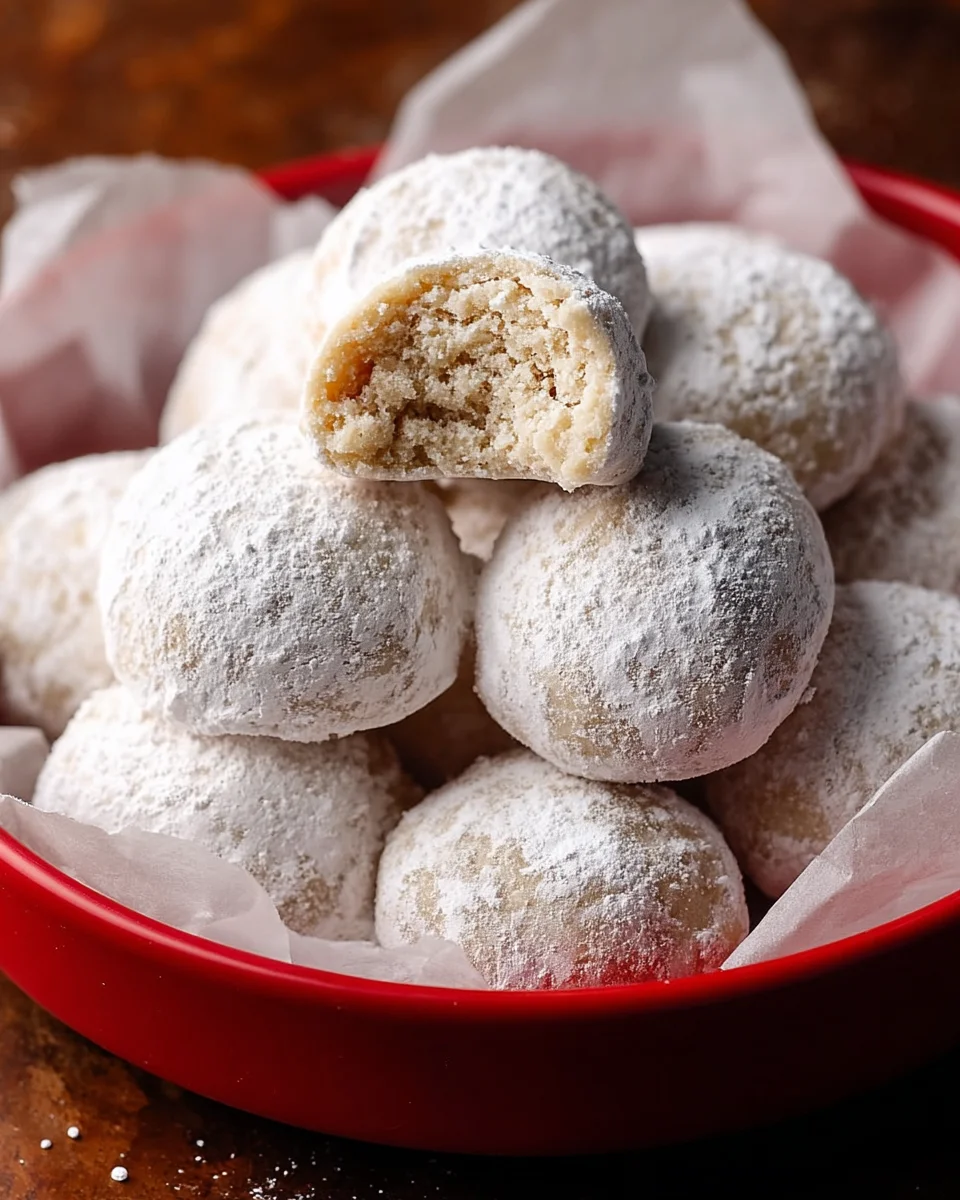
Snowball Cookies are delightful, tender treats coated in powdered sugar, perfect for the holiday season.
Ingredients
- 2 cups flour (white, spelt, whole wheat pastry, or gluten-free flour)
- 1/2 cup finely chopped walnuts or almonds or pecans
- 1/2 cup powdered sugar or sugar free powdered sugar
- 1 cup butter or coconut oil
- Optional additional powdered sugar or cocoa powder, for rolling
Instructions
- Preheat your oven to 325 degrees Fahrenheit to prepare for baking the cookies.
- In a medium bowl or stand mixer, combine the butter with the powdered sugar and beat until smooth and creamy.
- In a separate bowl, stir together the flour and chopped nuts until well combined.
- Gradually mix the flour and nut mixture into the creamed butter and sugar to form a soft dough that holds together.
- Shape the dough into small balls, about 1 inch in diameter, and place them evenly spaced on a cookie sheet.
- Bake in the preheated oven for 25 minutes or until the cookies are lightly browned at the edges.
- Prepare a bowl of powdered sugar and gently roll the warm cookies in it to coat thoroughly.
- Transfer the cookies to a wire rack to cool completely before serving or storing.
Notes
- For a chocolate variation, you may roll the cookies in cocoa powder instead of powdered sugar.
- Store in an airtight container for up to one week.
Nutrition
- Serving Size: 1 cookie
- Calories: 120
- Sugar: 5g
- Sodium: 50mg
- Fat: 8g
- Saturated Fat: 5g
- Unsaturated Fat: 3g
- Trans Fat: 0g
- Carbohydrates: 12g
- Fiber: 1g
- Protein: 2g
- Cholesterol: 30mg


