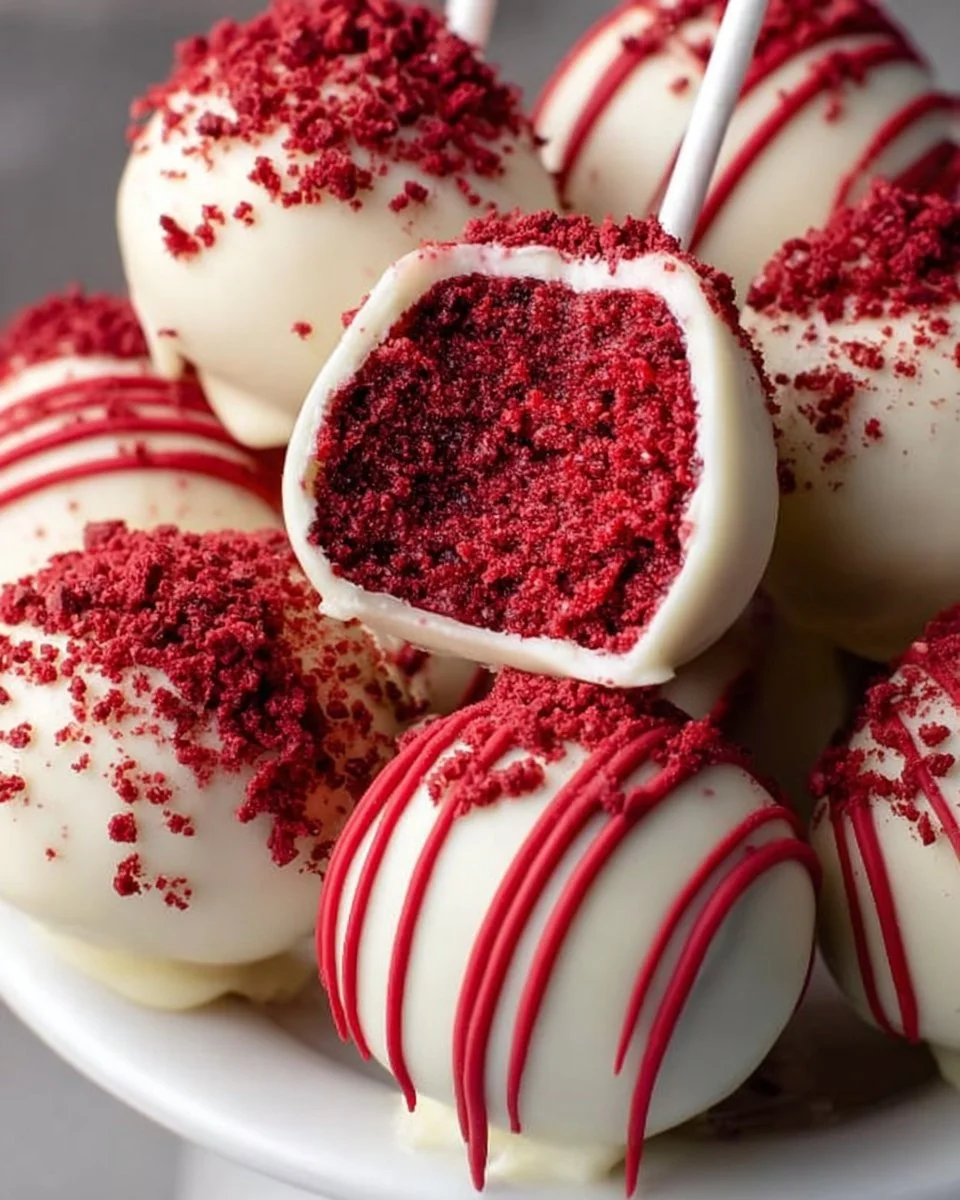
Indulging in a red velvet cake pop is like stepping into a whimsical bakery filled with the rich aroma of cocoa and a hint of vanilla. Each bite is a journey through layers of soft, moist cake, perfectly balanced with the tangy sweetness of cream cheese. Enveloped in a smooth, decadent coating of chocolate, these cake pops offer a delightful crunch that gives way to a soft, velvety texture, sending your taste buds on a joyful rollercoaster ride. The brilliant red hue, glistening under the light, tantalizes the eyes before that first heavenly nibble. Imagine them elegantly displayed at a party, drawing your guests closer with their irresistible allure.
When you bring these delightful red velvet cake pops to a gathering, they are sure to be the star of the dessert table. Perfectly bite-sized, they deliver an explosion of flavor, making them the ideal treat for birthdays, anniversaries, or any festive occasion. Their vibrant color and sweet aroma quickly captivate hearts and create unforgettable memories. So gather around and experience the joyful delight of homemade cake pops. You’re going to want to share these fabulous treats, although you might find yourself wanting to keep them all to yourself!
Why You’ll Love This Tasty Red Velvet Cake Pop Recipe
This red velvet cake pop recipe stands out for several reasons. First and foremost, the celebration of flavors is unparalleled. The chocolatey richness of the red velvet cake melds beautifully with the luxurious cream cheese frosting, creating a treat that is both sweet and slightly tangy. Their playful presentation invites fun, making them perfect for a variety of occasions—think sweet sixteen parties, romantic anniversaries, or cozy holiday gatherings.
Beyond their appearance and delightful flavors, these cake pops are incredibly easy to make, requiring minimal ingredients while providing maximum enjoyment. You can unleash your creativity during the decorating phase, allowing for customization that caters to your event’s theme or your personal taste, whether you choose elegant sprinkles, playful toppings, or adorn these beauties with festive colors. Perfect for both novice and seasoned bakers, these red velvet cake pops ensure a fun, stress-free baking experience.
Preparation Phase & Tools to Use
Before embarking on your cake pop adventure, gather a few essential tools that will help transform your ingredients into mouthwatering treats. Each item plays a crucial role in the overall success of your creation:
- Mixing Bowls: Use large mixing bowls for comfortably blending ingredients without spilling.
- Baking Sheet: A flat surface is essential for chilling your cake pops after rolling them into balls.
- Microwave-Safe Bowl: This is vital for melting chocolate or candy melts, allowing for easy and safe preparation.
- Lollipop Sticks: Choose sturdy sticks that can hold the weight of the cake with ease.
- Cooling Rack: To properly set your dipped cake pops, a cooling rack allows air circulation all around.
Practical Preparation Tips
- Ensure Your Cake is Cooled: Allow your baked red velvet cake to cool completely before crumbling; a warm cake can make the frosting melt too much.
- Chill the Cake Balls: This step is essential for preventing the cake pops from falling apart while dipping.
- Be Patient While Melting Chocolate: Melt your coating slowly to avoid burning and ensure a smooth, glossy finish.
Ingredients for Tasty Red Velvet Cake Pops
To whip up these delightful cake pops, you’ll need a handful of simple ingredients that come together harmoniously:
- 3 cups cooled and fully baked red velvet cake: Use your favorite homemade recipe or store-bought for convenience!
- 1/2 cup frosting made with cream cheese: This binds the cake together and adds that delightful tanginess.
- 1 1/2 cups white chocolate or candy melts: Choose high-quality chocolate for the best flavor and texture.
- 2 tablespoons optional red velvet cake crumbs or sprinkles: Customized toppings add a fun pop of color and texture.
Possible Substitutions:
- For a dairy-free version, opt for a dairy-free frosting and chocolate.
- Use chocolate cake instead of red velvet for a delicious variation.
How to Make Tasty Red Velvet Cake Pops
Crafting these mouthwatering red velvet cake pops is a fun and fulfilling experience. Here’s how to create them step by step:
- Crumble the Cake: Start by crumbling the cooled red velvet cake into a large bowl, breaking it down until it resembles fine crumbs.
- Mix in Frosting: Add the cream cheese frosting into the bowl. Mix thoroughly until the cake and frosting are fully combined. The texture should be moist yet easily moldable.
- Roll into Balls: Scoop a tablespoon of the mixture and roll it into small balls about one inch in diameter. Place them on a baking sheet lined with parchment paper and chill in the fridge for about an hour to set.
- Melt the Chocolate: In a microwave-safe bowl, melt the white chocolate or candy melts. Heat in 30-second intervals, stirring between each until fully melted and smooth.
- Insert Lollipop Sticks: Dip the end of each lollipop stick into the melted chocolate, then insert it carefully into each cake ball. This helps secure the stick and prevents the cake pop from breaking apart later.
- Dip into Chocolate: Now dip each cake pop into the melted chocolate, twirling gently to allow any excess chocolate to drip back into the bowl for a beautiful finish.
- Decorate: Before the chocolate hardens, sprinkle optional red velvet crumbs or sprinkles on top for a colorful and festive touch.
- Let Set: Arrange your finished cake pops upright in a holder or foam block to allow them to set completely.
Chef’s Notes & Helpful Tips
Make-Ahead Tips
- Prepare the cake balls a day in advance, storing them in the refrigerator until you are ready to dip.
Cooking Alternatives
- Use an air fryer to chill cake balls quicker by setting a low temperature (approximately 300°F) for 15 minutes.
Customization Ideas
- Experiment with different chocolate coatings or colors to match your event’s theme. Feel free to get creative with toppings like crushed nuts or edible glitter for a dazzling finish.
Common Mistakes to Avoid
- Overmixing: Avoid overworking the cake and frosting mixture, which can lead to a dense texture instead of the desired lightness.
- Not Chilling: Forgetting to chill the rolled cake balls first will result in them falling apart when dipped in chocolate.
- Dipping Temperature: Ensure your melted chocolate isn’t too hot; otherwise, it will melt the cake pop.
What to Serve With Tasty Red Velvet Cake Pops
Pair your red velvet cake pops with contrasting flavors to elevate the experience:
- Coffee: The bitterness of coffee beautifully balances the sweetness of the cake pop.
- Hot Cocoa: The warmth of cocoa complements the rich chocolate coating, enhancing the indulgence.
- Fruit Platter: A combination of fresh fruits like strawberries and melon adds a refreshing touch that contrasts well with the rich pops.
- Cheesecake Bites: Serve alongside mini cheesecake bites for an extravagant dessert spread.
- Ice Cream: Pair with a scoop of vanilla or chocolate ice cream for a delightful treat trio.
- Nutty Pastries: Items like almond croissants or pecan pie offer crunchy textures that harmonize deliciously.
- Sweet Sparkling Wine: Bubbles and sweetness create a bubbly celebration that effortlessly pairs with your pops.
Storage & Reheating Instructions
Store leftover cake pops in the refrigerator in an airtight container for up to a week. If you want to enjoy them later, you can freeze the cake pops before dipping them in chocolate. They can last for up to three months in the freezer. When ready to enjoy, let them thaw for a few hours in the fridge. Avoid reheating, as these are best enjoyed cold or at room temperature.
Estimated Nutrition Information
- Calories: Approximately 150 per cake pop (varies based on ingredients and servings)
- Total Fat: 8g
- Saturated Fat: 5g
- Total Carbohydrates: 20g
- Sugar: 15g
- Protein: 1g
Note: These values are estimates and may vary based on specific ingredients used.
FAQs
1. Can I use a different flavor of cake?
Absolutely! While red velvet provides a delightful aesthetic and flavor, feel free to experiment with vanilla, chocolate, or even carrot cake—just adjust the frosting to match!
2. How do I ensure the chocolate coating is smooth?
Make sure your chocolate is finely chopped or in small pieces and has been melted slowly over low heat. Stir it consistently to avoid overheating and achieve a glossy finish.
3. Can I make these cake pops vegan?
Yes! Substitute your cake mix with a vegan option and use a dairy-free frosting or prepare one with coconut cream. For the coating, look for vegan chocolate.
4. How do I prevent the cake pops from falling off the stick?
Ensure the cake balls are sturdy and chilled before inserting the sticks. The melted chocolate at the base helps anchor the stick when it hardens.
5. What if the mixture seems too dry?
If your cake mixture appears too dry to mold, add a little more frosting to achieve a moist and cohesive mixture.
Conclusion
There’s a certain magic that unfolds when you take that first bite of a red velvet cake pop. With their inviting color, rich flavor, and delightful textures, they guarantee smiles and satisfaction. No gathering is complete without a batch of these heavenly morsels. So why wait? Gather your ingredients, unleash your inner baker, and create something that will leave friends and family raving long after the last pop disappears. Enjoy the process and, most importantly, the delectable results!
Print
Tasty Red Velvet Cake Pops
- Prep Time: 15 minutes
- Cook Time: 60 minutes
- Total Time: 75 minutes
- Yield: 20 servings 1x
- Category: Dessert
- Method: Baking
- Cuisine: American
- Diet: Vegetarian
Description
Delightful and colorful red velvet cake pops coated in smooth chocolate, perfect for any celebration.
Ingredients
- 3 cups cooled and fully baked red velvet cake
- 1/2 cup cream cheese frosting
- 1 1/2 cups white chocolate or candy melts
- 2 tablespoons optional red velvet crumbs or sprinkles
Instructions
- Crumble the cooled red velvet cake into a large bowl until it resembles fine crumbs.
- Add the cream cheese frosting and mix until fully combined.
- Roll tablespoon-sized portions into balls and chill in the fridge for about an hour.
- Melt the white chocolate in a microwave-safe bowl, heating in 30-second intervals.
- Dip the end of each lollipop stick into the melted chocolate and insert into each cake ball.
- Dip each cake ball into the chocolate coating, twirling to remove excess.
- Sprinkle with optional toppings before the chocolate hardens.
- Set the cake pops upright in a holder to let them harden completely.
Notes
Make-ahead tips: Prepare cake balls a day in advance and store in the refrigerator until ready to dip.
Nutrition
- Serving Size: 1 cake pop
- Calories: 150
- Sugar: 15g
- Sodium: 50mg
- Fat: 8g
- Saturated Fat: 5g
- Unsaturated Fat: 3g
- Trans Fat: 0g
- Carbohydrates: 20g
- Fiber: 0g
- Protein: 1g
- Cholesterol: 10mg