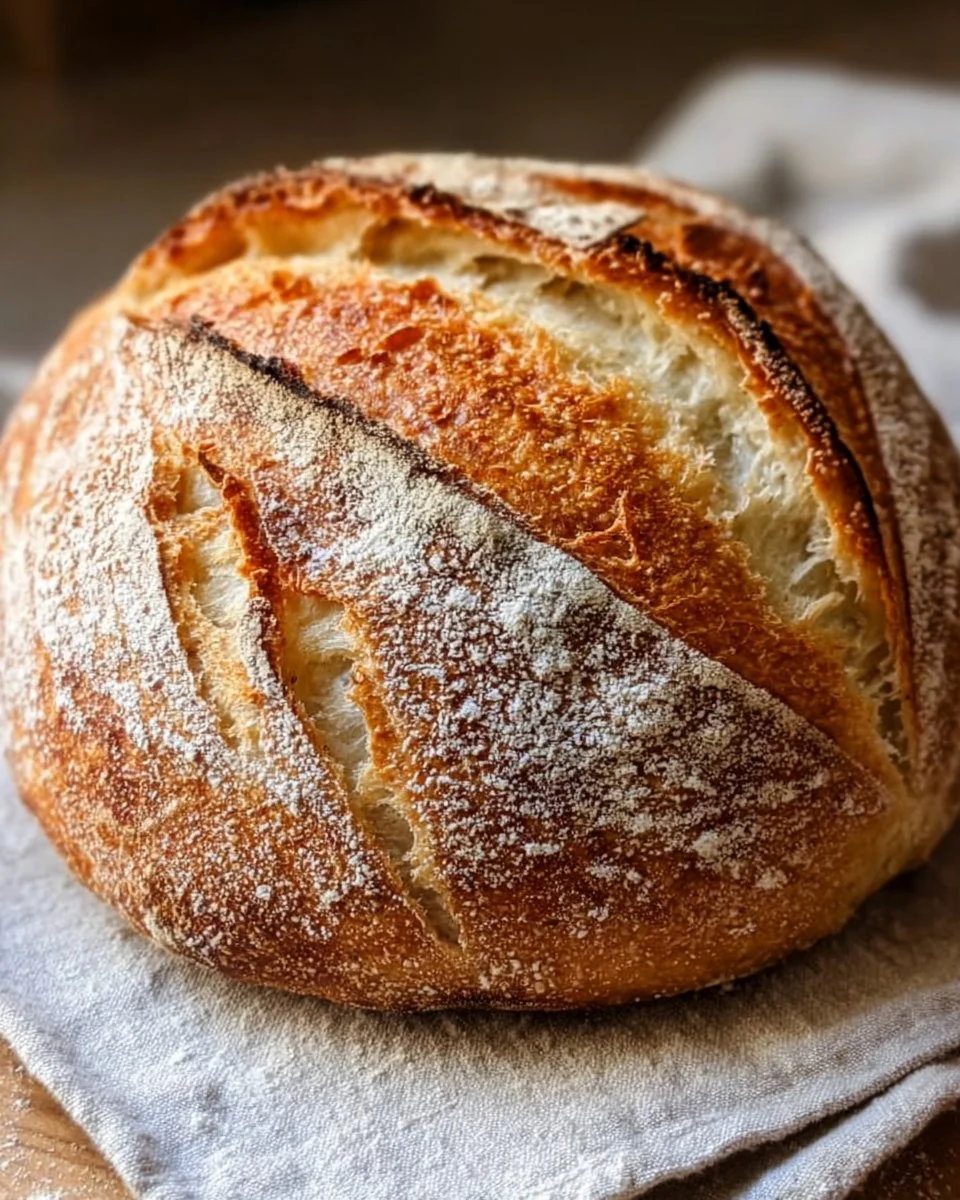
Sourdough bread invites you into a sensory experience like no other. Imagine pulling a freshly baked loaf from the oven, the golden crust crackling as you slice through its ridges. The aroma wafts through your kitchen—warm, earthy, and slightly tangy, whispering of wild yeast captured in each loaf. As you bring a piece to your mouth, the interior reveals a soft, chewy crumb dotted with air pockets, promising a pleasure-filled venture of flavor and texture that only traditional sourdough can deliver.
Each bite invites you to appreciate the delightful dance between the crusty outer layer and the pillowy softness within. Your taste buds awaken to the nuanced flavor that veers between subtly nutty and strikingly sweet, balanced by the refreshing tang of fermentation. You find yourself torn between savoring it plain or indulging it with spreads, but you already know: this bread transcends mere sustenance; it becomes a canvas for your culinary creativity.
Why You’ll Love This Sourdough Bread
This sourdough bread recipe stands out for its amazing depth of flavor and incredible texture. Thanks to the long fermentation process, it captures that signature tang along with a rustic crunch that makes it irresistible. Perfect for special occasions like family gatherings or cozy weekend brunches, this bread elevates every meal. Best of all, using an active sourdough starter means you not only bake something delicious, but you also engage in a rewarding experience that connects you to a time-honored baking tradition.
Sourdough bread is also incredibly versatile. It pairs beautifully with creamy avocado, acts as the perfect base for a rejuvenating bruschetta, and elevates a simple bowl of soup into something comforting and complete. Its robust flavor complements an impressive array of toppings and spreads, making it the hero of many meals.
Preparation Phase & Tools to Use
Before embarking on your sourdough journey, gather some essential tools that enhance your baking experience:
Mixing Bowl: A large bowl allows you to mix your ingredients without the risk of spillage. Opt for a non-reactive bowl, like glass or ceramic, to ensure purity in taste.
Dutch Oven: This magical pot acts like a mini-oven, trapping heat and steam, which helps create that desirable crusty exterior while cooking the bread evenly.
Proofing Basket: A rattan proofing basket (or banneton) gives your dough structure as it rises, leading to an aesthetically pleasing round shape adorned with a delicate pattern.
Bench Scraper: This handy tool helps you handle the sticky dough with ease, allowing you to shape and transfer without much mess.
Remember to prepare your sourdough starter at least 8 hours beforehand, ensuring it’s bubbly and active. This step is key to achieving the wonderful flavors and textures you desire in your final loaf.
Ingredients for Sourdough Bread
500g Bread Flour
Opt for bread flour for its higher protein content, which encourages a better gluten formation. If needed, substitute with all-purpose flour, though the texture and rise may differ slightly.
350ml Water
Use filtered water at room temperature. Temperature matters; too hot can kill the yeast, while too cold can slow down the fermentation process.
100g Active Sourdough Starter
Your starter is the heart of sourdough. It must be bubbly and active. For beginners, ensure it’s fed 4-8 hours before baking for optimal performance.
10g Salt
Salt is essential for flavor and controls the fermentation process. Consider experimenting with different salts (like sea salt) for varied taste nuances.
How to Make Sourdough Bread
Combine the flour and water. In a mixing bowl, mix the bread flour and water until no dry flour remains—this creates the foundation for your dough.
Incorporate the starter and salt. Add the 100g of active sourdough starter and the salt, mixing gently until fully incorporated; your dough will feel a bit shaggy.
Let the dough relax. Allow the dough to rest for 30 minutes (this is called autolyse), a magic moment where the flour hydrates.
Knead the dough. Once rested, knead it for about 10 minutes until smooth and elastic. Keep your workspace slightly floured to manage stickiness!
First rise. Place the dough into a lightly greased bowl, cover it with a damp cloth, and let it rise at room temperature for 4-6 hours, or until it doubles in size—watch as the dough springs to life!
Shape the dough. Once risen, gently deflate the dough and shape it into a round loaf, using a bench scraper if necessary. Transfer it to a floured proofing basket.
Final proof. Cover with a damp cloth and let it proof for another 2-3 hours. If you’re short on time, you can also do a cold proof in the refrigerator overnight.
Preheat your oven. Set your oven to 230°C (450°F), placing the Dutch oven inside to heat up.
Bake the bread. Carefully transfer your dough into the hot Dutch oven, cover it, and let it bake for 30 minutes. Then, remove the lid, and continue baking for an additional 15-20 minutes until it turns golden brown, promising that crunch we all love.
Cooling time. Once baked, transfer to a wire rack and allow it to cool completely before slicing; this step helps the interior texture set beautifully.
Chef’s Notes & Helpful Tips
Make-ahead tips: You can prepare your dough the night before and let it proof in the fridge. Baking the next day enhances the flavor further.
Cooking alternatives: If you don’t have a Dutch oven, baking on a preheated pizza stone can also yield wonderful results, though you may need to add steam to your oven with a tray of water.
Customization ideas: Feel free to play! Mix in herbs, olives, or cheese for a flavorful twist. For a sweeter loaf, try adding dried fruits or nuts.
Common Mistakes to Avoid
Many stumble on the fermentation process. Avoid rushing it—good sourdough takes time! If your bread isn’t rising, your starter might be inactive. To prevent dense loaves, ensure it bubbles before using. Another common mishap is underbaking; ensure your loaf is golden brown and sounds hollow when tapped.
What to Serve With Sourdough Bread
The versatility of sourdough bread opens the door to a world of pairings:
Avocado Toast: Smash avocado with a sprinkle of salt and chili flakes for an irresistible brunch treat.
Classic Tomato Soup: Dive into comfort by pairing it with a warm bowl of tomato soup, where the bread sops up every flavorful drop.
Bruschetta: Top slices of toasted sourdough with diced tomatoes, basil, and a drizzle of olive oil for a refreshing appetizer.
Cheese Board: Serve with an assortment of cheeses like brie or aged cheddar, letting guests create their combinations.
Charcuterie: Pair with cured meats, nuts, fruits, and artisanal dips for a delightful snack centerpiece.
Eggs Benedict: Elevate your breakfast with poached eggs and hollandaise sauce atop your fresh slice.
Garlic Butter Bread: Blend butter with garlic and herbs, spread, then toast until crispy—allowing flavors to meld together beautifully.
Storage & Reheating Instructions
For freshness, store your sourdough bread in a paper bag or cloth bag at room temperature. Avoid plastic, as it can cause mold. For longer storage, slice and freeze the loaf, keeping each piece separated with parchment paper for easier defrosting. To reheat, pop it in a toaster, or wrap in foil and place in a preheated oven until warmed—enjoy that delightful crust once more!
Estimated Nutrition Information
Approximate values per slice (based on 12 slices):
- Calories: 80
- Protein: 3g
- Carbohydrates: 15g
- Fat: 0.5g
- Fiber: 1g
Keep in mind these values can vary based on the specific ingredients used.
FAQs
Can I use whole wheat flour in this recipe?
Yes, you can! Just substitute up to half of the bread flour with whole wheat flour, but expect a more dense texture.
What do I do if my bread doesn’t rise?
If it remains flat, your starter might need rejuvenating. Feed it regularly and ensure it’s bubbly before baking.
How long does the sourdough starter last?
Properly maintained, it can last indefinitely! Keep it refrigerated and feed it weekly if not in frequent use.
Can I bake sourdough without a Dutch oven?
Absolutely! You can use a baking stone or a cast-iron skillet and create steam in your oven for a crispy crust.
How can I tell when my sourdough is done baking?
The crust should be golden brown, and when tapped, it should sound hollow. An instant-read thermometer should read around 90°C (190°F) in the center.
Conclusion
Baking your own sourdough bread might just become one of your favorite hobbies. With each loaf, you’ll not only craft an exquisite treat but also cultivate a meaningful connection to the art of bread-making. So grab your ingredients and tools and let the adventure begin! Whether serving it alongside a gourmet cheese platter or simply slathering it with butter, this bread promises satisfaction with every bite. If you’re eager to dive deeper into the craft, you can check out Sourdough Bread: A Beginner’s Guide, explore a step-by-step approach with Homemade Sourdough Bread, Step by Step, or discover handy tips in this guide from How to Make Sourdough Bread. Happy baking!
Print
Sourdough Bread
- Prep Time: 8 hours
- Cook Time: 45 minutes
- Total Time: 8 hours 45 minutes
- Yield: 12 slices 1x
- Category: Bread
- Method: Baking
- Cuisine: General
- Diet: Vegetarian
Description
This sourdough bread recipe features a golden crust and soft, chewy interior with a delightful tang, perfect for various pairings and culinary creativity.
Ingredients
- 500g Bread Flour
- 350ml Water
- 100g Active Sourdough Starter
- 10g Salt
Instructions
- Combine the flour and water in a mixing bowl until no dry flour remains.
- Incorporate the starter and salt, mixing gently until fully combined, resulting in a shaggy dough.
- Let the dough relax for 30 minutes to allow the flour to hydrate.
- Knead the dough for about 10 minutes until smooth and elastic.
- Place the dough in a greased bowl, cover with a damp cloth, and let it rise for 4-6 hours until doubled in size.
- Gently deflate the dough and shape it into a round loaf, then transfer to a floured proofing basket.
- Cover with a damp cloth and let it proof for 2-3 hours or cold proof in the refrigerator overnight.
- Preheat your oven to 230°C (450°F) with a Dutch oven inside.
- Transfer the dough to the hot Dutch oven, cover, and bake for 30 minutes.
- Remove the lid and bake for another 15-20 minutes until golden brown.
- Transfer to a wire rack and allow to cool completely before slicing.
Notes
Make-ahead tips: Prepare the dough the night before. If you don’t have a Dutch oven, use a preheated pizza stone and introduce steam for a crispy crust.
Nutrition
- Serving Size: 1 slice
- Calories: 80
- Sugar: 0g
- Sodium: 400mg
- Fat: 0.5g
- Saturated Fat: 0g
- Unsaturated Fat: 0g
- Trans Fat: 0g
- Carbohydrates: 15g
- Fiber: 1g
- Protein: 3g
- Cholesterol: 0mg